1 - Managing Columns on List View
In X5 is very easy to manage columns to display on your listview. To add columns, follow the steps below:
- First navigate to the listview that you want to make changes to.
- Click the
 icon at the top of the list, then select “View configuration”.
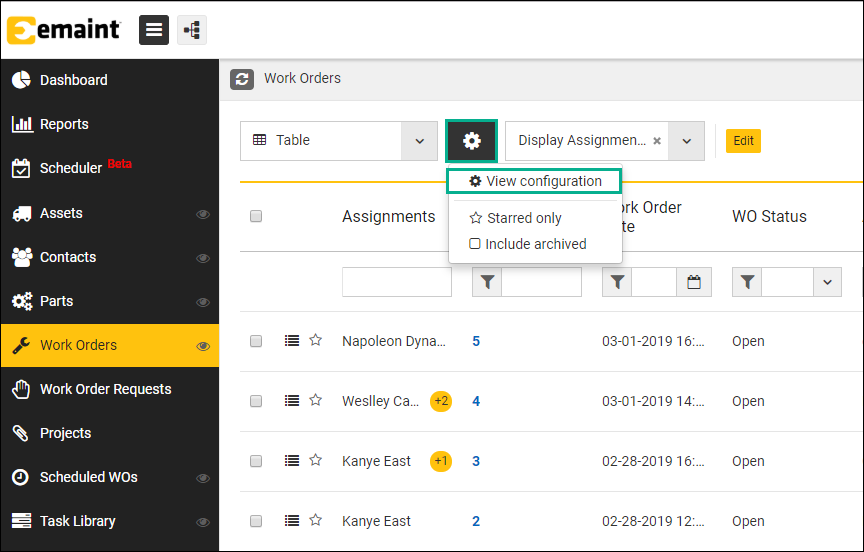
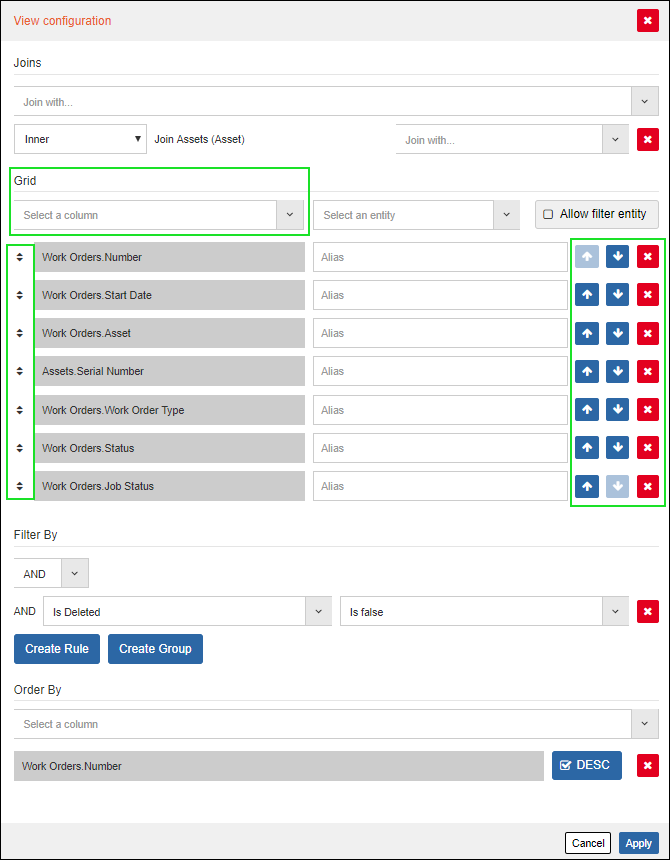
Once you see the configuration window, you will be able to:
- Add columns (fields) using the dropdown on the “Grid” section.
- Remove fields from display by clicking the red x.
- Rearrange fields by using the blue up/down arrows or by using the
 icon to drag and drop fields. Hit the “Apply” button at the bottom when you are done.
2 - Rearranging and resizing the columns on the list view.
To move a column on the list, simply grab the columns header, drag it to where you want it to be, then drop it there.
3 - Sorting Records on the Listview
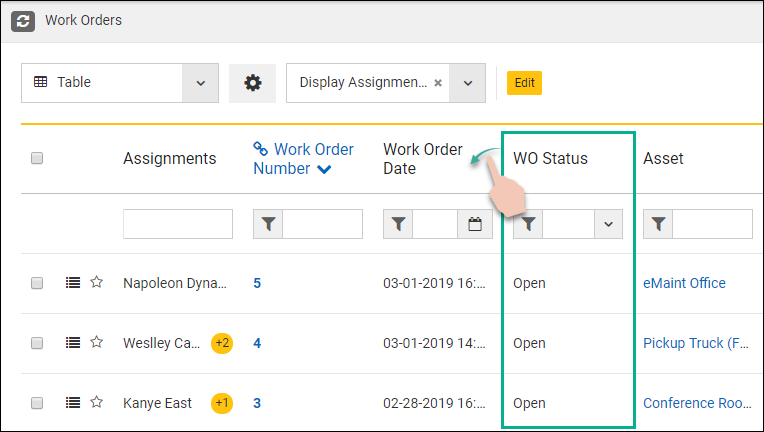
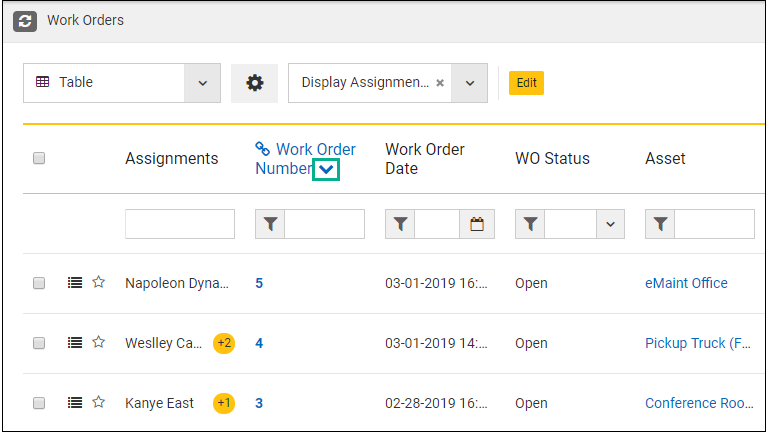
To sort your list, click on the header of the column you want to sort by. You will then see a little arrow icon that will allow you switch the sort from ascending to descending and vice versa.
If you wish to sort by more than one field at the same time, you can navigate to “View Configuration”, then at the bottom of the popup window you will be able to manage your sorts.
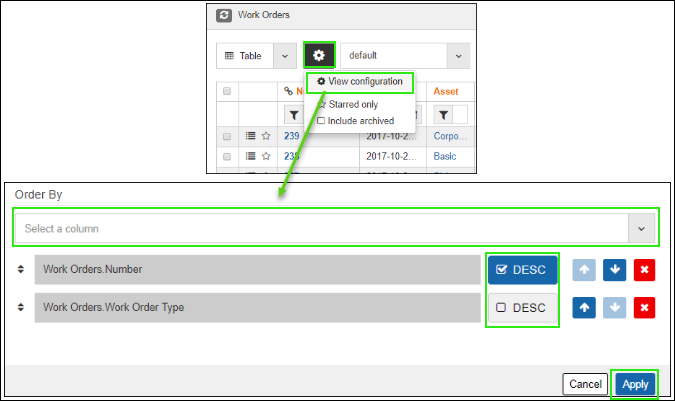
Note - For each sort added, you can define whether the sort is in ascending or descending order.
4 - Filtering for Records on the Listview
At the top of each column in X5 you have a search field. Next to each search field, you have a funnel icon that will allow you to select an “Operator” to go with the value you are looking for (equal to, contains, ends with, etc).
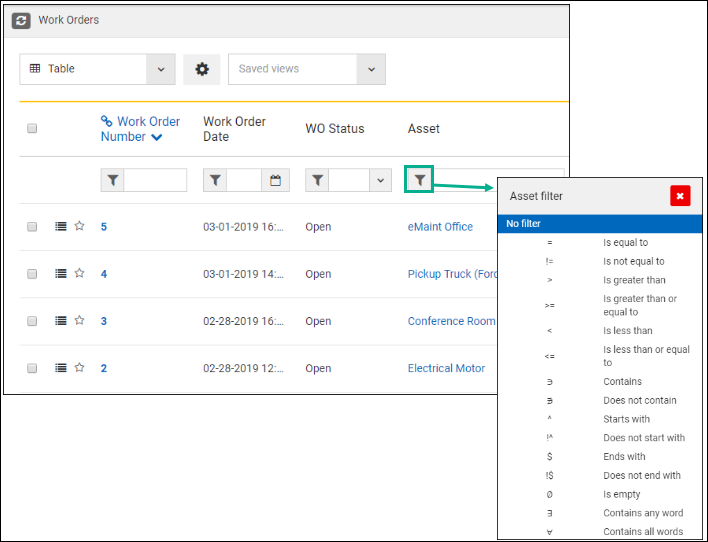
The system will automatically apply the filter, either when you hit enter or when you click anywhere outside of that search field.
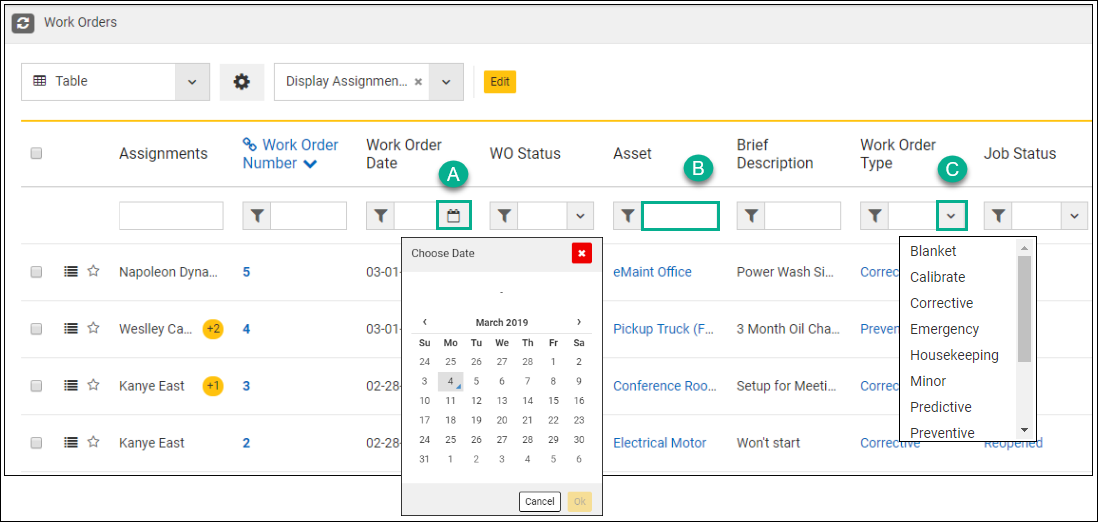
Search fields will have different behaviors based on their type. Here are some examples:
- A - Date fields will have a little calendar icon, which will allow you to select dates more easily.
- B - Text fields will allow you to type to search.
- C - Lookup Fields will allow you to pick a value from a dropdown list.
Note - When searching on the List View, values are not case sensitive.
To clear your filter, you can click the “Clear” button icon at the top right of the list.

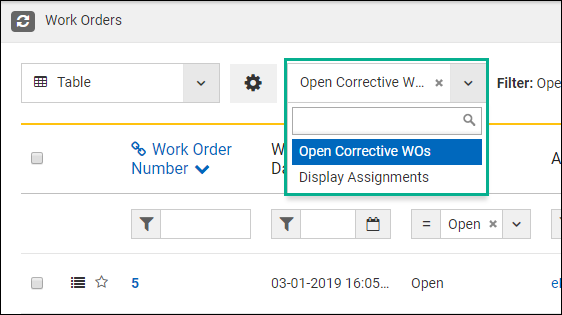
5 - Saving Filters
In X5 you have the ability to create and store different filters. When creating a filter you will have the option to make it public (Global) or keep it private.
More than likely there’s a combination of filter fields you often need to use when searching for specific records in the List view. Instead of having to setup those common filters repeated times, you can just save them. To do so:
- A - In the WO List Input the values in the search fields to find the records you are looking for;
- B - Click the “Save” button at the top right-hand corner of the screen;
- C - Name your filter accordingly;
- D - Decide whether this filter will be private or public; then E - Save it.

Once your filter has been created you will always be able to select it when searching for records in the list view.
6 - Starring Records
In X5, you have the option to star your records (mark them as a favorite):
- In the list view, you will see a little white star next to each record.
- Once you have determined your favorite items, simply click on the star next to them. This will change the star from white to yellow.
- If you need to view only your starred items, you can click the gear icon at the top of the list and select “Starred Only” (at this time you will only see starred records on the list).
