1 - Joining Tables
1.1 - Understanding Table Join
You can add supplemental tables to the report, if you need to pull information from fields that are not available in the main table.
If, for example, you want to create a report that shows Work Order information and also includes associated Assignments, you will need to join the Assignments table to the Work Orders table. After doing so, you will be able to pull fields from either table.
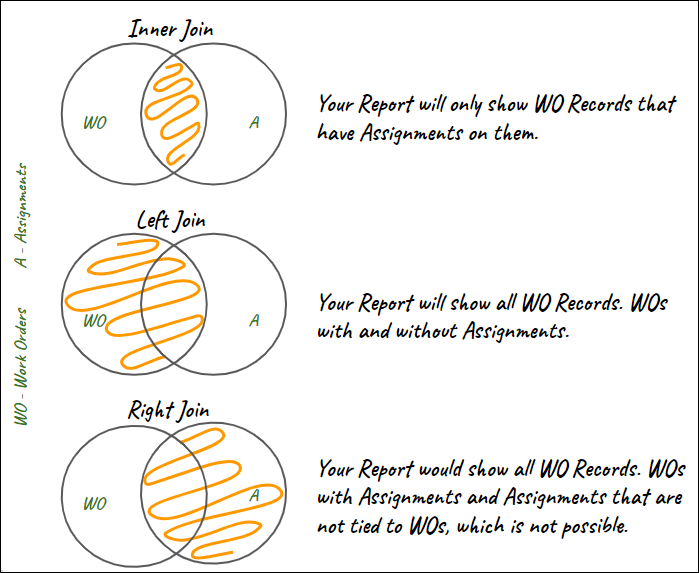
When joining a table, you will need to choose a join type. The join type will determine if a record should be included in the report depending on the record's relationship with the table you are joining. The join types will be displayed on a drop down list next to the joined table.
There are 3 types of joins you will see when joining tables to a report:
1.2 - Creating “Open WOs by Assign to”
To help you understand the “Table Join” feature, we will walk you through the creation of a report using that feature. To start, click the “New” button at the top of the Report list, then follow the steps below:
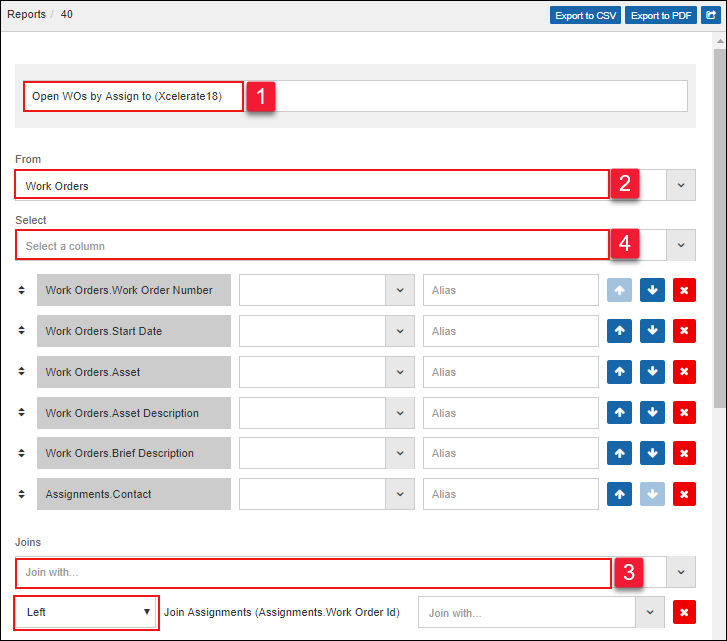
- 1 - Name your report “Open WOS by Assign To”.
- 2 - Select “Work Orders” into the “From” field.
- 3 - Select “Assignments” into the “Joins” section and Change the join type from Inner to Left (so you can see all WOs regardless of having assignments or not).
- 4 - Into the “Select” field, search and add the following fields/columns. Notice that now this list will include field from both WO and Assignments table:
From Work Orders Table:
- Work Order Number
- Start Date
- Asset
- Asset Description
- Brief Description
From Assignments Table:
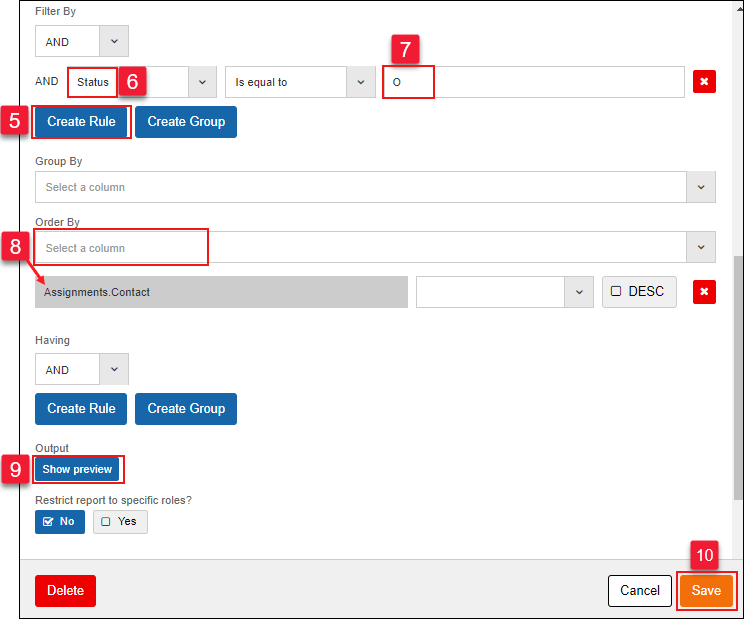
- 5 - Click on “Create Rule” to add a new filter.
- 6 and 7 - Once the filter appears, select “Status” (from the Work Orders Table), then Type in “O” into the filter area.
- 8 - In the “Order By” section search and select the “Contact” field.
- 9 - Click on “Show Preview” to view your report.
- 10 - Click the Save Button.
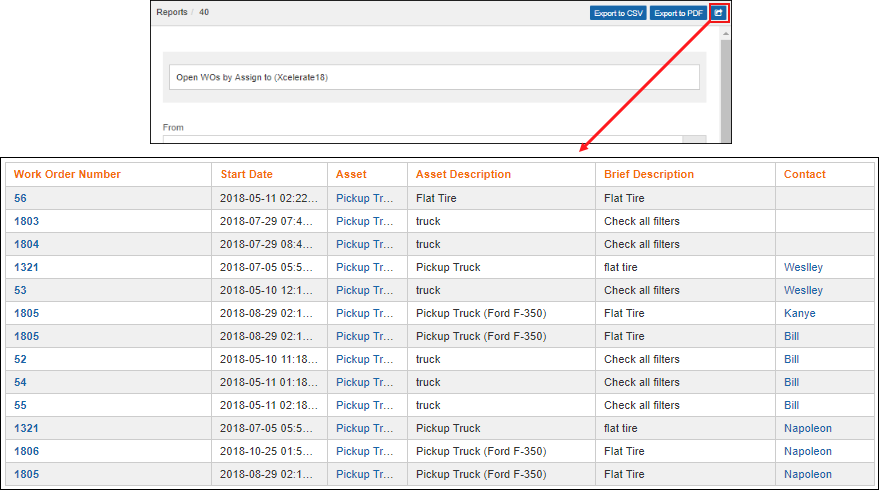
Once the report has been saved, click the arrow to run your report within the browser.