1 - Introduction
A work order can either be assigned to a single or multiple individuals in eMaint. This document will explain how to configure both scenarios.
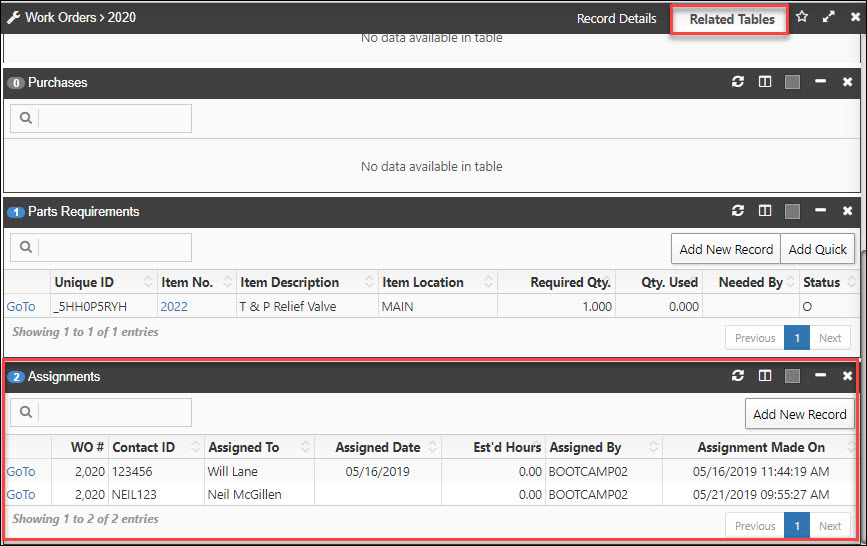
There are two different methods of assigning employees (or technicians, contractors/suppliers, etc.) to a work order. The first is to use the Assign To field on the main Record Details tab. Using the Assign To field on the Record Details tab allows for a one-to-one association from the Contact table to the Work Order table - regardless if that contact is an employee, vendor, customer, etc. Using the Assign To field on Record Details Tab allows for a single assignment from contacts on the work order. The second method uses the "Assignments" related table which allows for multiple contacts to be assigned to the work order. Navigate to the Assignments Related Table and select your additional contacts.
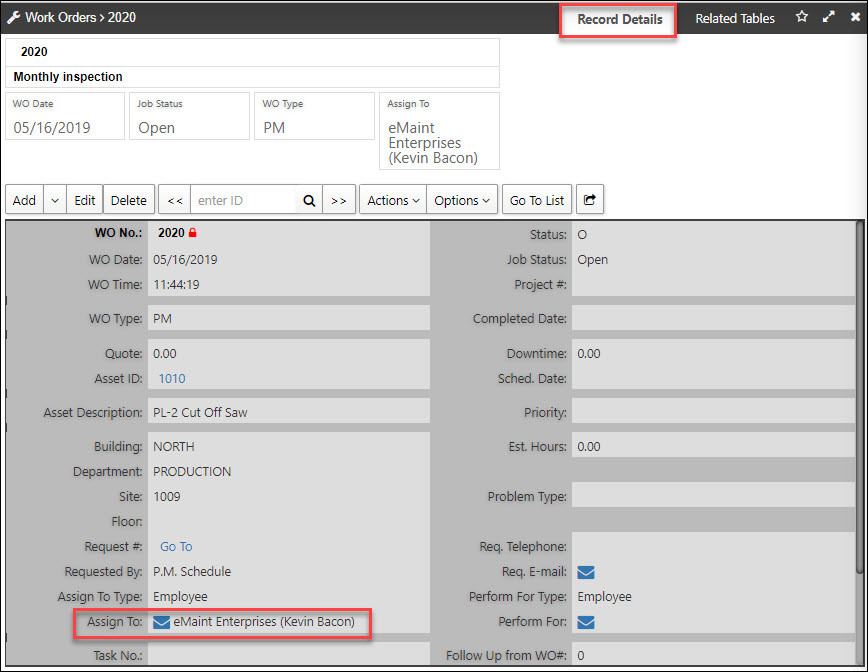
Assign To field
Assignments Related Table
2 - Assigning the WO to One Technician (Using the Assign To field)
The Assign To field on a Work Order is linked to the Contacts table. This allows the association of work orders to employees/technicians (or customers, e.g.) that are maintained in the contacts table. Employee, Contractor, and Supplier, are typically used for the Assign To Type field,
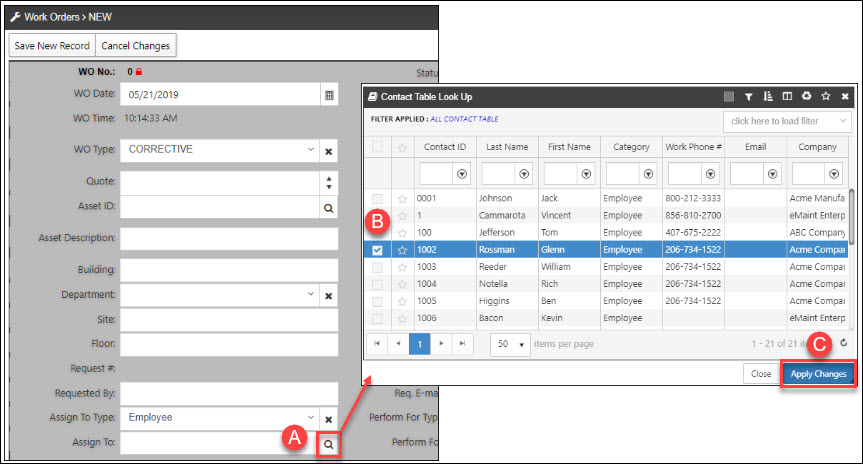
- A - While you are on the Record Details Tab, click on the magnifying glass on the Assign To field
- B - Select the appropriate record from the Contact Table Look Up list.
- C Click on Apply Charges
Assign To Field Lookup
3 - Assign WO to Multiple Technicians (Assignments Related Table)
Assigning Multiple people to Work Orders
The assignments related table allows work orders to be assigned to multiple contacts. The Assignments related table can be found under the Related Tables tab. Depending on your view options, you may see a tab for Assignments instead.
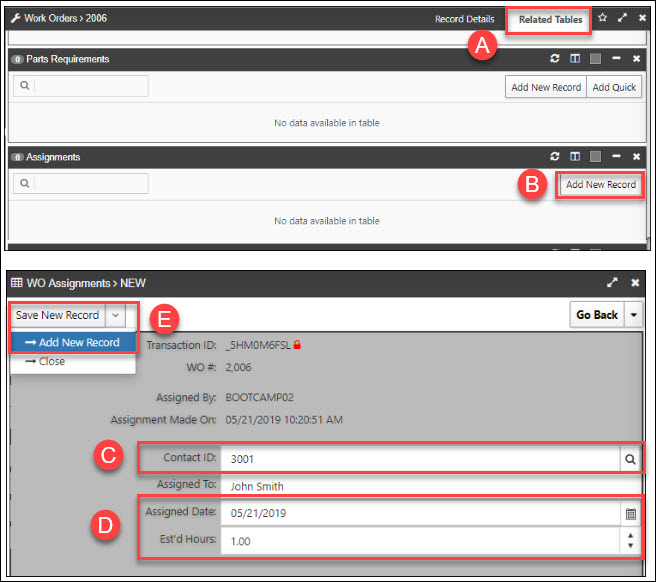
To create your first assignment, tap the Add New Record button (B) on the Assignments related table. On the Contact ID field use the magnifying glass icon (C) to search for and select a new contact. See below for reference. You can optionally add an assignment date and estimated hours for each assignment (D). Filling out this section is useful if you plan to use the scheduler because assignments viewed there reference these values.
Note - To easily add multiple assignments, hover over the Save New Record button and tap Add New Record which saves the current assignment and loads a blank record for the next assignment.
Creating a new work order assignment record
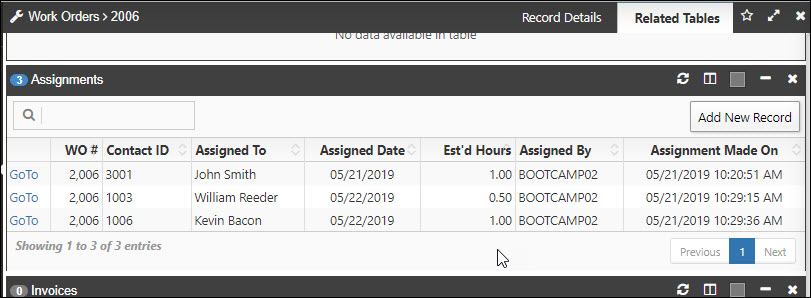
Viewing multiple assignments on a work order
Assignments can be viewed in list view format from the related table. Users can manage the related table to view customize the columns in the view.
4 - Adding Assignments Tab to the upper bar
If you would like to add the Assignments Tab to the upper bar, you can do so by starting out on the Record Details tab, hovering over the Options drop-down (A), and selecting Manage Record Tabs. Using the grey hamburger icon, drag the Assignments related table (C) from the left section to the right section and position in between [Record Details] and [Related Tables]. Finally, tap the Apply Changes button (D) to save the new tab.
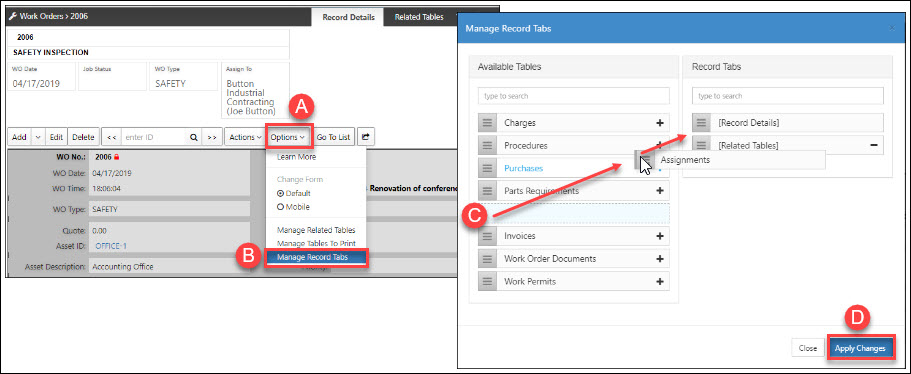
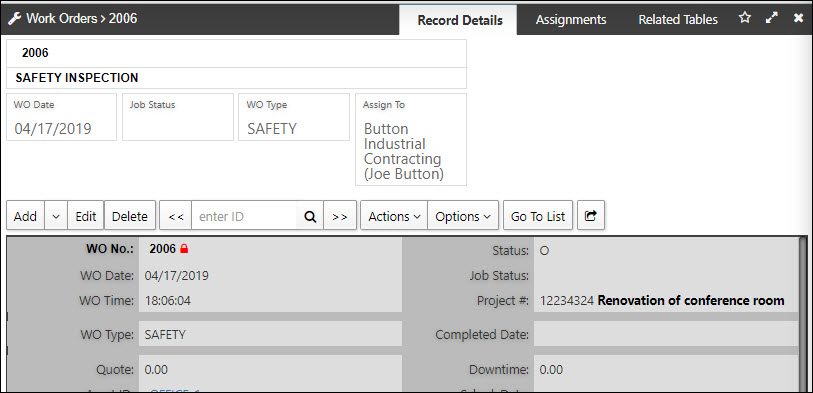
Creating a tab for Assignments
5 - Assignments in the scheduler
Assignments made using the Assignments related table can be viewed in the Scheduler tool. To display assignments, hover over the wrench icon and select WO Assignments. See below for reference.
Note - This view will only show assignments made using the related table. Assignments made using the Assign To field on a work order are not displayed with this specific view option.
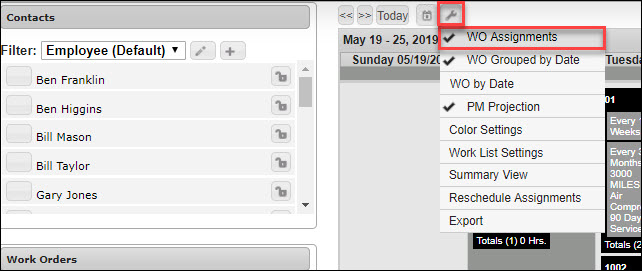
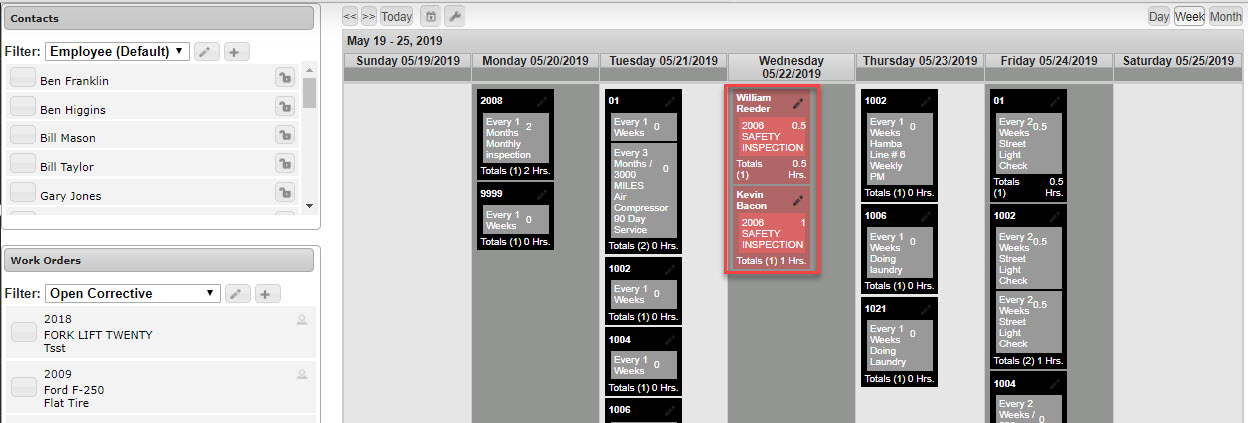
Viewing assignments in the scheduler tool