This feature is not available for customers at the "Team" account level. For more information on eMaint CMMS plans (account levels), you can contact your Customer Success Manager or email services@emaint.com. This information is also available at http://www.emaint.com/cmms-pricing/#plans-pricing.
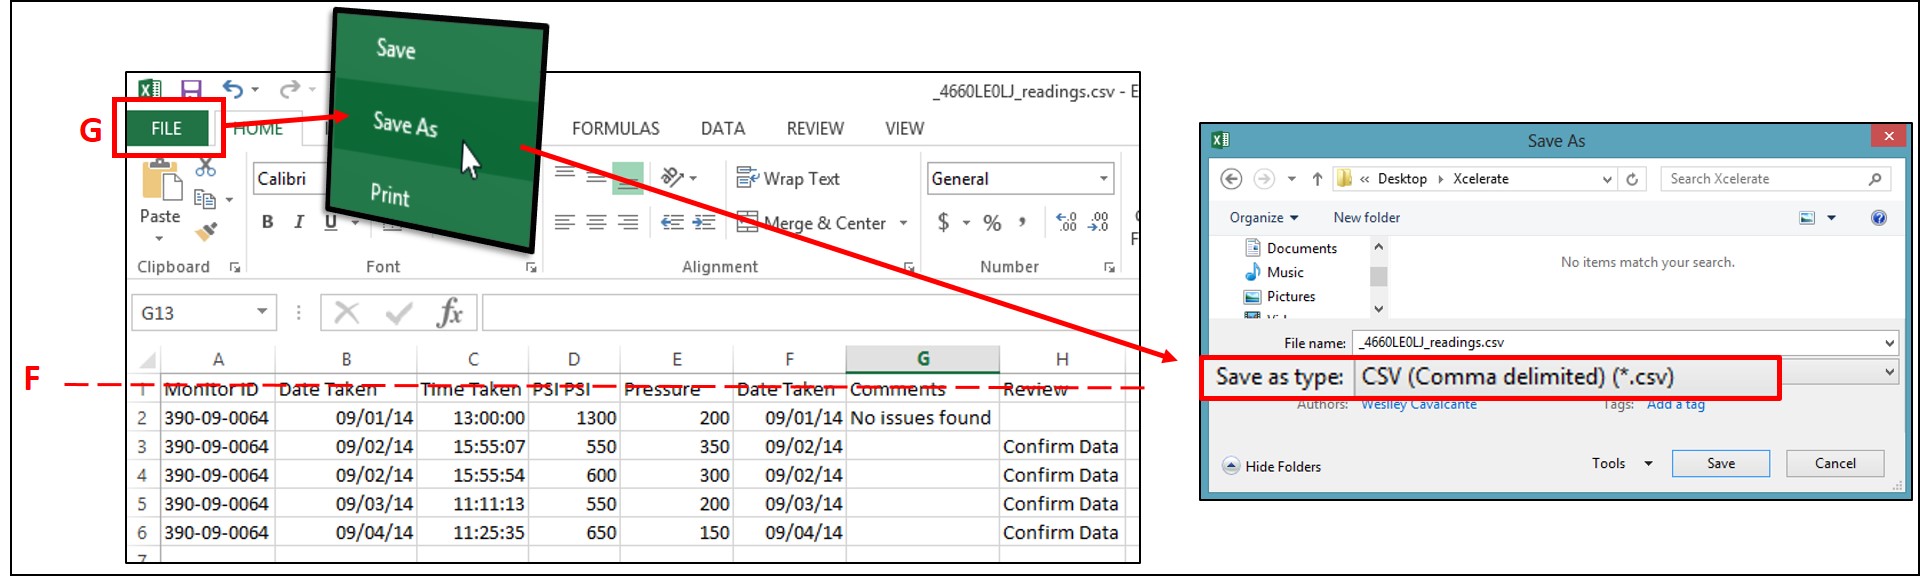
While you can manually enter in your condition monitoring readings for each class, this process can also be done through an excel import using a document in the “CSV (CommaDelimited)” format.
PreparingtheSpreadsheet
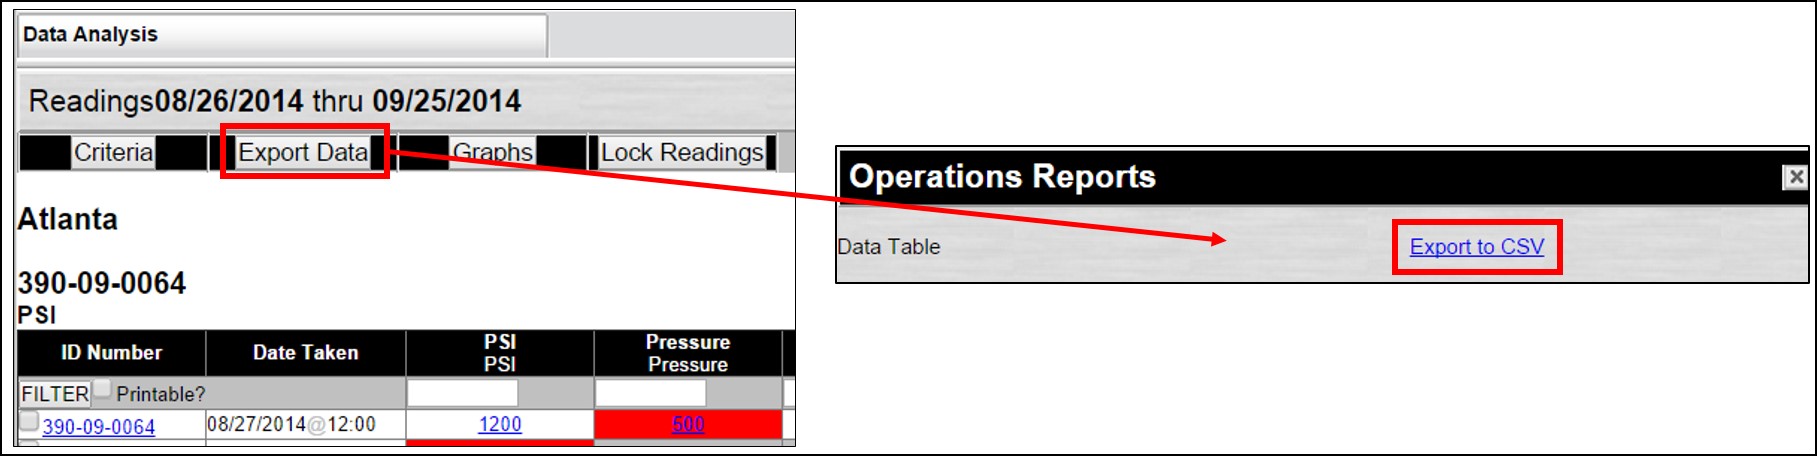
The first step to enter readings through import is to prepare your spreadsheet correctly. We will start by showing you how to download existing readings, so you can you use that spreadsheet as a template:
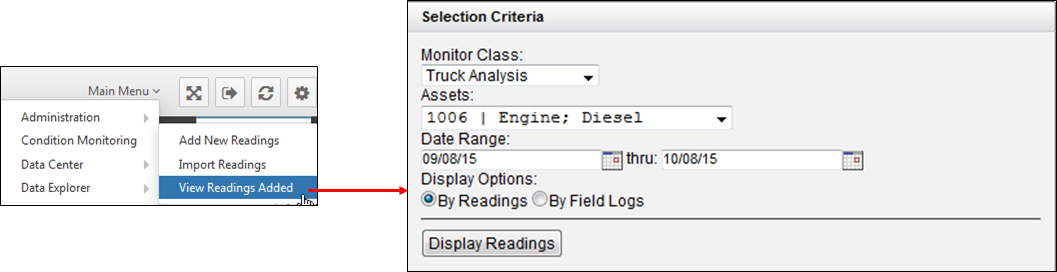
On the Condition Monitoring section in the Main Menu dropdown, click on “View Readings Added”, then select the criteria of the Monitor Class and Points you would like to work with (the class which will be performing the import)
Now you can open your spreadsheet and make the necessary changes before importing the readings:
A and B - Remove first blank row and first blank column
C - Change the Date format to MM/DD/YY
D - Change the time format to 00:00:00
E - Populate your readings.
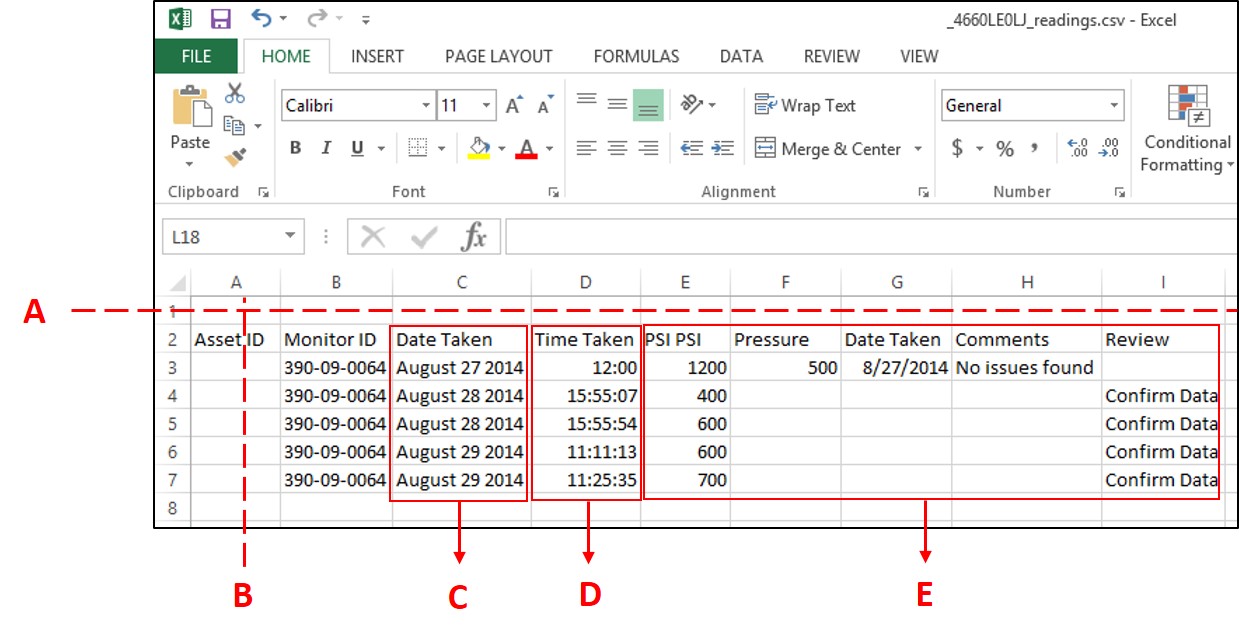
NOTE: You may have noticed that under the “Monitor ID” column, the Asset ID’s are being displayed instead. You could correct the header to reflect that if you would like. However, this wouldn’t be necessary since you have to delete the header anyway before importing. In the example above we repeated the same Asset ID, but of course you can have different asset IDs in the same spreadsheet.
 AdditionalInformation
Understandingtheorderofcolumnsforimporting
On the excel sheet, the order of the columns is determined within two locations in the system.
On the import screen after choosing the CSV file for the asset ID, date, and time fields.
On the monitoring point on the “Import Map” field.
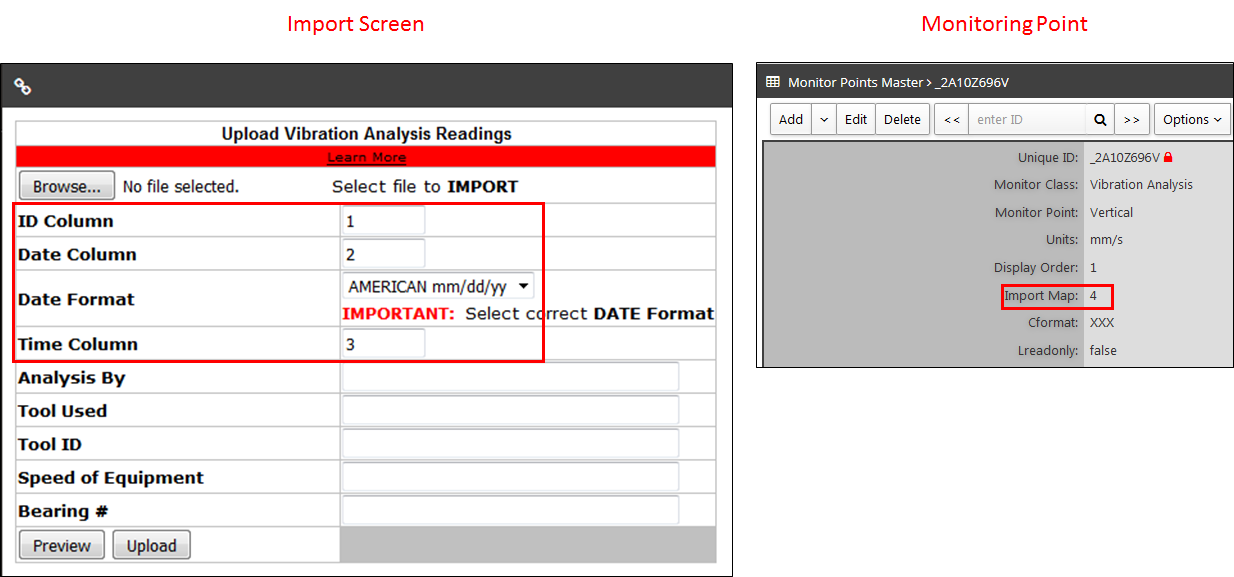
NOTE: When setting up your monitoring points you will always want to put the number 4 into the “Import Data” field for the first monitoring point, then number 5 for the second point, 6 for the third, and so on.
ImportingReadings
Now that your CSV file is ready, let’s learn how to import it:
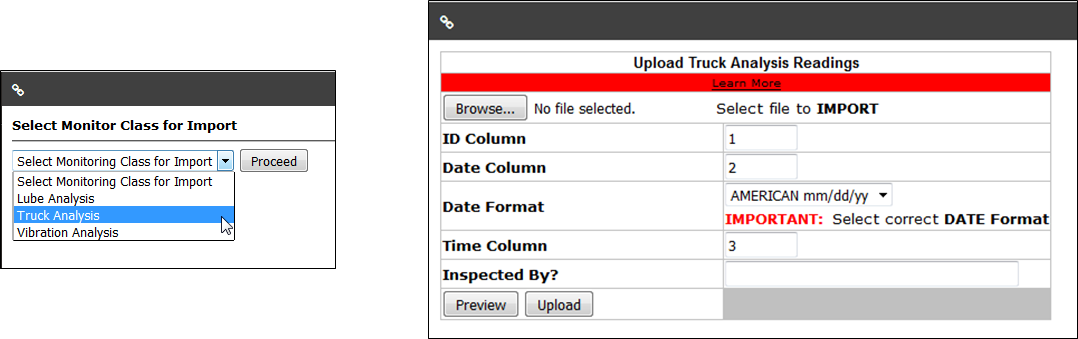
On the Condition Monitoring screen, select the Monitoring Class you want to import the data into..
After you proceed to the next screen, use the “Browse” button to select your CSV file. Click the Preview button to confirm that there are no errors within the formatting of the import template.
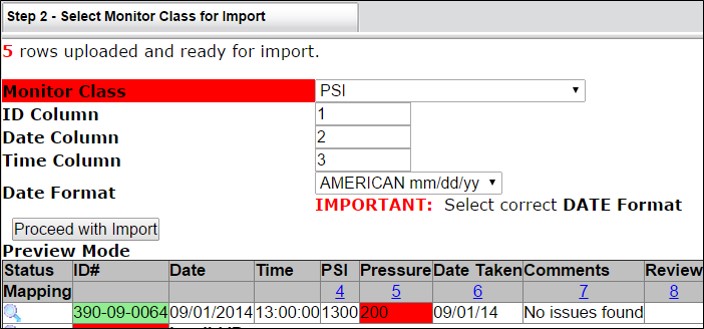
NOTE: - Any lines with errors will be ignored during the import process.