There are two methods available for generating PM Work Orders: Manual or Automatic.
GeneratingPMsManually
The PM Schedule list is used to either preview or generate PMs that match the criteria you have specified in the filters. Single or multiple filters may be set.
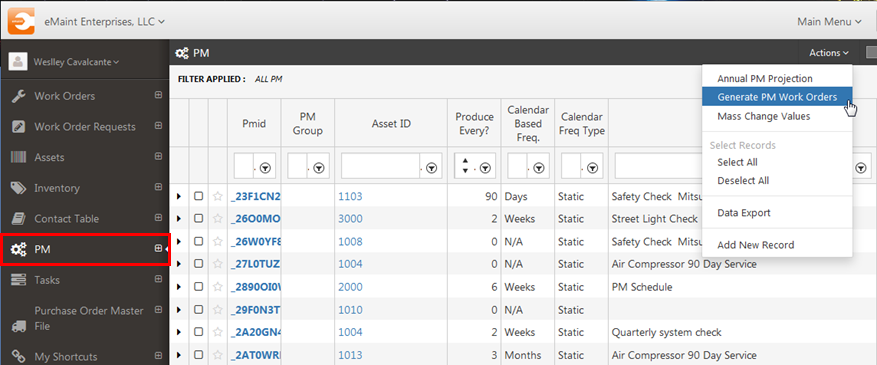
To take advantage of the group PM generation feature, first click the “PM” Tab on the left side of the screen. From the PM table, access the “Actions” dropdown and click “Generate PM Work Orders” option.
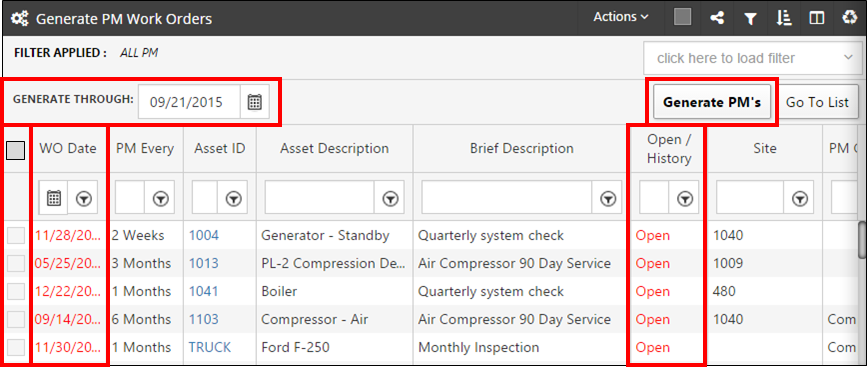
This will take you to the PM Generation screen. This screen is very similar to your PM schedule list, but there a few additional tools to help you generate your PMs:
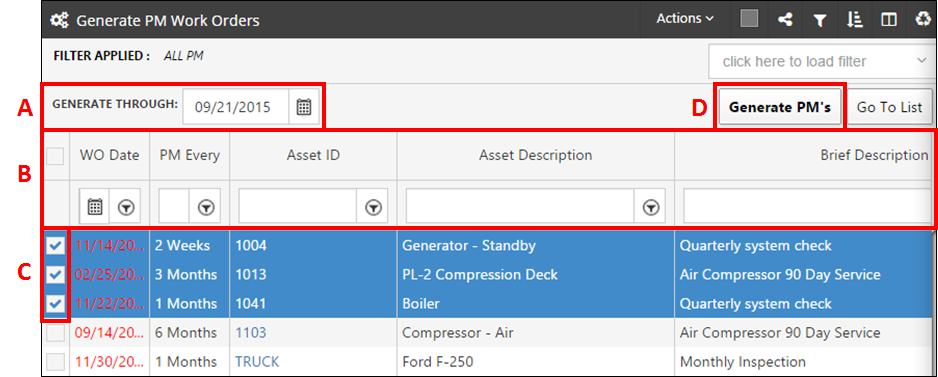
Checkboxforselectingallrecords- The checkbox at the top of the list allows you to select all records of the list with one click.
WODatecolumnonthelist - This column displays the “Next PM Date”, which will be the WO date after generation.
Open/ Historycolumnonthelist - This column is displaying the status of the previous WO that was generated from this PM schedule.
GenerateThrough - This section allows you to pick a date in the future that you would like to generate your PMs through. When generating future PMs, the system maintains their original next PM date as the WO dates.
GeneratePM’sbutton - Apply your filters to display only the group of PMs you want to generate, put checkmarks next to each PM that needs to be generated, then click this button.
To learn how to generate PMs follow the steps below:
A- After clicking the “Generate PM WO’s” button from the “Actions” on the PM Table, you will be on the PM Generation screen. At the top of the list you will see the “GENERATETHROUGH” section. By default, the system populates this section with today’s date, which will show you all PM Schedules where the “Next PM Dates” are either before or equal to today’s date. You also have the ability to pick a future date to generate upcoming PM work orders.
B - Set the filters to find the PM schedules that you wish to generate (The fields that you see on the PM Generation screen to filter by can be modified directly from the list view of the page. You can use any fields from the PM form or the Asset Form as filters. Saved filters can also a be used from from this screen).
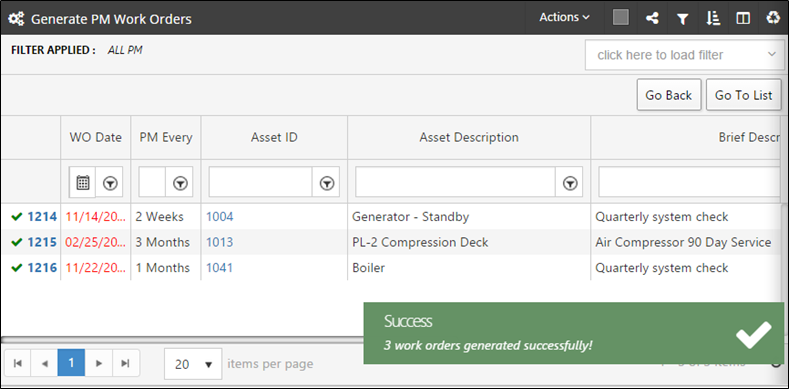
C- After selecting the date, the user can either select individual records or select all by checking the checkbox at the top of the list. Once the records are selected for generation, click the “GeneratePM’s” button on the top right hand corner of the screen.
Now you will a message at the bottom confirming that the selected PMs were generated.
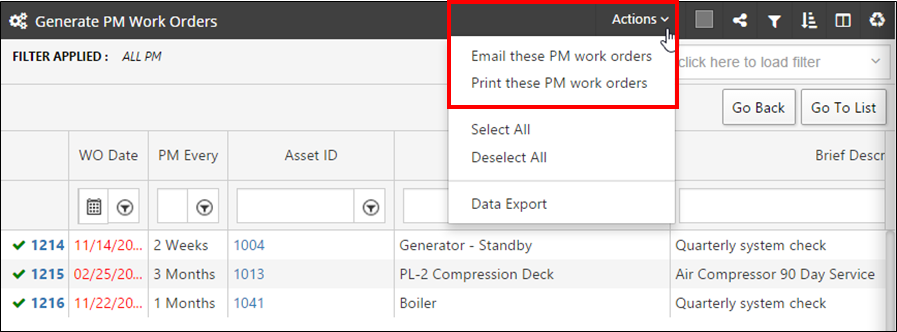
If, after generating these PMs, you want to Printthem or Emailthem to the users who are assigned to them, you can click the “Actions” button and choose one of these options.