MX Mobile 2.0 makes it easier to take eMaint on the go and be able to complete all of the work that can be done in the normal desktop interface.
1 - Key Features
Create, view, approve/reject and assign work requests
Create, view and close out work orders
View, issue and return parts, and make parts adjustments
View, enter and adjust meter readings
View inventory history, perform a key change, purchase parts, and recalculate inventory quantities
Add and view assets, perform key changes, and add parts and labor charges
Access your X4 contacts and call them from your mobile phone
Upload images right from your mobile device and attach to records
2 - Activating Mobile 2.0
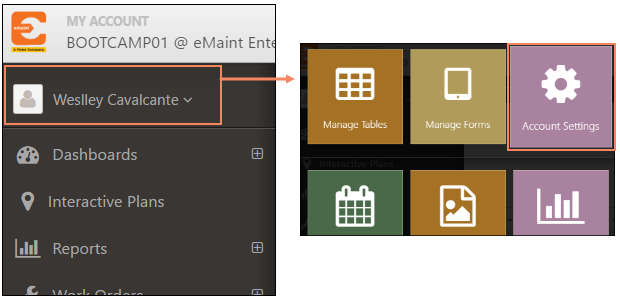
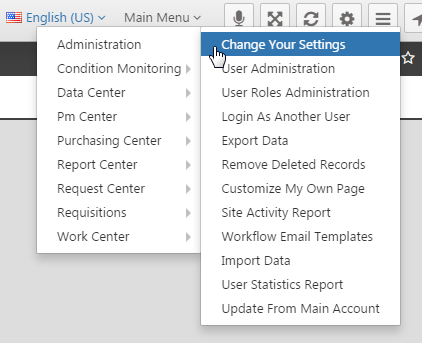
If Mobile 2.0 is not already activated in your account, access “Account Settings” under your icon at the top of the menu bar, or through “Change Your Settings” under Main Menu/Administration on the top right hand corner of the screen.
OR:
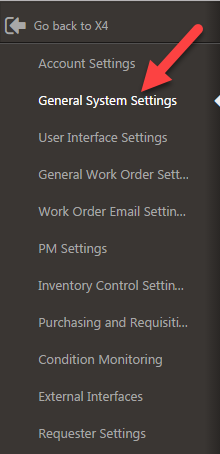
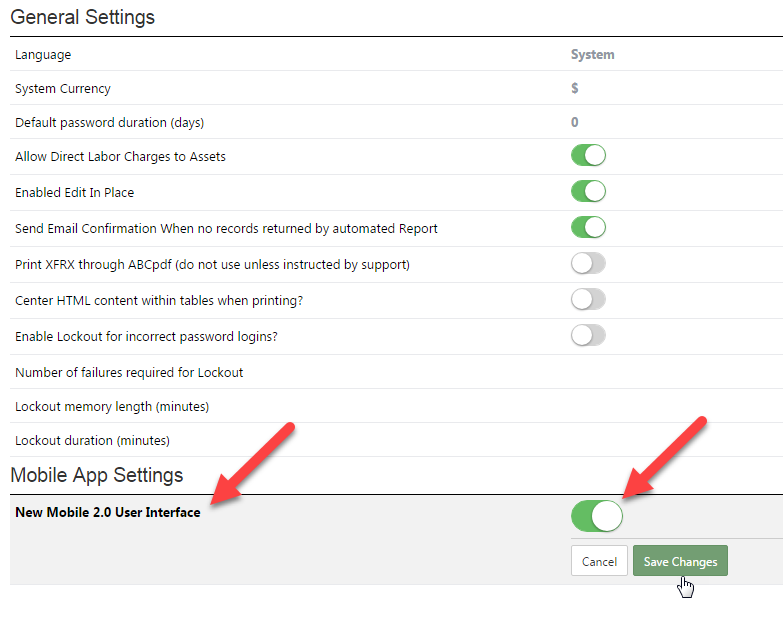
From the Account Settings screen, click on “General System Settings.” At the bottom of the page for General System Settings, you will need to turn on “New Mobile 2.0 User Interface” to activate this version. Make sure to save your changes.
3 - Mobile 2.0 Home Page
To access Mobile 2.0, you would log into the eMaint system on your mobile device (or computer) by going to m.emaint.com on your preferred browser.
On the home page, you will have two options on the top of the screen.
- Menu - Allows you to access the previous MX mobile features as well as access data for other tables in the system.
- Home - Takes you back to the home page.
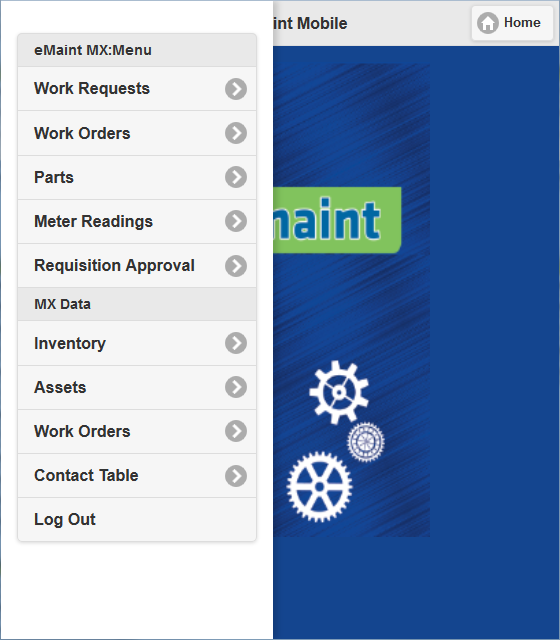
4 - MX Mobile Menu
When accessing the menu from the home page, you will see 2 sections:
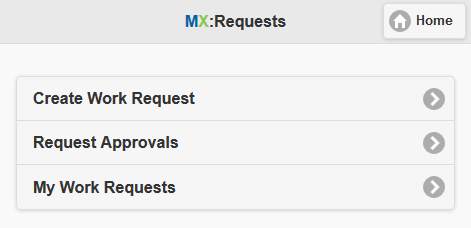
4.1 - Work Requests
Create Work Request - Allows you to create a request to be approved or rejected.
Request Approvals - Shows pending requests waiting on approval.
My Work Requests - Shows the work requests that the logged in user created.
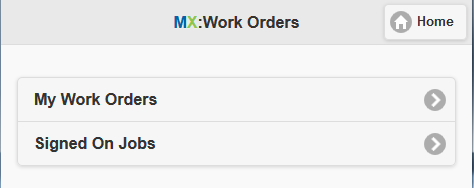
4.2 - Work Orders
My Work Orders - Shows open work orders assigned to the logged in user
Signed On Jobs - Shows that work order that you are currently signed into.
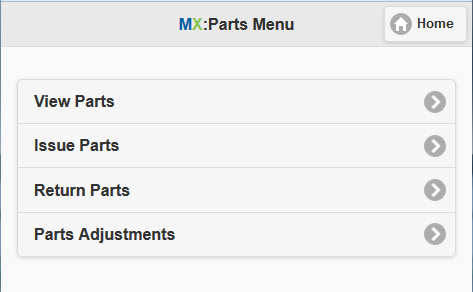
4.3 - Parts
View Parts - Allows you to lookup parts to view and edit the data.
Issue Parts - Gives the ability to issue parts to a work order.
Return Parts - Allows you to return parts from a work order.
Parts Adjustments - Creates a parts adjustment to either add or subtract inventory.
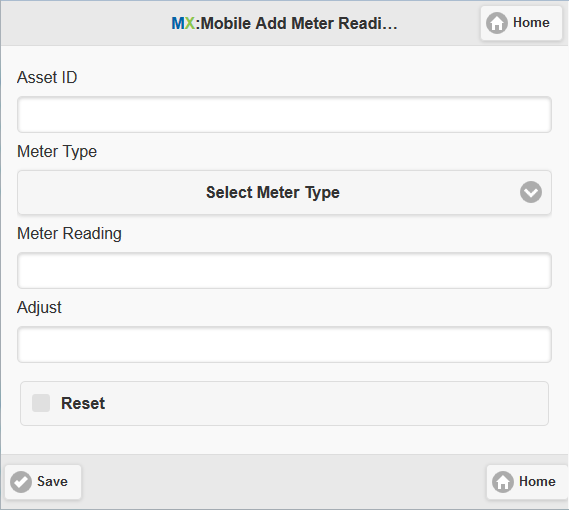
4.4 - Meter Readings
Allows you to add meter readings by typing in an asset ID, selecting a meter type, and entering in your latest meter reading. A meter reset and adjustment can also be done from this screen.
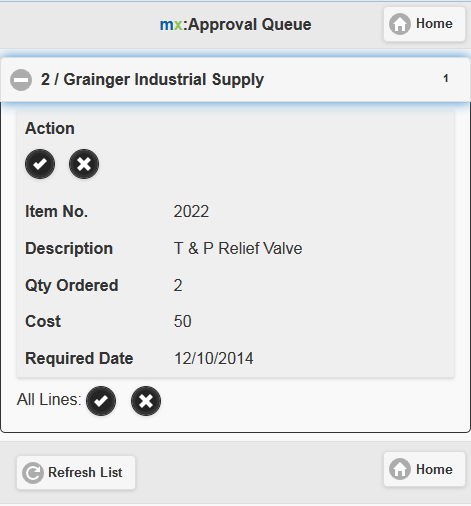
4.5 - Requisition Approval
Allows you to approve pending requisitions that are assigned to you for approval. This is only available on accounts using the requisition feature.
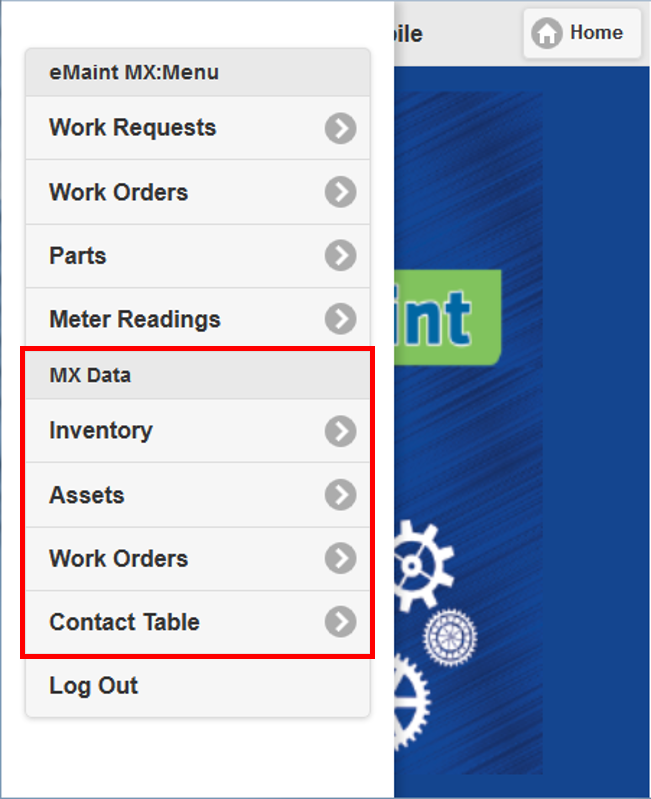
4.5 - MX Data
Inventory - Lookup Parts within the system
Assets - Lookup Asset within the system
Work Orders - Lookup Work Orders within the system
Contact Table - Lookup Contacts within the system
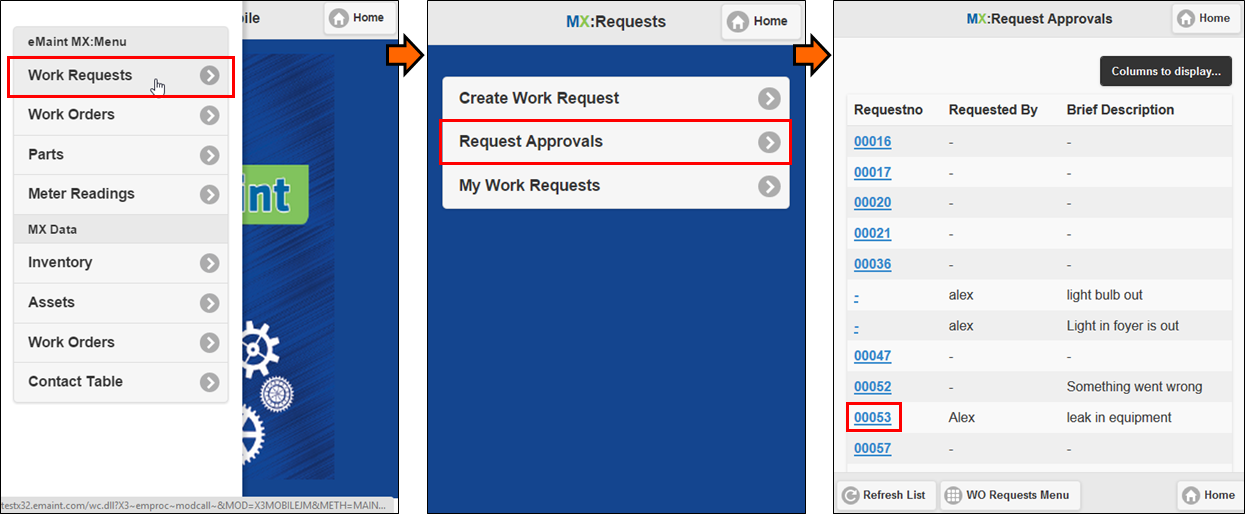
5 - Approving or Rejecting a Work Order Request
Within Mobile 2.0, if you have the user rights you have the ability to approve and reject work order requests created within the system. This can be accessed by going to Work Requests > Request Approvals. From here you can choose the request that you want to review.
Once you access a request, click on the menu button on the top left corner. This will give you the options to either add a new request, copy this request, and attach an image to the request. You also have the ability from the menu to Approve, Reject, or Print the Work Order Request.

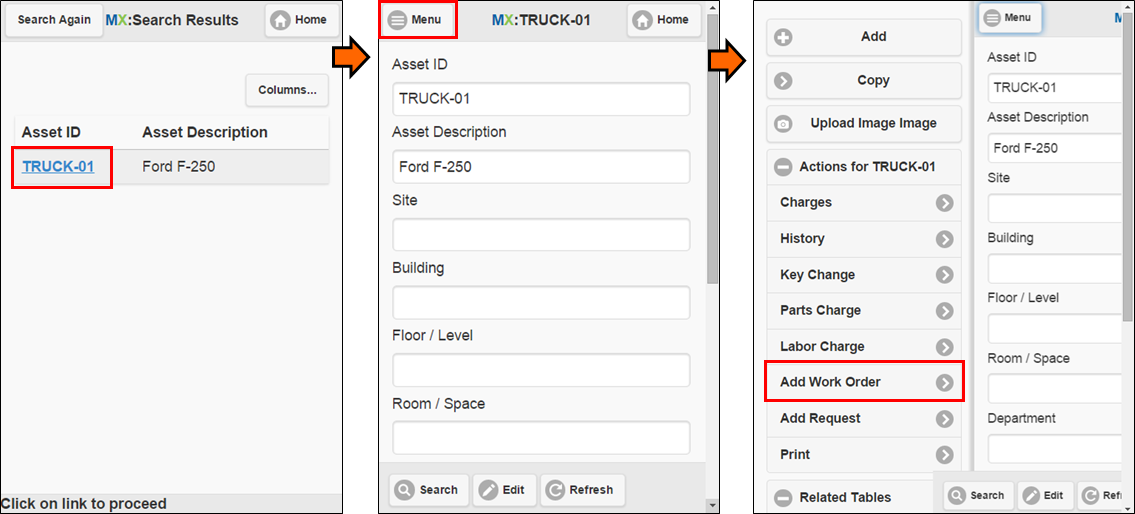
6 - Creating Work Orders through Asset Records
Under the MX Data section you will be able to search and find records (Parts, Assets, Work Orders and Contacts) by different fields. When first clicking on any of these tabs the “Search By” field will default to the keyfield (Asset ID, contact ID, etc), but you can click the down arrow to change that if you want to search by a different field.
In the following example you will see how quick a WO can created through MX Mobile: Click the Menu button > Click on “Assets” > Type in the Asset ID or Scan it into the field (if you are using a handheld computer scanner or have an app for that purpose) > Click “List Matches” >

Click the Asset ID > Once on the Asset Record click the “Menu” button > Click on “Add Work Order”, then fill out the Work Order Form accordingly and save it.
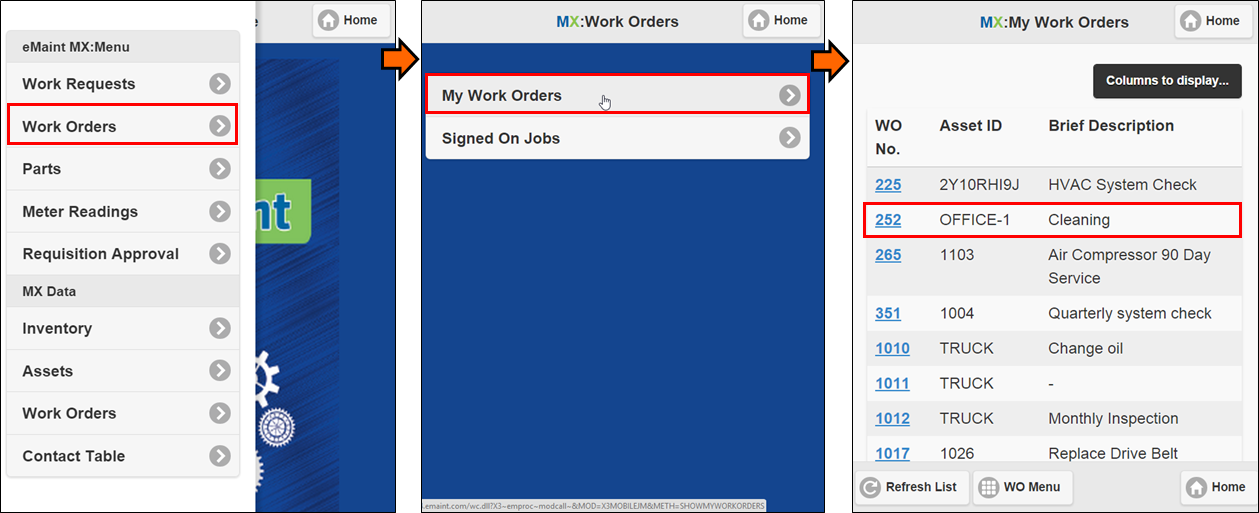
7 - Work Order Sign-on/Sign Off
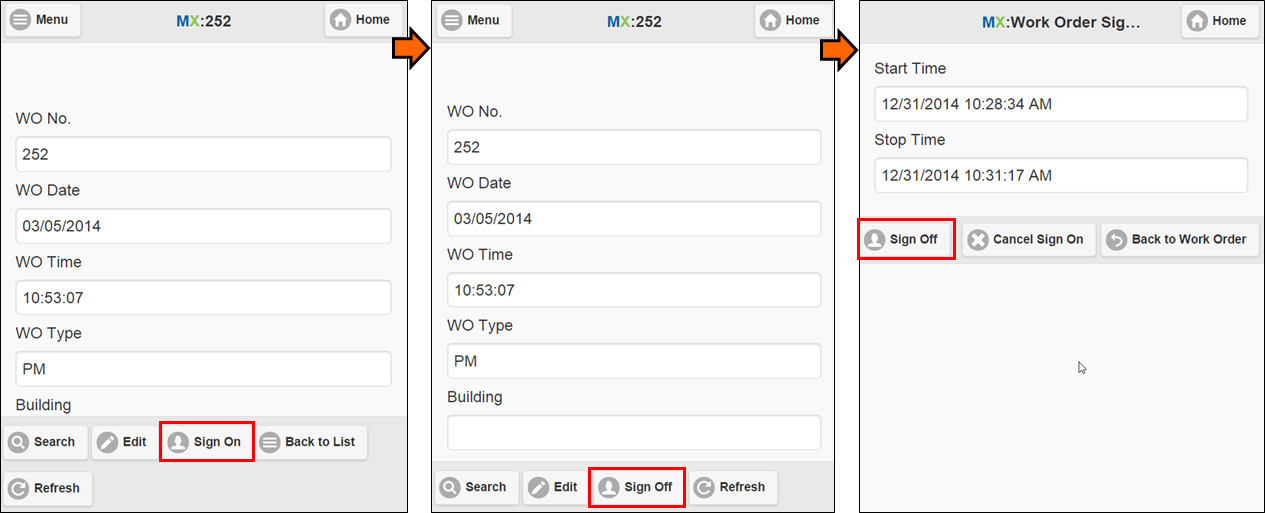
You can easily manage your work orders on MX Mobile with smartphones and tablets. The “Sign-On / Sign Off” feature allows you to add labor charges to work orders more accurately. The system will calculate the time from when you clicked the “Sign On” button until the time when you clicked the “Sign Off” button and will add the a labor charge to that work order with the total time worked during those two events.
To use this feature follow the steps below:
Click on “Work Orders”, then click on “My Work Orders”
Now that you can see a list with all the Work Orders that are assigned to you, click on the WO that you need to work on.
Click the “Sign On” button at the bottom.
Let it run until you are done working on that WO, then press “Sign Off” and Confirm Sign Off on the next screen.
8 - Issuing and Returning Parts
To Issue a part to a work order, open up the Menu from the Home page and select Parts under the eMaint MX:Menu section. From here, select the Issue Parts option be begin issuing a part. Begin by choosing an Item Number for the parts issue and then the Work Order Number to attach it to. If you are using Multi-Location Inventories, you can choose the location to attach it to from here. Select the Qty amount to charge to the Work Order and the Account Number if required. Once the data has been entered, click Process to proceed to the next screen.
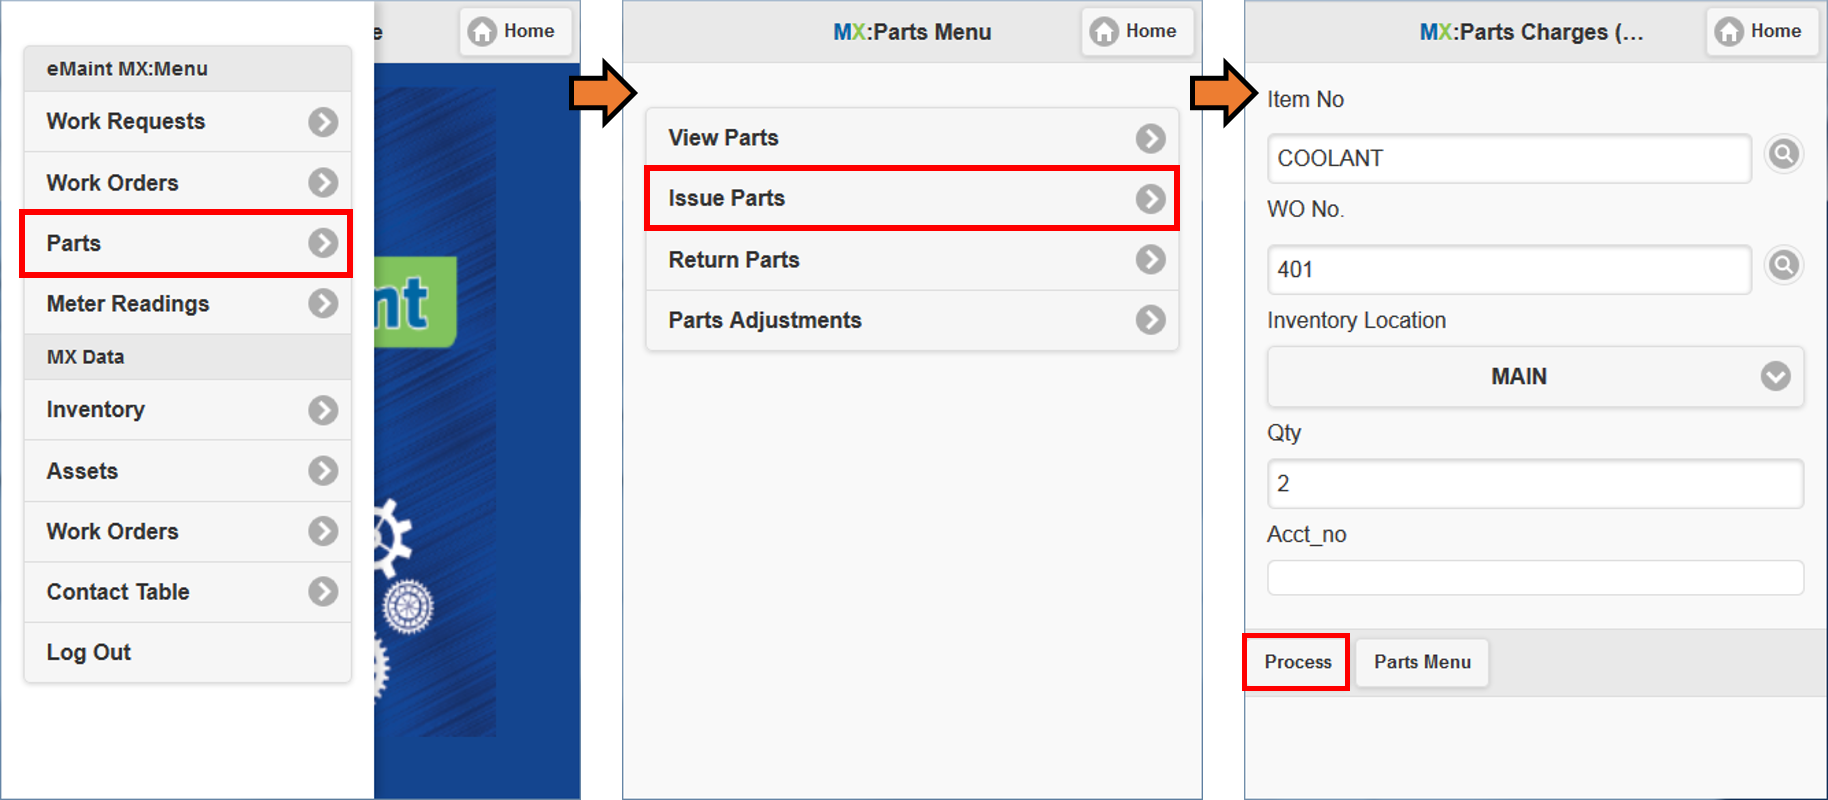
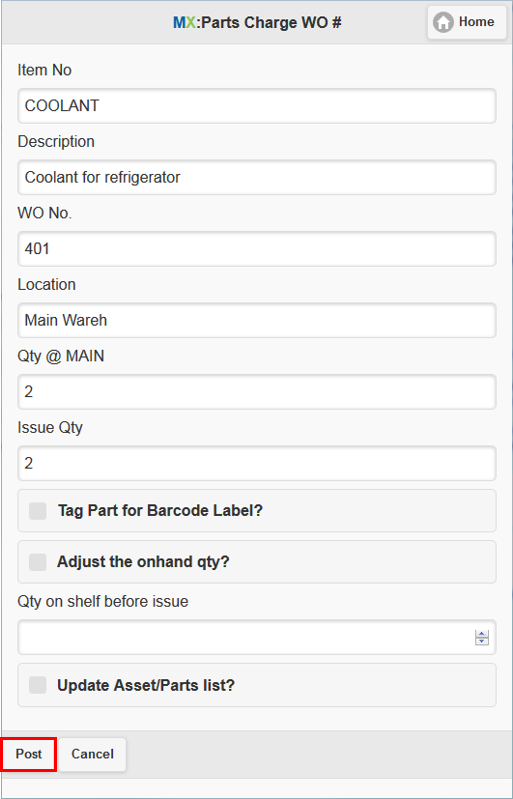
Once you process the parts issue, the next screen allows you to review information on the part as well as what your current on-hand stock for the location chosen. If the Qty on hand is lower than the Issue Qty, the transaction will be rejected and you will be taken to the previous screen if a Post is attempted. Once you confirm your data is correct, click Post to finalize the part issue. If no error message appears, then the part issue has been completed successfully.
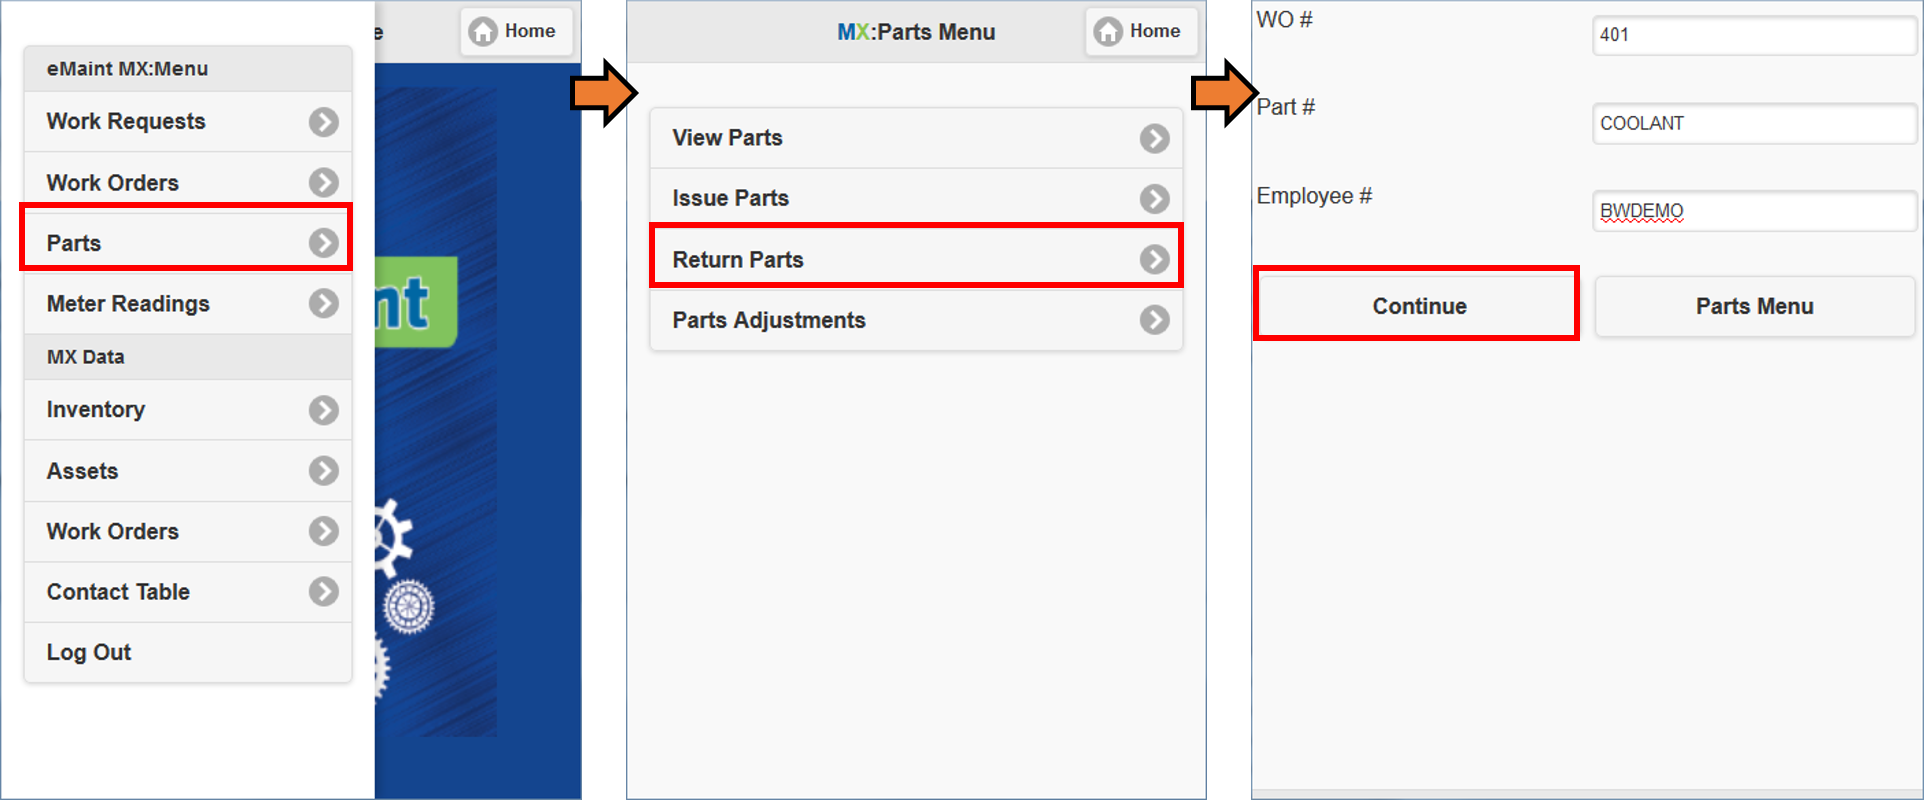
To Return a part from a work order, open up the Menu from the Home page and select Parts under the eMaint MX:Menu section. From here, select the Return Parts option be begin issuing a part. Begin by choosing a Work Order Number for the part return and then the Part Number to return into inventory. You can also choose the Employee Number (ContactID) to attach to the return. Once the data has been entered, click Continue to proceed to the next screen.
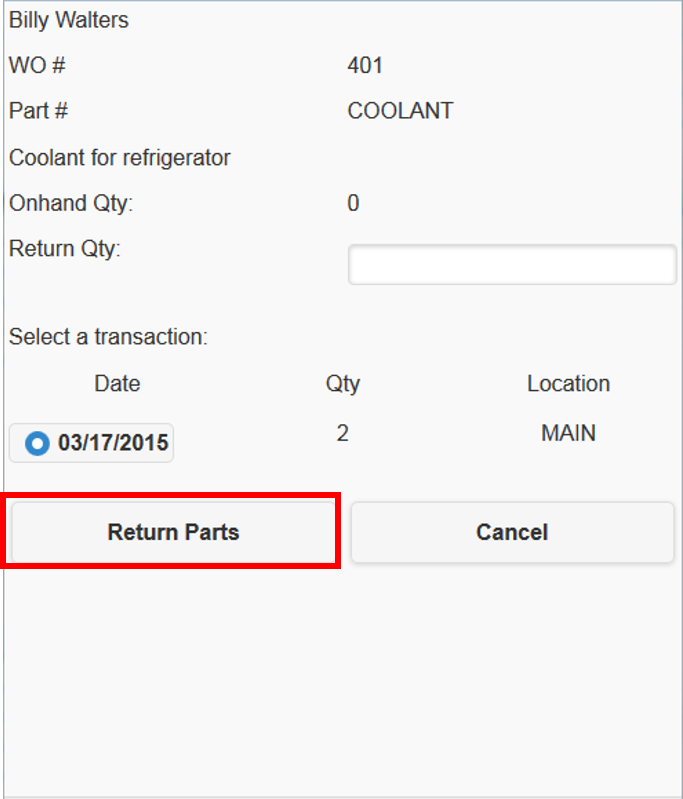
Once you continue to the next menu, you will get a menu that shows the Transaction for the part chosen on the work order and how many were issued. You can also see the current Onhand Qty for the part. In the Return Qty field, enter in the total amount of parts to be returned and then click on Return Parts to complete the transaction.
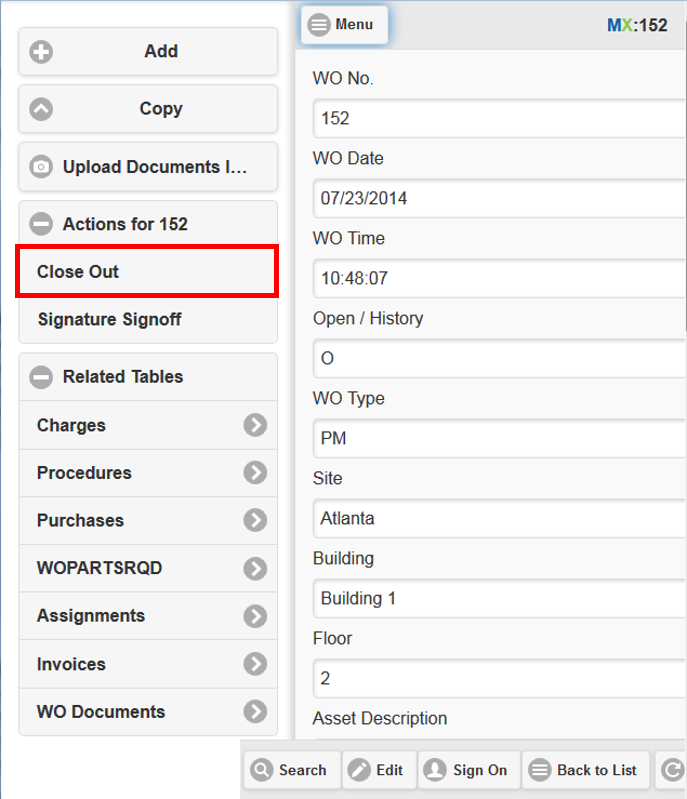
9 - Closing out work orders
To close out a work order, you will first need to access the work order you are closing out. This can be done through either “Work Orders” under eMaint MX: Menu and then “My Work Orders” which shows you all work orders you are currently the “Assign To” contact to. Another Method is going to “Work Orders” under MX Data and manually searching for the work order.
Once you have accessed the work order, click on the “Menu” button in the top left hand corner. Here you have the ability to add a new work order or copy this work order. You also have the ability to use the Signature Signoff feature to add a signature to the work order. You can also access the Related Tables associated to the work order.
To close out the work order, click the Close Out button to complete the closeout process.
10 - Viewing Asset History
To view Asset History to review all work orders associated to an asset, click the Menu button from the Home page and select Assets from the MX Data Menu. You will be taken to a screen to find an asset. Select a filter to search by and look for an asset in your system and then click List Matches. You will then get a list of all assets that match your filter criteria. Click on the Asset ID to proceed to the detailed view of the asset.
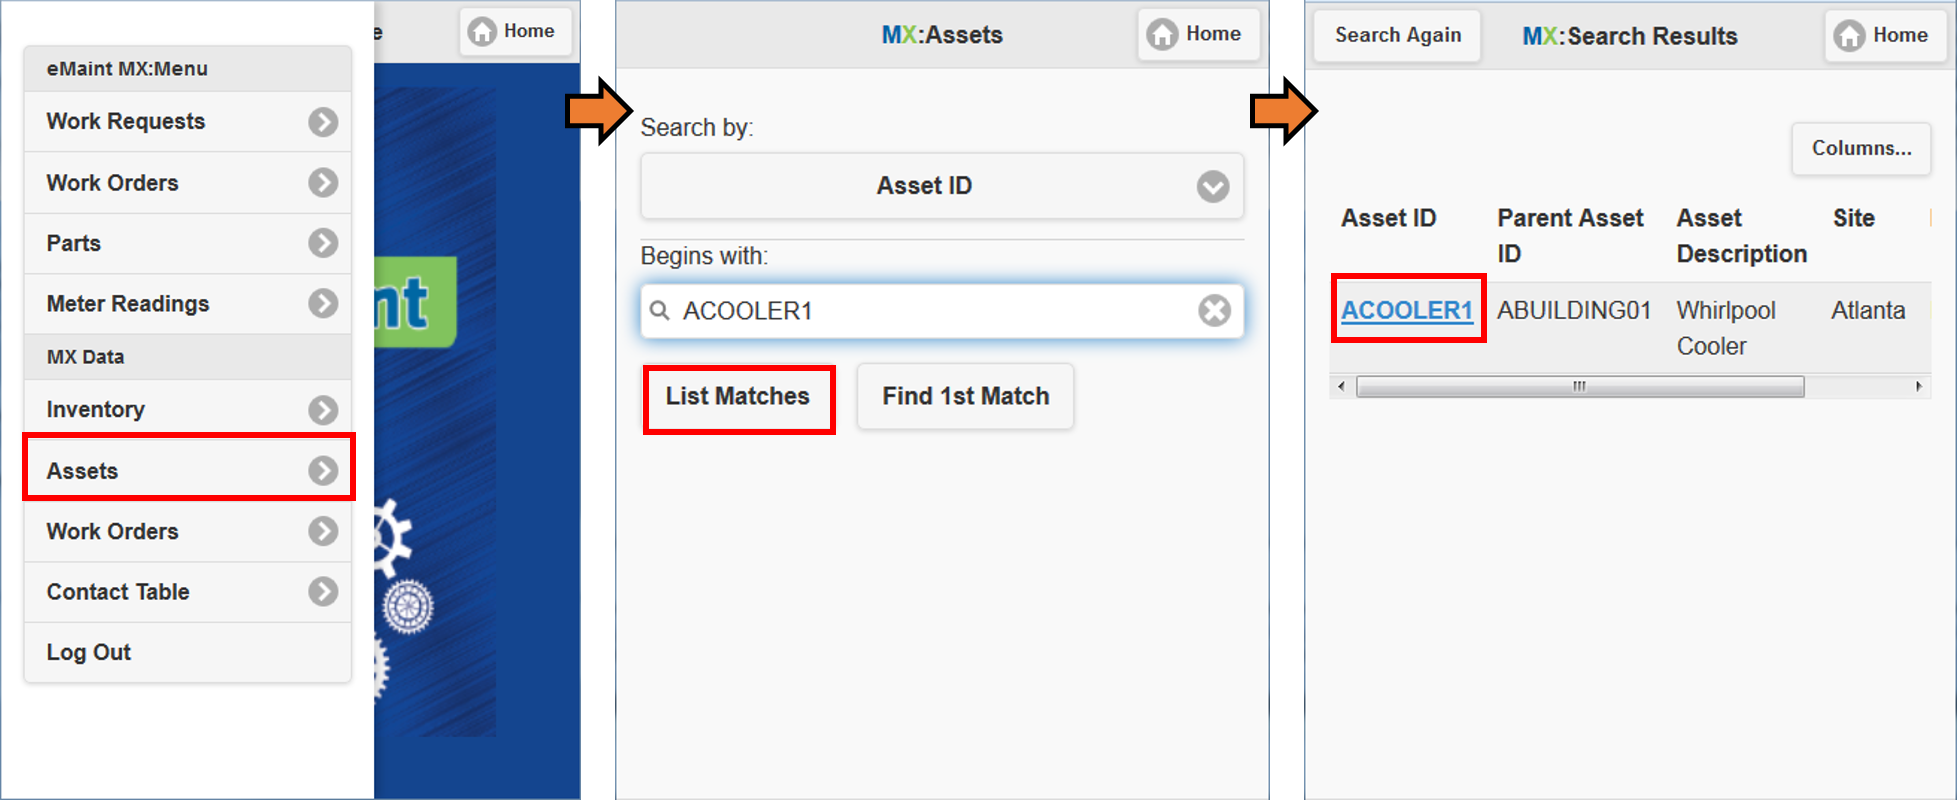
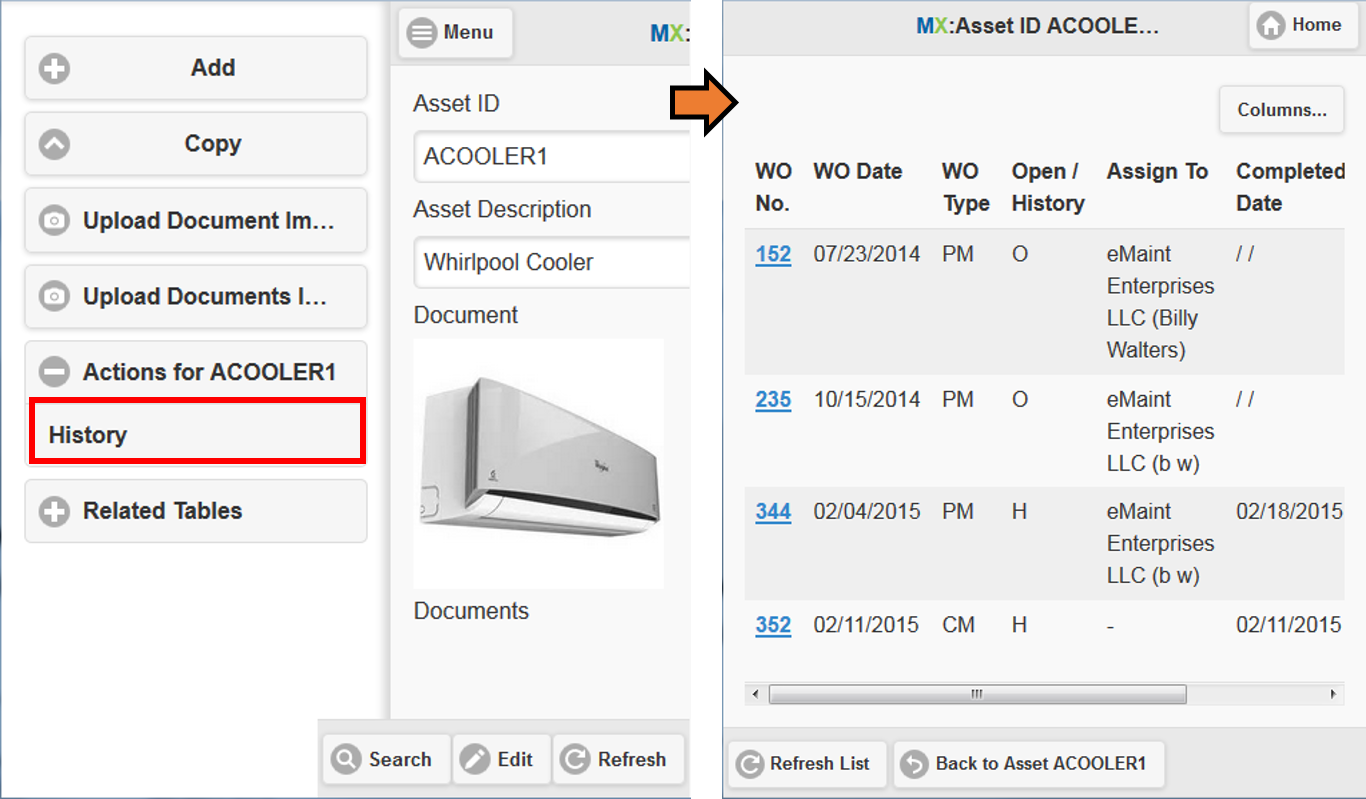
From the Asset detail view, click on the Menu button in the top left hand corner. Under the Actions section, there is an option for History. Clicking this button will allow you to view the entire work order history of the asset.
11 - Adding Images to Records
When creating Work Order Requests, you can also embed an image on the form to better explain the issue. If you don't already have an image field on the WO Request Mobile form, you will first need to create it. To learn how to create this type of field search for the "Document Storage" manual available here or call support for help.
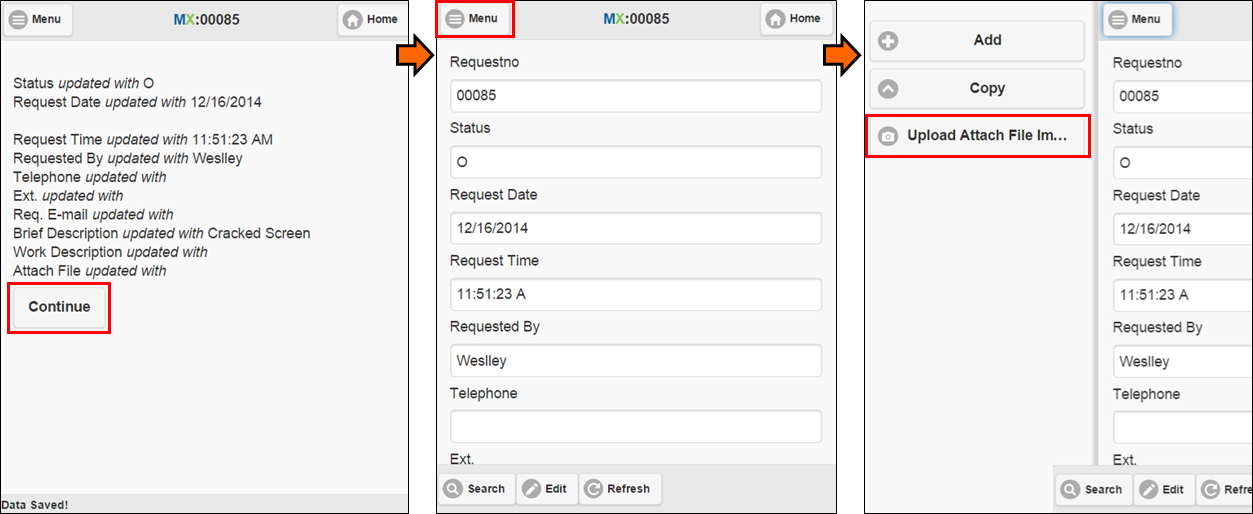
Once the Document Storage field exists on the request form, you will be able to embed images into it. To do so, you will first need to create a new request (as demonstrated below) or navigate to an existing request.
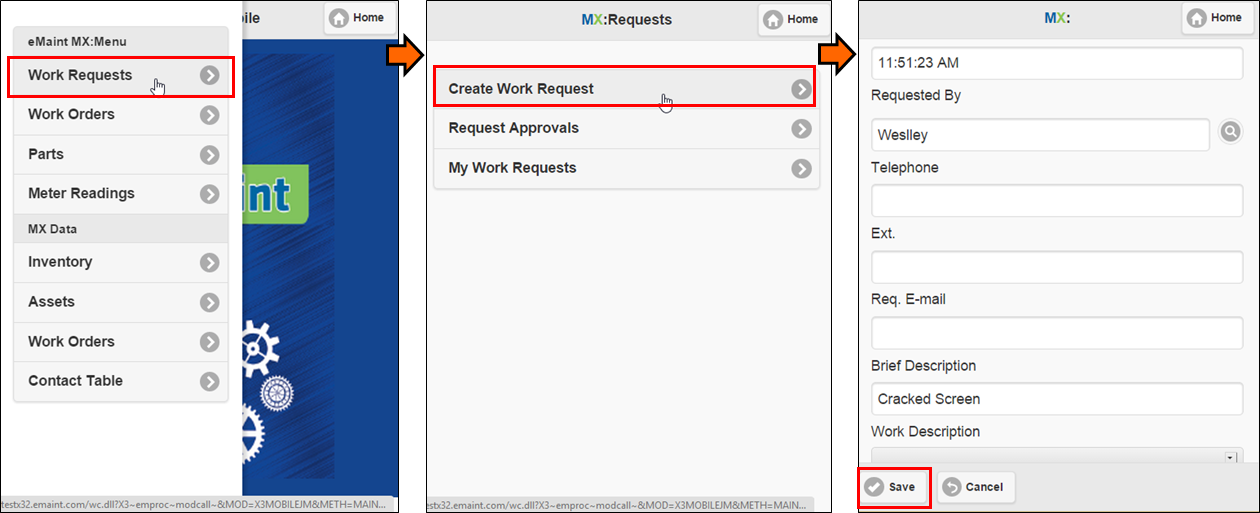
After you save your new request, Hit the “Continue” button, then Click the “Menu” button at the left hand corner, then hit “Upload Attach File Image”.
Now choose a file from your Computer, Type in a “Document Description”, then hit “Save” and you are done.
