Introduction
The X4 Offline App enables you to manage your open Work Orders as well as record Condition Monitoring readings when internet access is not available.
Currently this application is only compatible with Windows 10 and is most often used with Windows Mobile devices. This application can be found on the Windows app store and it can be used by customers at the “Professional” or “Enterprises” subscription levels for an additional cost per user. Customers at the “Team” level don’t have access to to this app.

For more information on pricing and on how to install the X4 app on your Windows device you can contact your Customer Success Manager or email services@emaint.com.
How it works
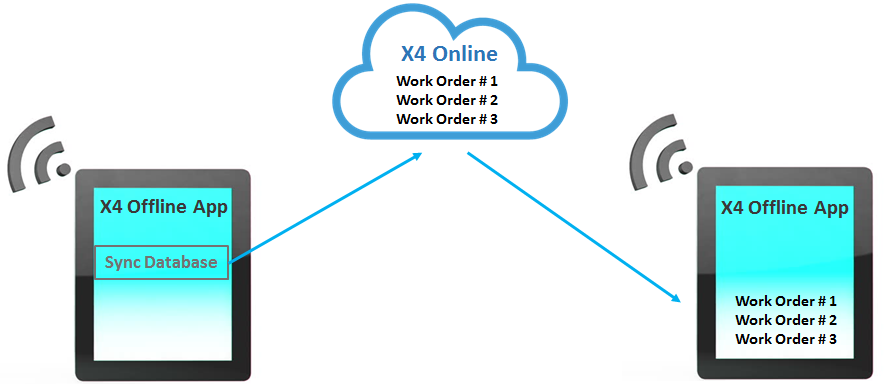
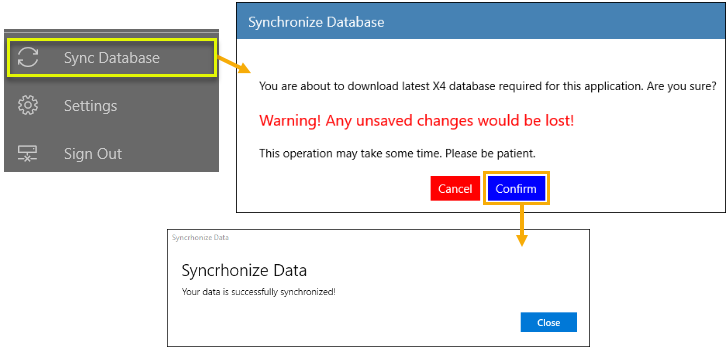
Before walking out to an area with no internet access, you will need to login to the X4 Offline app (while connected to the internet) on your mobile device and click on Sync Database. This will update the WO list on your offline app to include any new WOs that were assigned to you since the last time you synced the database. This action will also remove WOs that have already been closed.
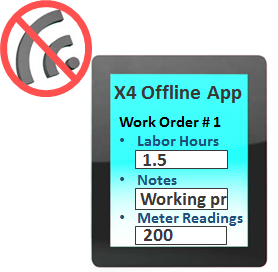
With an updated list of Work Orders on your offline app, you can now go to areas with no internet, and go into your WOs to add Labor Charges, Notes, Meter readings (where needed) and mark them as Completed. You also have a tab dedicated for entering Condition Monitoring Readings, which will be discussed further in this manual.
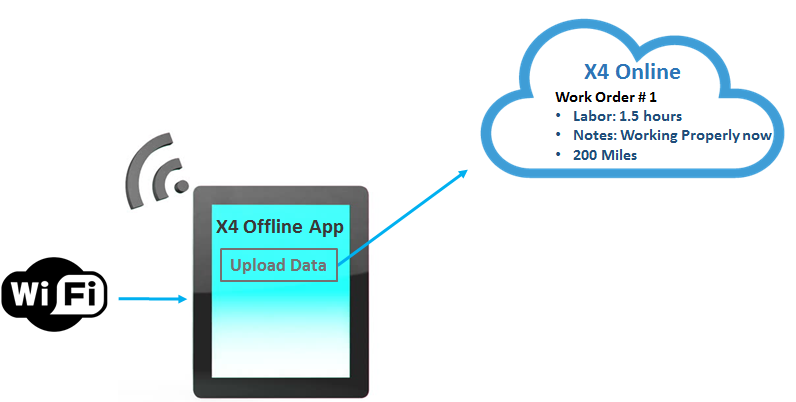
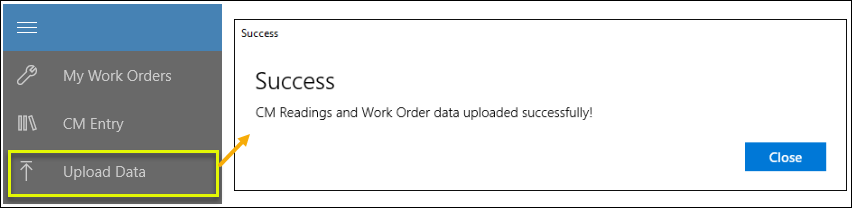
When you have internet access again, you will need to click on Upload Data to send all the information you have recorded on your X4 Offline App to your X4 Account Online.
App Login
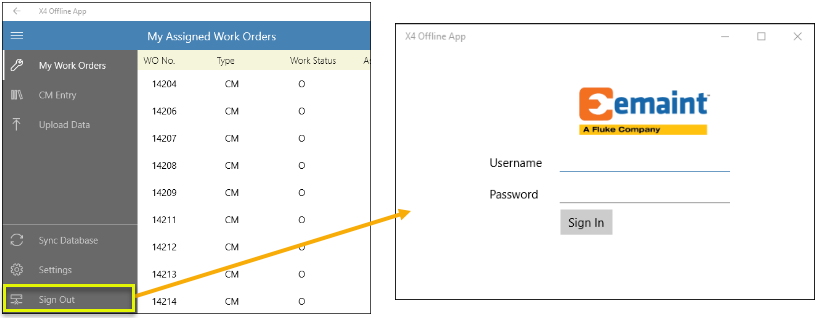
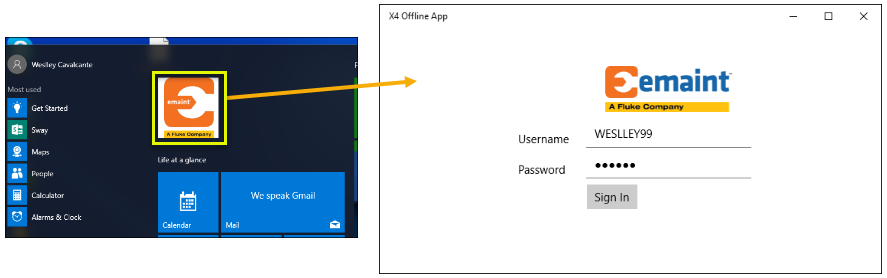
Once the app is installed on your device, you will be given a shortcut for it. Clicking the app will take you to the login screen.
Navigating the X4 Offline App
The X4 Offline app is simple and very easy to navigate. On the left side of the screen you will have your two main tabs (My Work Orders and CM Entry). You will also have the two buttons mentioned in the previous section (Sync Database and Upload Data).
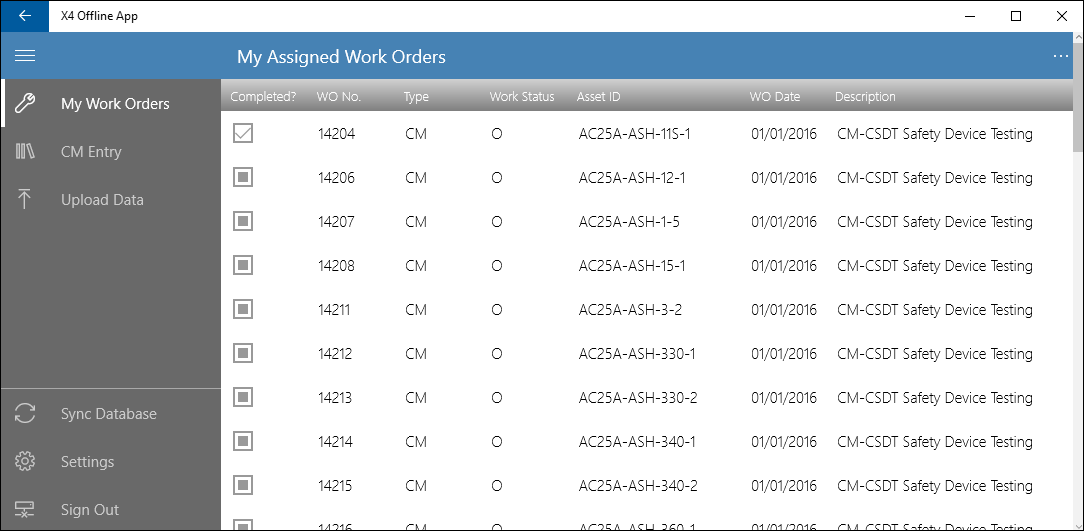
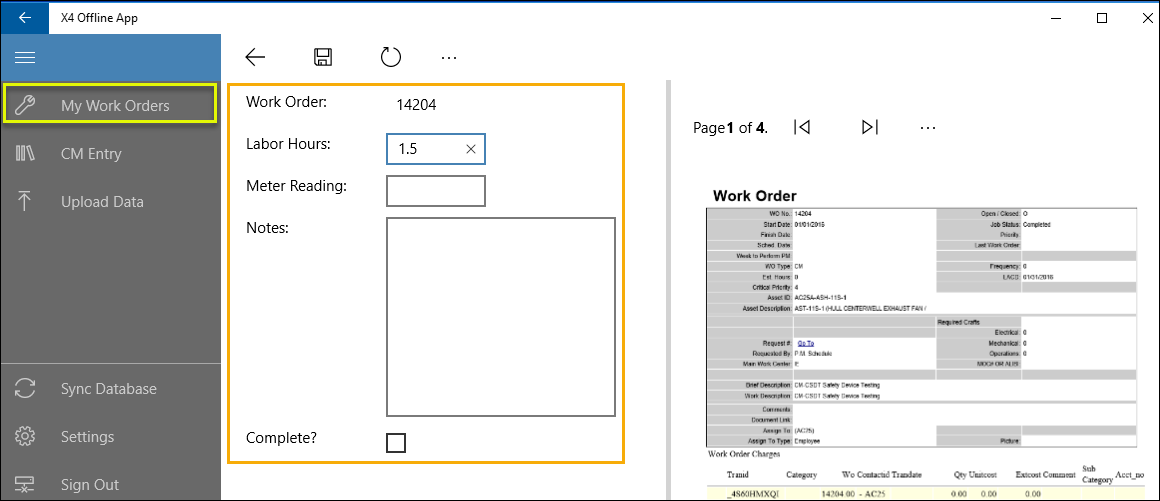
My Work Orders - In this tab you will see a list of Work Orders that are assigned to you. Clicking a record here will display the WO in PDF format and will allow you to add Labor Charges, Notes, Meter readings (for PM WOs generated from Assets with meter based PM Schedules) and mark them as Completed. To save your entry click the floppy disk at the top.
Additional Notes
Marking a WO as Complete does not close the WO. It changes the Job Status to “Completed”.
After saving an entry (and before uploading your data) you will be able to go back to WO to make changes if needed.
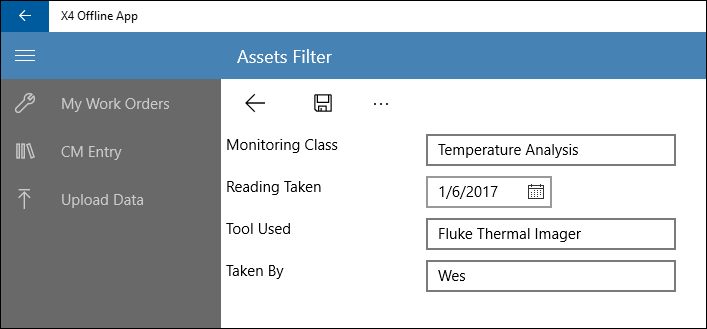
CM Entry - In this area you will be able to record Condition Monitoring Readings for your assets. The process of recording readings here is very similar to the process you may already be familiar with from X4 Online. Select the Monitoring Class that is required for data entry, then if needed, adjust the value in the Date Readings Taken field, then click on “Select Class”.
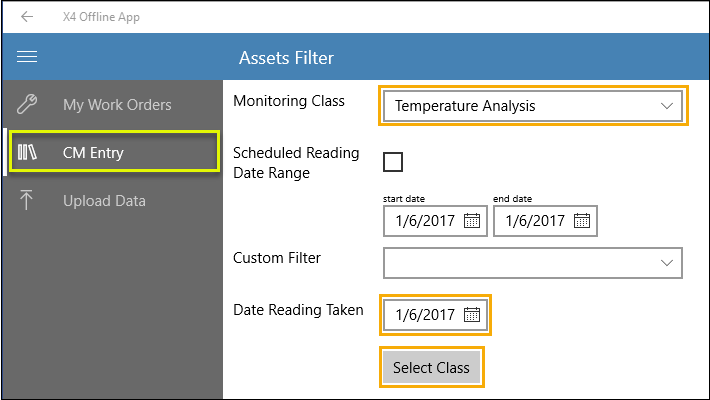
Additional fields on this screen:
Scheduled Readings Date Range - Search, within a date range, for PM Work Orders that were generated as reminders to take Condition Monitoring readings (WO type = CM). These WOs will be closed automatically upon reading entry.
Custom Filter - Select a custom filter to narrow down the asset selection even further.
After selecting a class, you will be taken to the questions section to answer any questions associated with the monitoring class you have selected. Once you have answered these questions, click the floppy disc.
From this next screen, you can enter the monitor readings for each point (e.g. Termination Box, Bearing, etc). After Entering the readings, mark the checkbox for the assets you are entering readings for, then click the floppy disc to save it.
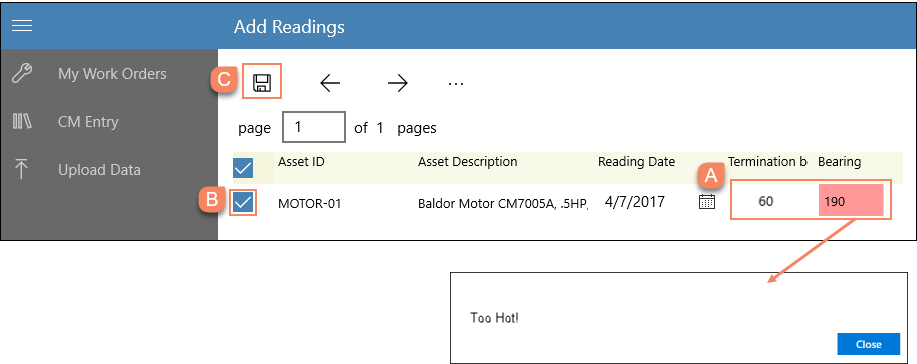
Note - As demonstrated above, the system will tell you if the reading entered is outside of the defined boundaries.
Upload Data - This button will send all the information recorded offline to your X4 account online. After clicking this button, all Work Orders you entered labor hours for will be removed from your WO list. If they are still open online, they will show up again on your offline WO list next time you sync your database.
Sync Database - As mentioned before, this button will update the WO list on your offline app to include any new WOs (created online) that were assigned to you since the last time you synced the database. This action will also remove WOs that have already been closed. This process takes 2 - 5 minutes.
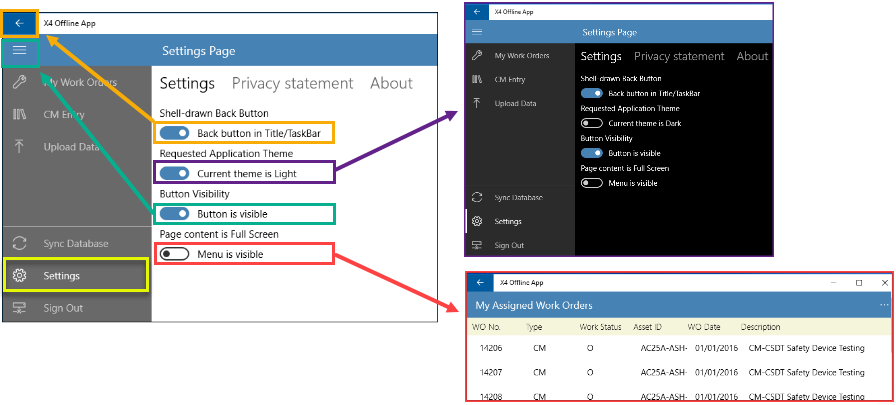
Settings - In this area you will see four settings where you can set a few preferences for the app:
Shell-drawn Back Button - If this option is turned off, the back button at the top left hand side of the screen will not be displayed.
Request Application Theme - This button gives you the option to change the application’s theme into a darker background.
Button Visibility - Turning this option off will hide the “collapse menu” butt`on at the top left hand side of the screen.
Page content is Full Screen - When turned on, neither the “Menu” on the left nor the “Collapse Menu” button will be displayed.
Sign Out - Signs you out of the app and takes you back to the login page.