1. Purpose & Introduction
The Time Clock Feature allows users to clock into the eMaint X4 system from the dashboards in eMaint X4 or the homepage in Mobile. The user’s location coordinates and time will be stored to allow time tracking to be done outside of a work order.
2. Clock In Procedures
2.1 Mobile
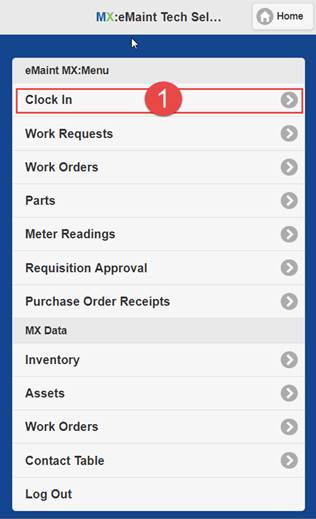
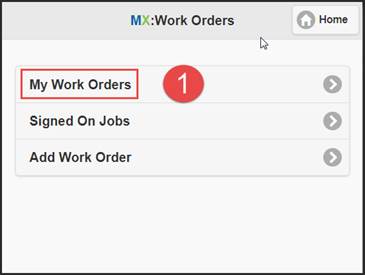
Step 1: The user selects “Clock In” from the Home page.
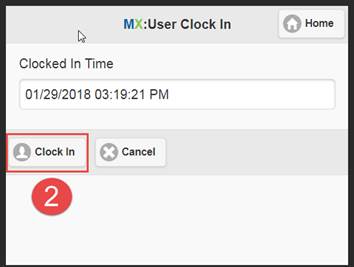
Step 2: The user selects the “Clock In” button. The time will be noted above.
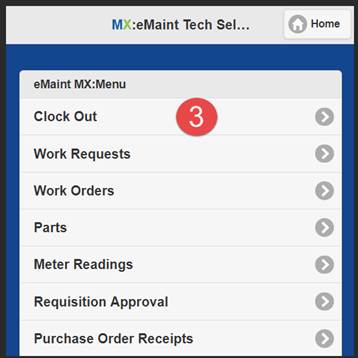
Step 3: The user will be returned to the menu on the Home page and select “Clock Out” when they are ready.

Step 4: The user’s Start Time and Stop Time will be displayed and then the user selects the “Clock Out” button.
2.2 Dashboard

Step 1: The user selects “Clock In” from the Clock-In/Clock-Out Wizard on the Dashboard.
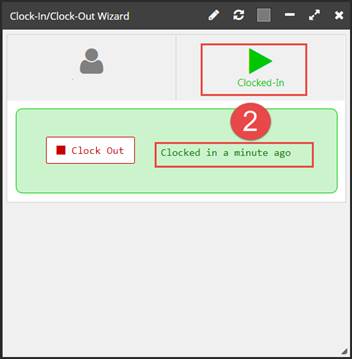
Step 2: There will be a green arrow displayed and a “Clocked in” message.
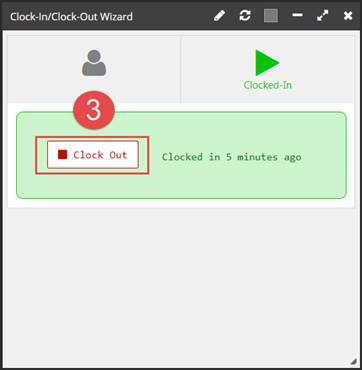
Step 3: The user will select the red “Clock Out” button when ready.
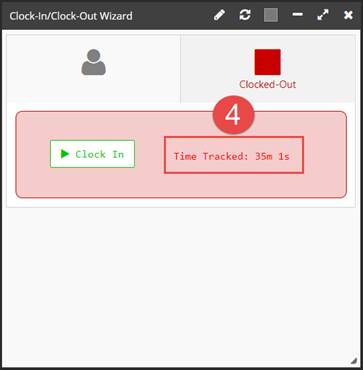
Step 4: The user’s time tracked will be displayed.
3. User Clock-In Tracking
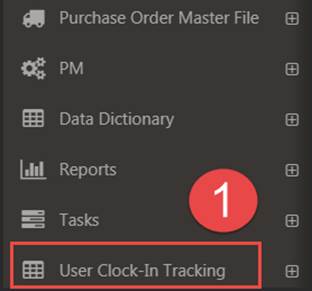
Step 1: Locate the User Clock-In Tracking table.
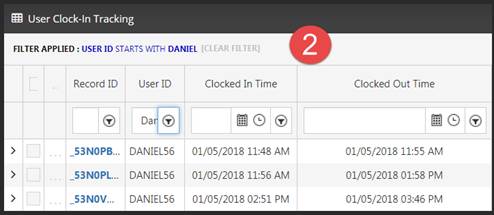
Step 2: In the List View you can track the Clocked In and Clocked Out Time for all users or filter for specific User IDs.
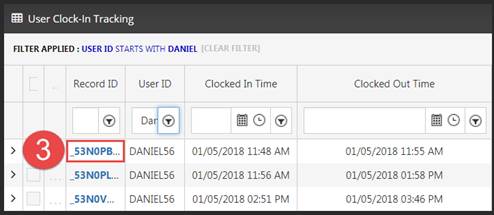
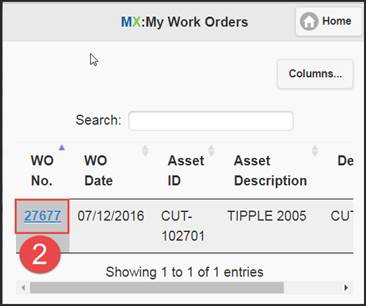
Step 3: To view the record select or view the Record ID.
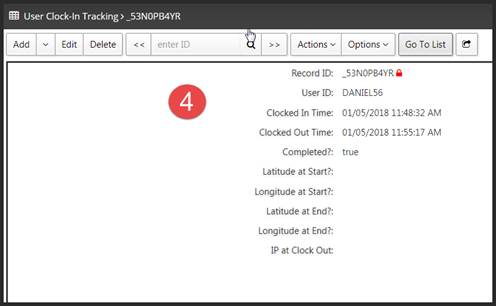
Step 4: The user’s Clocked In and Clocked Out times will be displayed.
4. User Permissions
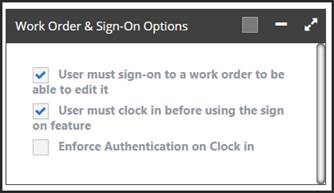
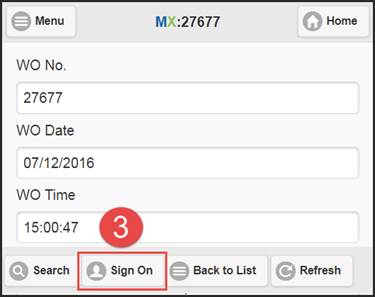
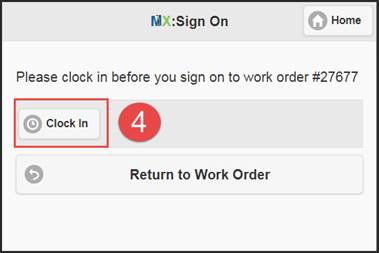
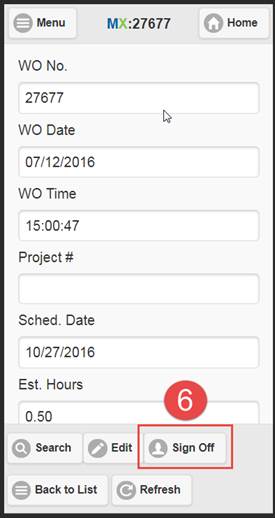
User Permissions: User must clock in before using the sign on feature.
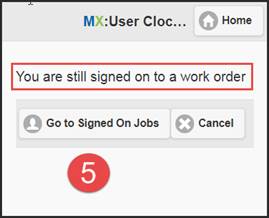
NOTE: The system will not allow the user to Clock Out if they are still signed on to a work order.

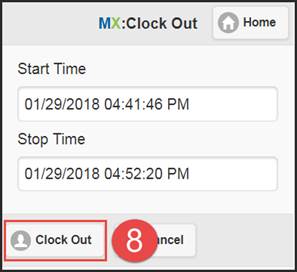
The user can then Clock Out successfully.
Release of eMaint Version 11.5.0