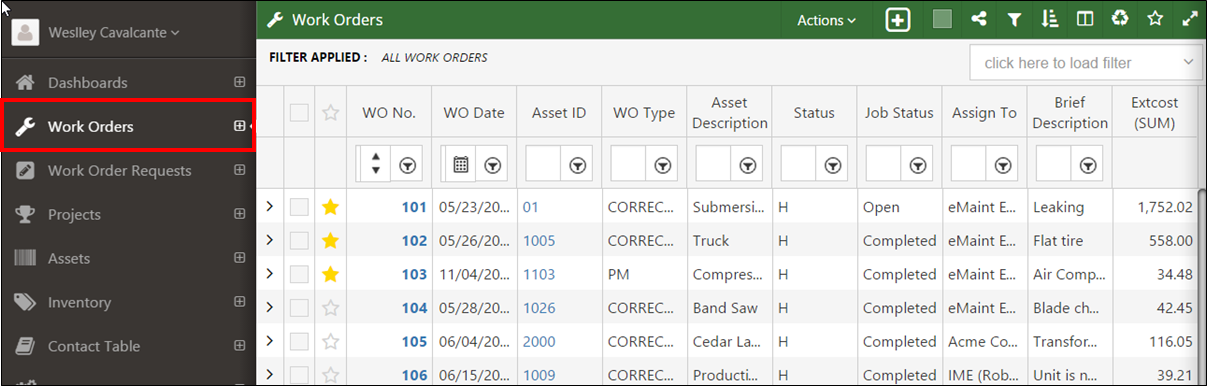
1 - ListView
The Work Order List View is the repository for all work orders within the eMaint system regardless of whether they are manually created, generated by the PM Scheduler, or from a request approval. You can access the Work Order List View in X4 by clicking on WorkOrders on the left hand of the screen.
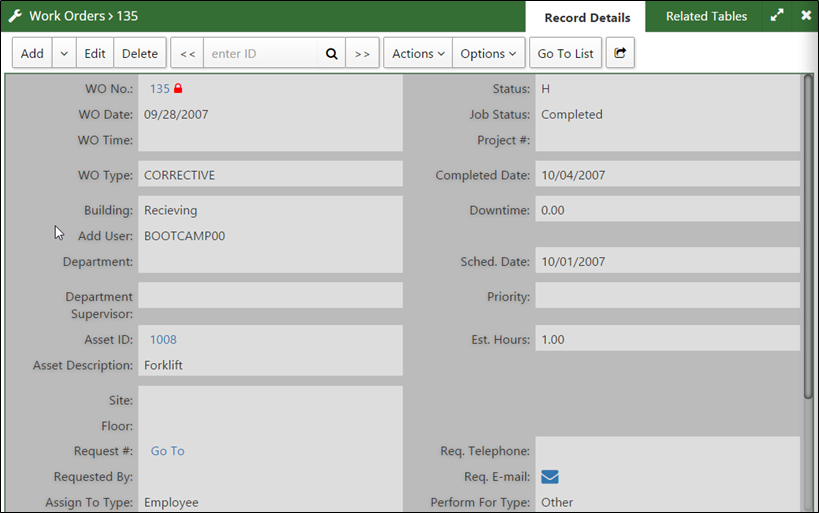
2 - DetailView
The Detail View is the full information that is contained within a work order. You can access a Work Orders detail view by clicking on the work order number from the list view.
TopLeftMenuOptions
Once you have accessed the detailed view, there are various options to choose from on the top left hand side of the menu.
Add - Allows you to add a brand new work order. The down arrow button next to Add gives you the option to copy the current work order into a new work order. If you have multiple forms, you can choose the form you would like to add a new work order to.
Edit- Opens the record in edit mode to allow changes to work order information.
Delete - Marked the work order for deletion. After deleting the record, you have the opportunity to undelete by going directly to the work order and clicking the Undelete button that will appear if the record is marked for deletion.
<< and >> Arrows - Allows you to move to the next or previous work order on the list view.
SearchBox- Gives the capability to directly search for an exact work order number.
Actions - Provides different actions specific to Work Orders.
Options- Provides different options to customize the Detail View
GotoList - Takes you back to the WO list
Arrowpointingtotheright - Will open the current screen in a different browser tab.
TopRightOptions
On the top right of the Work Order detailed view, you have multiple options for displaying information and changing the size of the display view.
RecordDetails - Displays the details of the main content of the Work Order.
RelatedTables- Displays all of the related tables for the chosen Work Order. Additional Related Tables can become Tabs by using the ManageRecordTabs option.
DiagonalArrows - Maximizes the screen to give you a full view of the detailed Work Order information.
X - Closes the detail view of the work order
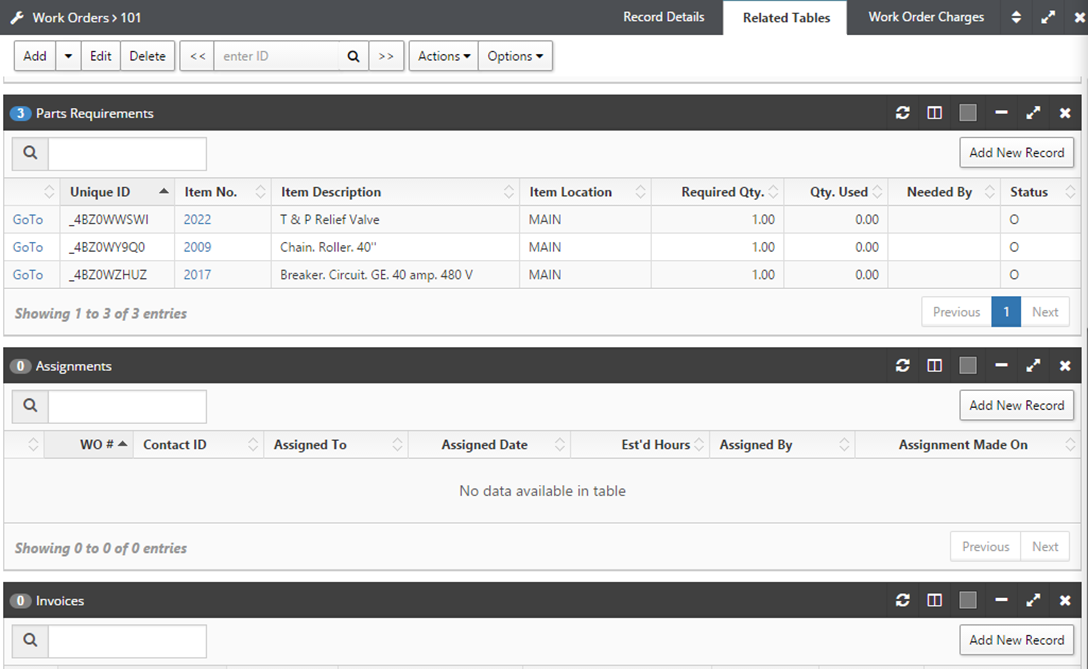
3 - RelatedTables
Within the RelatedTables tab by default, the user can access the WorkOrderCharges, WorkProcedures, Purchases, PartsRequirements, Assignments, and Invoices on the work order.
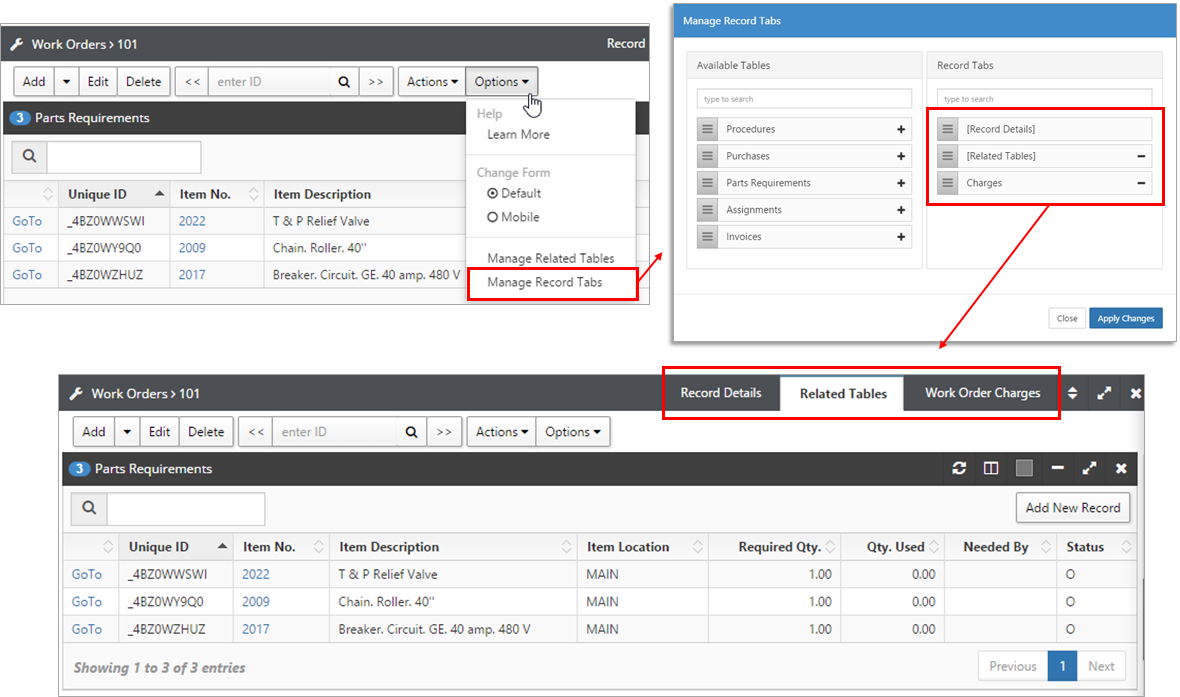
In the example above you can see that we have given “Work Order Charges” its own tab within each record. Below you will learn how to manage these tabs and create them for any related table.
To add a tab for a related table, click the “Options” button, click on “Manage Record tabs”, then using the plus sign next to each related table decide which related table (s) should have their own tab.
At the top left corner of each related table you have “Search” box that allows you to search for words within any of the displayed columns.
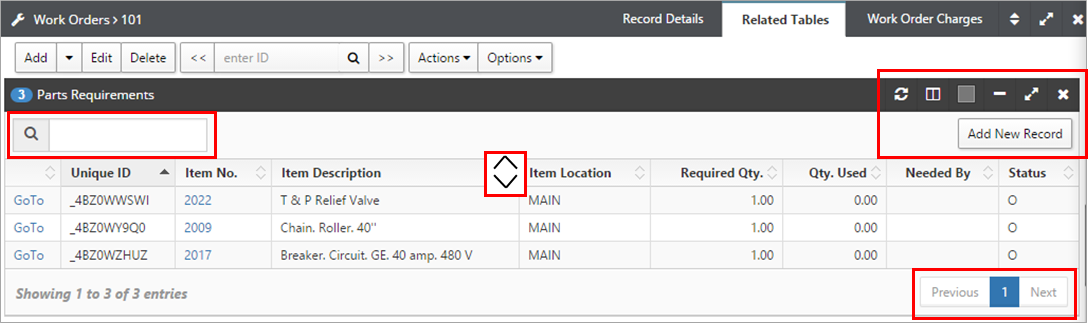
At the right corner of each column you can see an icon with arrows pointing up and down, which allow you to sort by ascending or descending. You can only sort by one field at the time.
At the right hand corner of each related table there are a few options:
Refresh Table Contents
Manage Table Columns
Change color of related table
Collapse table content
See Related table in full screen
Remove Related Table from Display (this will not delete any existing data in the table). To display the table again click the “Options” button, then select “Manage Related Tables” and display the table again.
At the bottom right hand corner of each related table you can go back and forward pages to check records within each table.