To look at previous Condition Monitoring readings, click on the Data Analysis button within the Condition Monitoring Tab.

Figure 7-1 - After entering Data Analysis, you will be presented with a screen to look at monitor point readings based on the chosen monitor class
On this screen, you will see several controls used to select which readings to view:
● Monitor Class - The monitor class used to filter the monitor points and assets for viewing.
● Assets - Gives the ability view all assets or a specific asset within that monitor class.
● Date Range - Select the date range you want to see results for.
● Display Options - Select “By Readings” to get all the data entered or “By Field Logs” to filter by each reading when it was taken.
After filling in the filters for the selection criteria, click Display Readings.
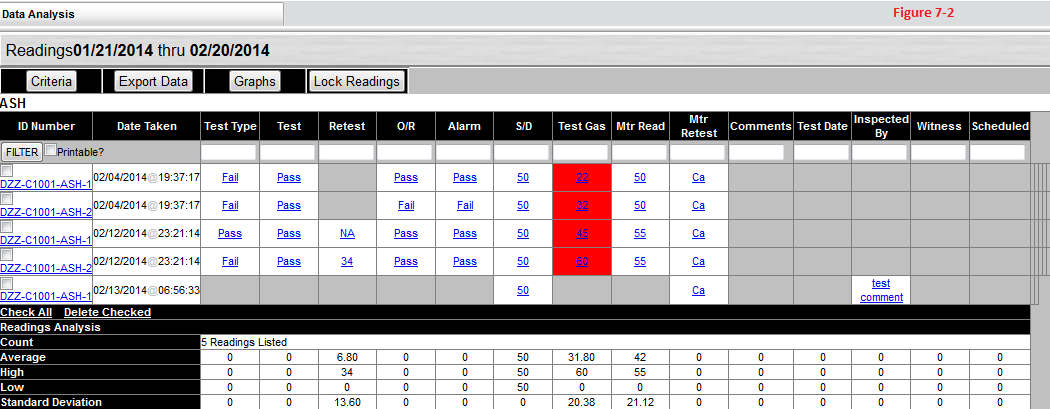
Figure 7-2 - After you click Display Records, you will arrive at a screen that displays all the reading information that meets your criteria
● Criteria - Brings back the Selection Criteria box to look up more readings.
● Export Data - Allows you to export the results into a .CSV file.
● Graphs - Creates a graph based on the monitor point you select.
● Lock Readings - Locks the readings on the results page to prevent this data from being edited in the future.
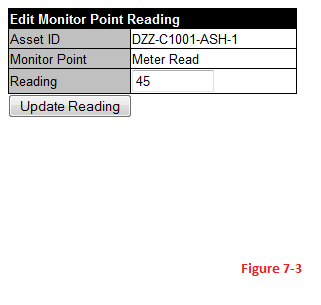
Figure 7-3 - Clicking a reading link will provide a popup box to edit the reading
If a monitor point that appears in the results is incorrect, you can edit the reading by clicking on the hyperlink to the left of the reading.