There are several categories, or types, of contacts that are tracked in eMaint X3. The categories include Employee, Contractor, Supplier, Location, Customer, and Tenant. It is important to establish your list of contacts so you can assign employees or contractors to tasks and work orders or assign suppliers to parts. Click the Contacts tab to access your system’s contacts.
TheListView
The List View contains user-selected fields from the contact detail screen that are most helpful in filtering and locating contacts in your system.
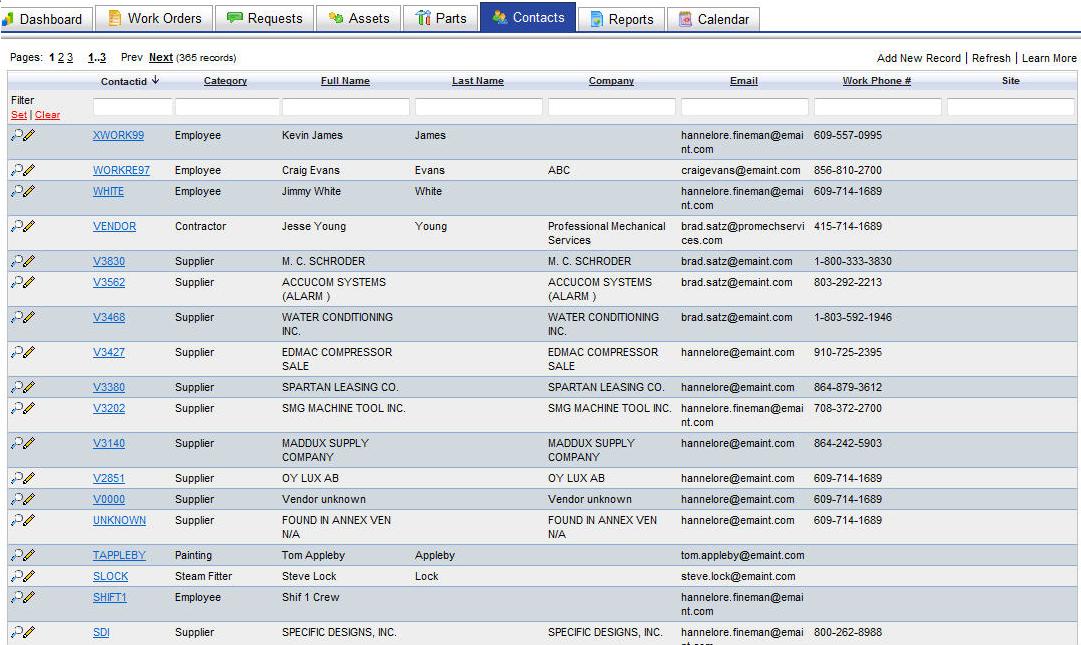
Each contact displayed in the list has its Contact ID underlined. This means you can click the Contact ID to see the contact record in detail. To the left of each row are a magnifying glass icon and a pencil icon. You can click the magnifying glass icon to see the detail record of the contact. You can click the pencil icon to edit the contact record.
From this screen you can add a new contact record to the list by clicking AddNewRecord in the upper right corner. If any changes were made to a contact while this window was open, click Refresh to reload the page. The LearnMore link provides a brief description of the list view and how to navigate around it. To close the window and return to the main menu, click the CloseWindowlink in the upper right corner.
Click the FormOptions link at the bottom of the list to change the default settings of how this screen is displayed.
SearchingyourContacts
You can expand your search further by applying sorts and/or filters.
Sortingthelist
Click on one of the column headings and the list will sort in ascending order. Once sorted, a small arrow icon (pointing up) will appear to the right of the column name. This indicates that the list is sorted in ascending order. Click the arrow icon and the list will sort again, this time in descending order.
ApplyingFilterstotheList
Filters are used to search the whole list and display the matching results. For example, if you wanted to see only those contacts whose category begins with the letter S, you would type the letter S in the filter for the Category column and then click the red Set link to the left of the filter row. Besides displaying the results, the number of records that matched the filter expression will display in the upper left of the screen. You can apply single or multiple filters at one time if needed.
To remove the filters, click the red Clear link and click Set again. The full list will display.
TIP: The system remembers the filters and sorts that you apply and will display it the next time you navigate to that list.
DetailView
Clicking on the Contact ID or on the magnifying glass on the Contact list view will open the detail view of a contact.
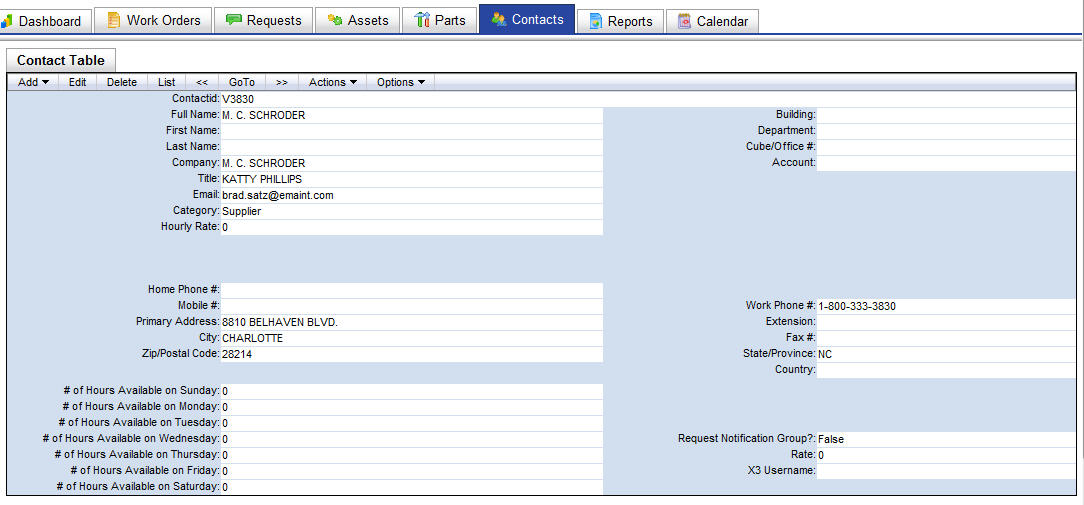
NOTE: With eMaint X3, you have the ability to add or remove fields to the screen as well as change field names and attributes, screen layout, colors, etc. Your screen may look slightly different than the example above.
The detail view contains all of the information of a contact. From this screen, you have total control of your maintenance contacts.
Options at the top left corner of the screen include:
Add – Opens a blank record for entering a new contact.
Copy/Add – Opens a new record in Add mode and populates the form with the previous record's values.
MultipleForms – If you have more than one form for your contacts, you will be prompted to choose one.
Edit – Opens the record in Edit mode for changing the contact's information.
Delete – Marks the record for deletion and removes it from the list view.
List – Returns to the list view.
<< – Displays the detail of the previous record (ordered by ID).
>> – Displays the detail of the next record (ordered by ID).
GoTo – Opens a window that allows you to navigate directly to a record by entering the Contact ID.
Actions – Provides you with a choice of actions you can perform.
History – Displays a listing of the work order history performed for this contact on the bottom portion of the screen.
Options – Options can include 'Learn More,' 'Change Form,' Customize Form,' and 'Manage Related Tables.' These options are covered in detail on the Administration manual.
AddingContacts:
You can add new contacts from either the list or detail view. From the list view, the AddNewRecord link is directly above the field headers, on the right and will open a new window in add mode. From the detail view, the Add choice is the first in the main menu bar and will change the current window to add mode. The Copy/Add option also changes the current window to add mode, except it will populate the form with the previous record?s values for fast record entry.
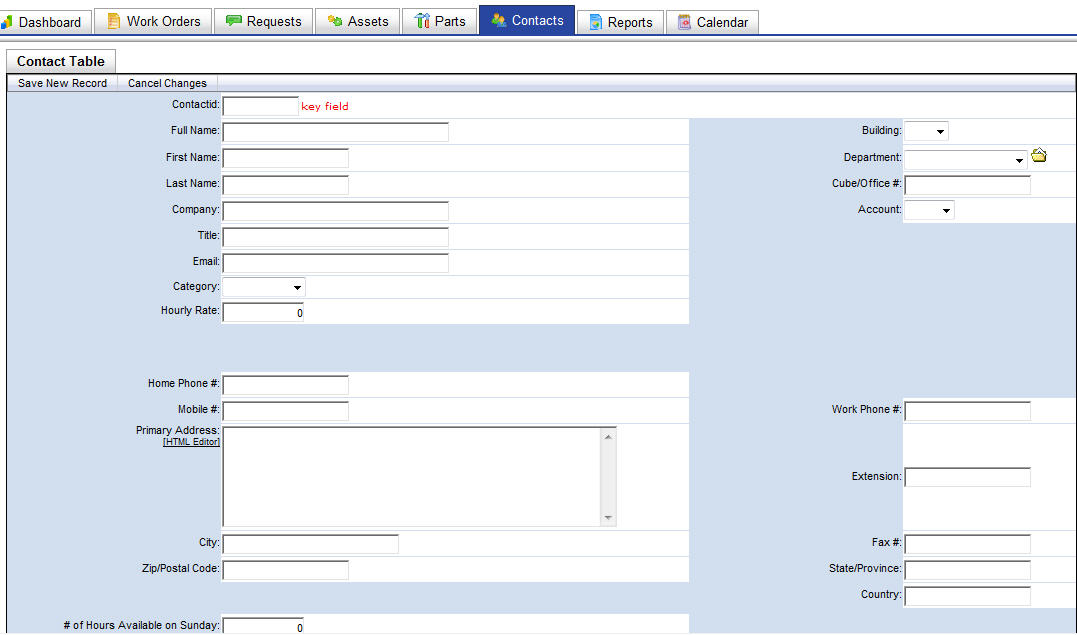
The main fields to populate are the Contact ID, Full Name, First Name, Last Name, company information and category. If you will be sending work orders via email, enter the email address in the Email field. If you'll be using the rate information when recording charges on a work order, enter the hourly rate in the field provided. If this contact should receive email notification when new work requests are entered, set RequestNotificationGroup to True.
EditingContacts:
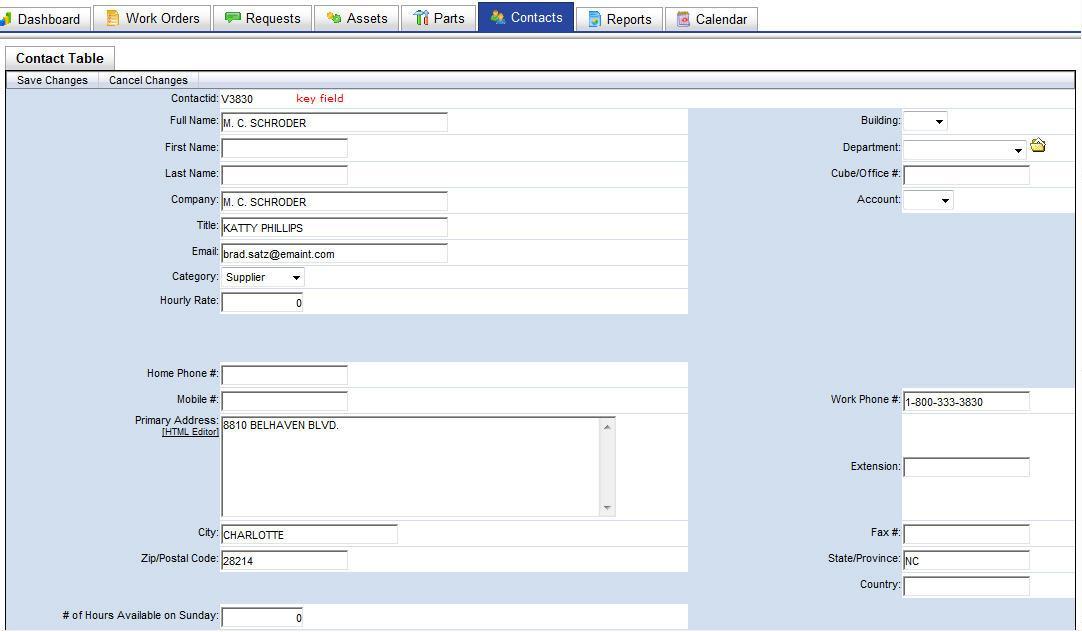
The form for editing contact information can also be accessed from either the list or detail views. From the list, click the pencil icon. From the detail view, click the Edit link in the menu bar. Both links will open the edit form in the existing window.
TheEdit form is similar to the Addform, except that the key field cannot be edited. The key field is the unique identifier for the contact and cannot be changed.
Click SaveChanges to save the changes or CancelChanges to discard them. The form will return to the detail view of the contact.
EditingInPlace
If EditInPlaceis enabled, you can make changes to most fields without the need for entering edit mode. Enter the record's detail screen by clicking on the Magnifying Glass icon or the Contact ID link on the list view. Place your mouse  cursor over the field you wish to edit. If the field is able to be edited, the cursor will change to a
  . Double-click your left mouse button and the field will open in edit mode. Make your changes then click the save
  icon to save your changes or click the cancel icon
  to return without saving.
If a field cannot be edited with Edit In Place, the cursor will change to a no symbol  . If editable, these fields require you to enter Edit mode to make any adjustments.
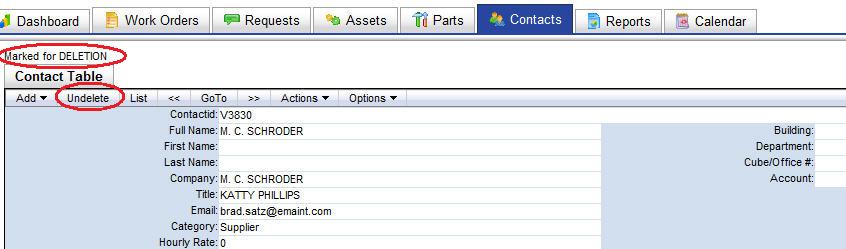
DeletingContacts
Deleting records is a two step process. The first step is to mark the record for deletion by clicking theDelete link. This removes the record from the list view but still allows you to locate it by using the GoTolink (if you know the record ID) or using theNext and Previous links to page through the records. At this point, you can still un-delete the record by clicking the Undeletelink.
The second step of the deletion process is to completely remove records from the system. Go to the Remove Deleted Records link located in the Administration menu. This list displays the various tables that can hold records marked for deletion. Click the magnifying glass icon to preview items that will be deleted. Click the trash can icon to remove all the records for that section.
NOTE: The Remove Deleted Records option permanently removes records. There is no way to bring them back. Use this feature at your own risk.
ViewingContactHistory
Clicking the Historylink will display the work order history in a list below the contact detail. This is for work orders where you are the PerformForcontact on the record.
