Within this document, you will find information on all of the features within MX Mobile. There is data about Work Orders, Parts, Work Requests, Assets, Meter Readings, and the Sign On/Off Feature.
Work Orders
My Work Orders
To view open work orders, in the Main Menu, click Work Orders (Fig. 1A). This will take you to the Work Orders Menu page (Fig. 1B). Next, click My Work Orders to view the My Open Work Orders list view.
 Fig. 1A
 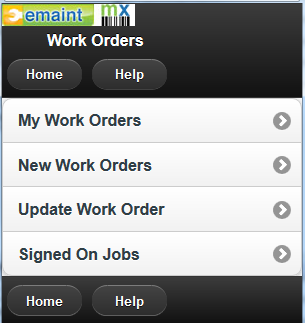 Fig. 1B
The My Work Orders page contains a list view of all open work orders (Fig. 1C). The columns include WO No, Asset ID, and Brief Description. The WO No is a link that you can click to view the details of that particular work order. The two buttons are Refresh List, which refreshes your page with updated work orders, and Menu, which returns you back to the Work Orders menu page.
Not all open work orders will be available in the list view. In order for open work orders to be viewed in the mobile browser, there are a few steps that you must do. First, create a new contact and in the ContactID field, name the ContactID to be the same as your Login Account Name and you can fill the rest in. Second, when creating a work order, in the assign to field, select that ContactID. Third, the work order must be open. Lastly, log into the MX mobile site and click Work Orders, My Work Orders and the list view should be available.
Clicking on a work order in the list view will open up a WO details page with the WO/Asset information and four buttons (Fig. 1D). The operation of the buttons (Find, Close, Charges and Menu) of the WO details view will be discussed in greater detail in the Update Work Orders section.
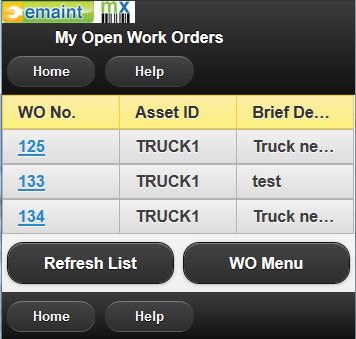 Fig 1C
 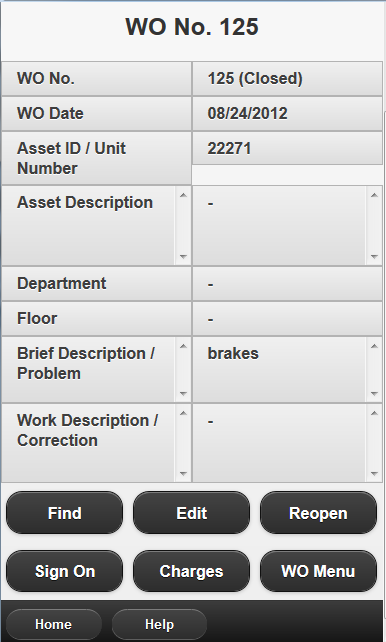 Fig 1D
New Work Order
To create a new work order, in the Main Menu, click Word Orders (Fig. 1A). This will take you to the Work Orders Menu page. Next, click New Work Order (Fig. 1B) to get to the Search/Find Asset page (Fig. 1E). In order to create a new work order, you need to find an asset and then can go from there.
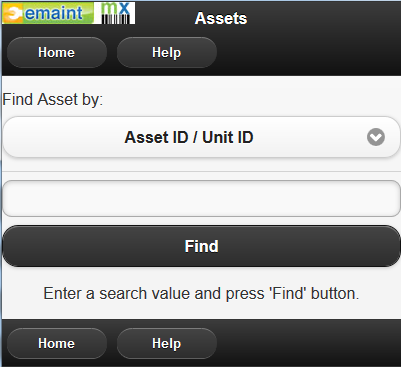 Fig. 1E
 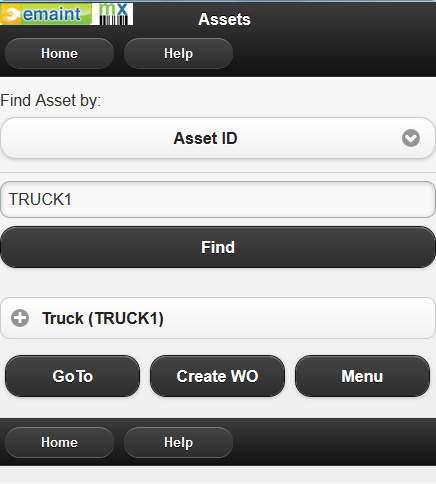 Fig. 1F
After you have entered your search criteria and clicked Find, a list of the results will appear. From here, three buttons (Go To, Create WO, and Menu) will appear (Fig. 1F). When creating a WO, you can either select an asset then click Create WO or you can not select an asset and click Create WO. By selecting an asset then clicking Create WO, you will have that asset's information filled in on the Work Order form's page (Fig. 1G). If you just click Create WO without a selection, you will only have WO Date filled in with today's date.
The only fields that users can input are the Brief Description and Work Description fields. There are three buttons in the create WO page (Fig. 1G). The Restart button will take you back to the Search/Find Asset page. The WO Menu button will take you back to the Main Menu. The Save button will save your information and a new work order will be created. After it is saved, you will be taken to the created WO confirmation page (Fig. 1H).
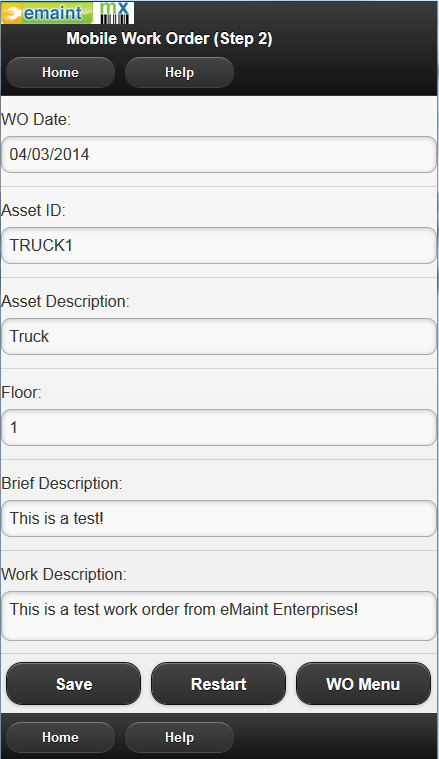 Fig. 1G
 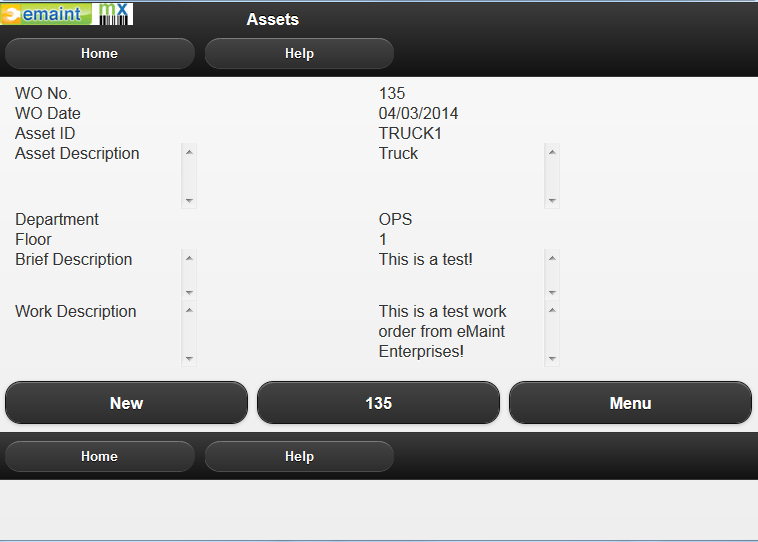 Fig. 1H
From here, you have three options (Fig. 1H). The New button will take you back to the Search/Find Asset page. The WO # button will bring up the WO details page (Fig. 1I). The operation of the buttons (Find, Close, Charges and Menu) of the WO details view will be discussed in greater detail in the Update Work Orders section. The Menu button will take you back to the Main Menu.
 Fig. 1I
Update Work Orders
To update or edit a work order, in the Main Menu, click Word Orders (Fig. 1A). This will take you to the Work Orders Menu page (Fig. 1B). Next, click Update Work Orders to get to the Input Work Order # page (Fig. 1J).
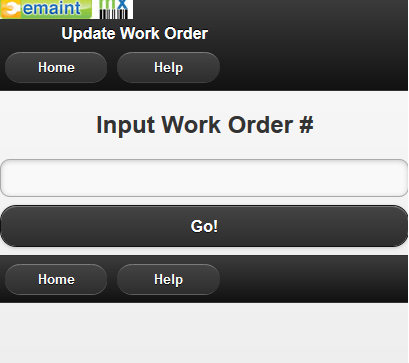 Fig. 1J
 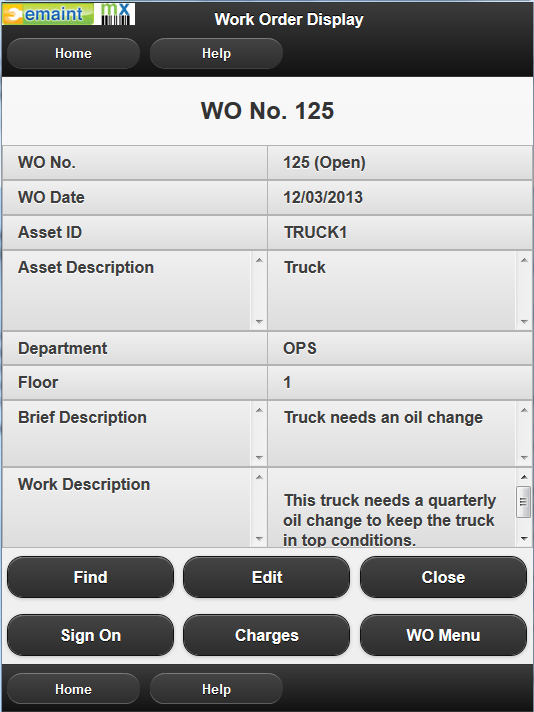 Fig. 1K
When you have entered your Work Order number, click Go! If the WO exists, you will be forwarded to the WO details page. The information on this page will display the WO and Asset data. The four buttons on this page includes: Find, Close/Reopen, Charges and Menu (Fig. 1K). The Find button will take you back to the Input Work Order # page. The Menu button takes you back to the Work Orders menu page. The Close/Reopen button will appear as Close if the WO is open and Reopen if the WO is closed/history.
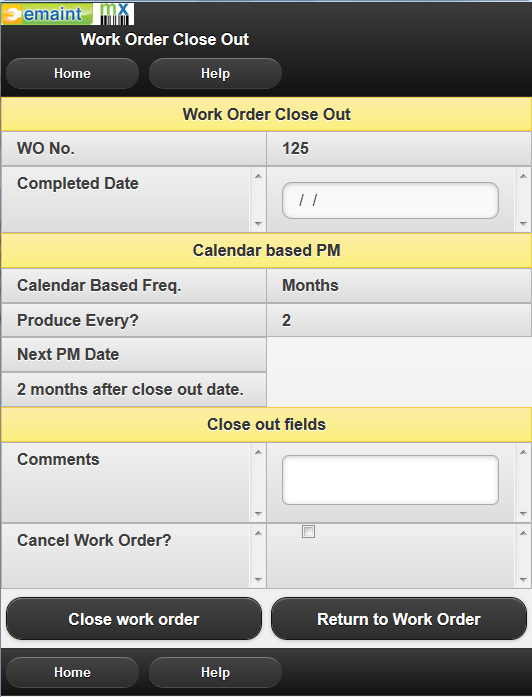 Fig. 1L
 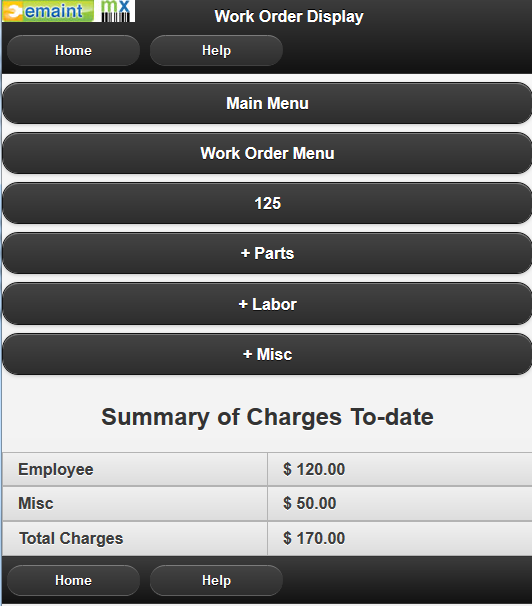 Fig. 1M
When closing an open WO, you click the Close button and it will take you to a Work Order Close Out page (Fig. 1L). This page contains the WO number, Completed Date, Close Work Order link and Return to Work Order link. You can pick a date or type in a date for the Completed Date field. Clicking the Close Work Order link will process and close out the WO and then redirect you to the Work Orders Menu page.
When you click the Charges button, it will take you to a page with four buttons: WO #, +Parts, +Labor and +Misc (Fig. 1M). If there are charges to the work order, then they will be displayed. Otherwise, 'No charges on file' will be displayed. The WO # takes you back to the WO details page.
 Fig. 1N
 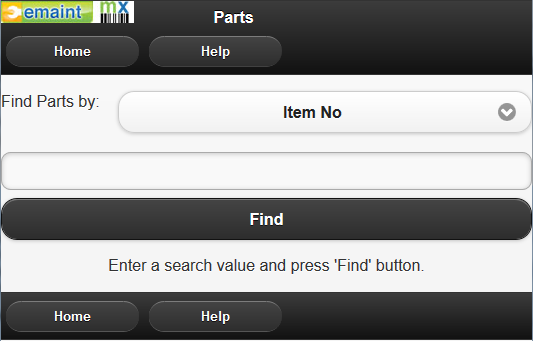 Fig. 1O
The +Parts button directs you to a Parts Charges WO form (Fig. 1N). There is a textbox with a Find link that takes you to the Find Parts by ID/Description page (Fig. 1O). From there, you search and click the Find button and a results list will appear along with three buttons: Charge to WO #, Go To and Menu (1P). The Menu button takes you to the Parts Menu. The Go To button takes you to the Parts details page where you can Issue the Parts to any work order. The Charge to WO # button will take your selected part and charge it to your current WO. Now you're back to the Parts Charges to WO form but with the Item No filled in (Fig. 1Q).
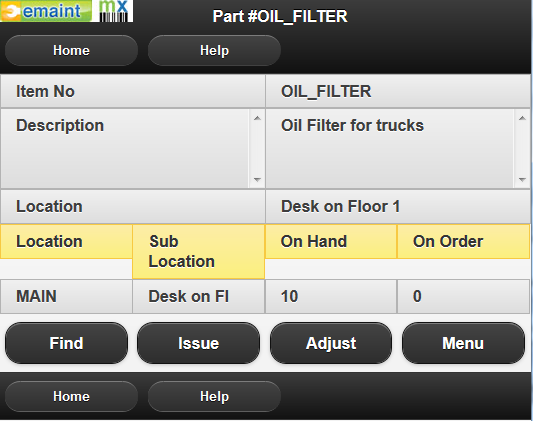 Fig. 1P
 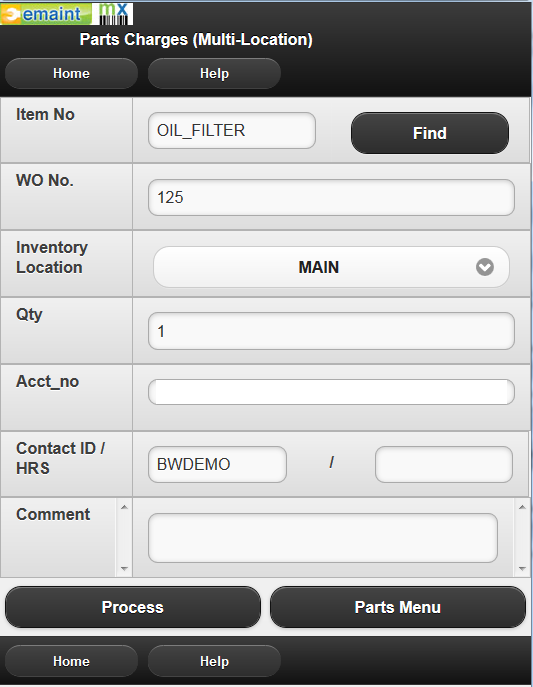 Fig. 1Q
Finish entering in all of your information and click Process to enter the confirmation page (Fig. 1R). Click the Post button to finalize your Parts Charge procedure. Once it's completed and the transaction is saved, you are taken to another page to continue to add Parts, Labor, or Miscellaneous charges (Fig. 1S).
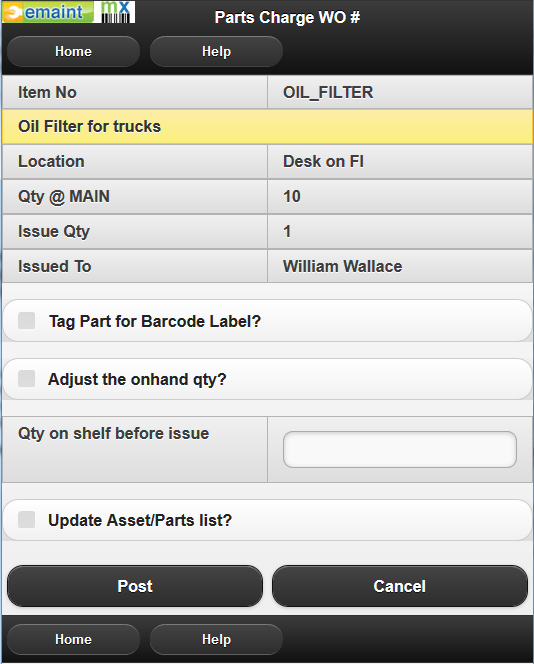 Fig. 1R
  Fig. 1S
Work Requests
Requests : Creating a work request
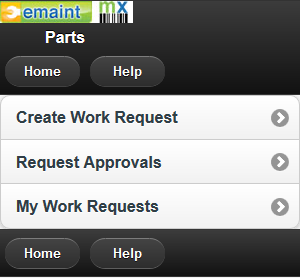
To create a new work request, in the Main Menu, click Work Requests . This will take you to the Work Requests Menu page. Next, click Create Work Request to get to the Search/Find Asset page.

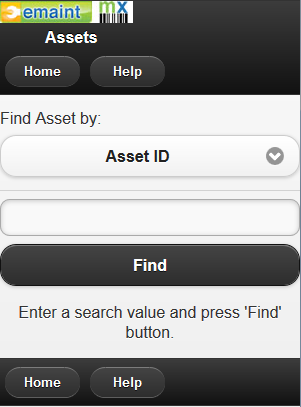
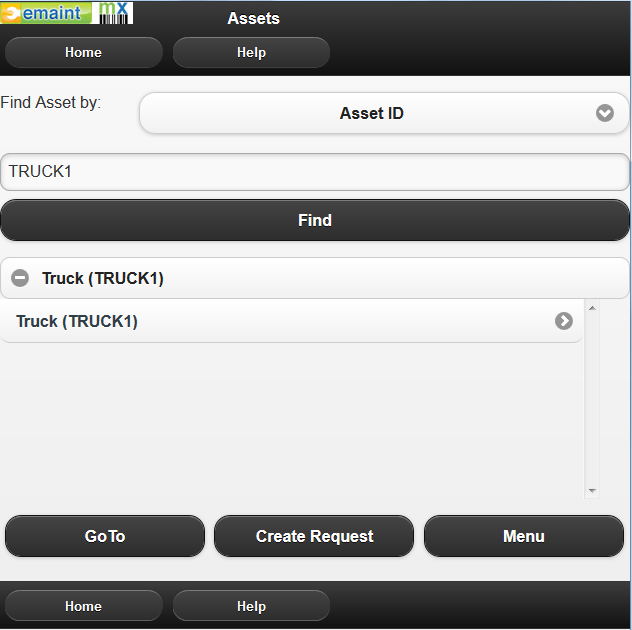
In order to create a new work request, you’ll need to use the Search/Find Asset page (Fig. 4C) to look up the asset for which this work request is being made. You can search by Asset ID, Asset Description, or another field. Just click on the field you want to use and then type in the search bar. Click the Find button when you’re ready. The results will be returned in the box below (Fig. 4D). Simply click on the asset you want to use and click the Create Request button.
You will then be taken to the Add Work Request screen.
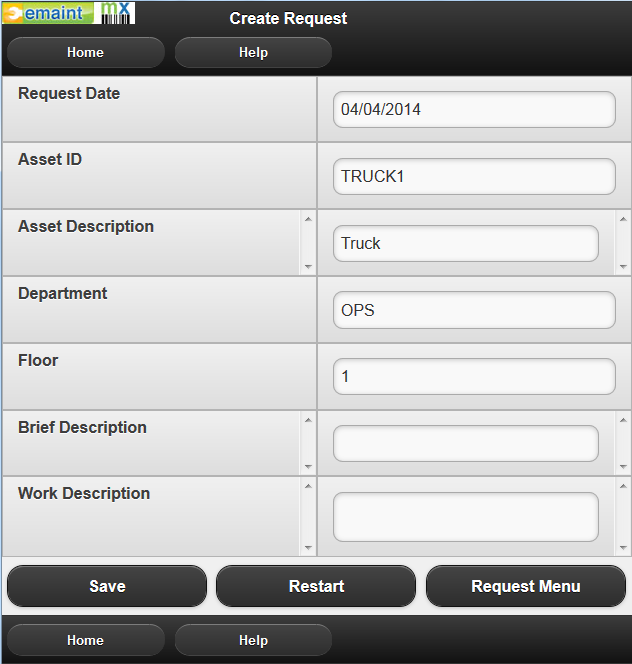
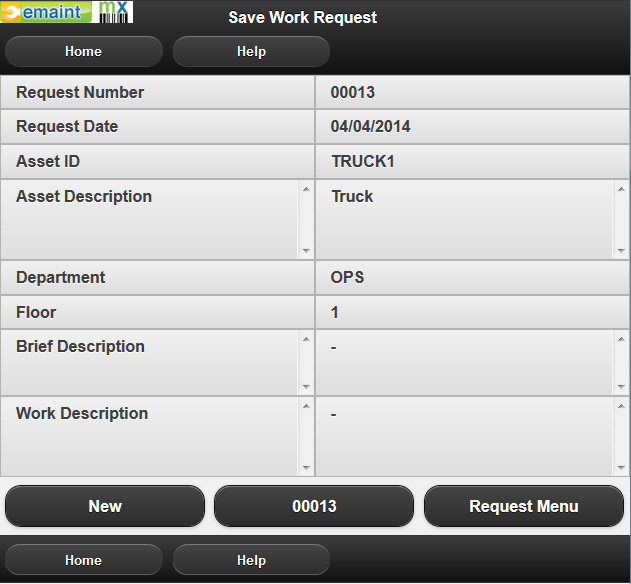
The asset information will be filled in automatically, as will the request date. Just enter the Brief Description and Work Description and then click the Save button. The request will be created and you will see the confirmation screen (Fig. 4F). The New button will let you add another request, the Menu button will return you to the Work Requests menu (Fig. 4B), and the button that displays the Request Number will show you the request you just made, along with some more options (Fig. 4G). you can approve it, reject it, or return to the list. We will discuss these options later on.
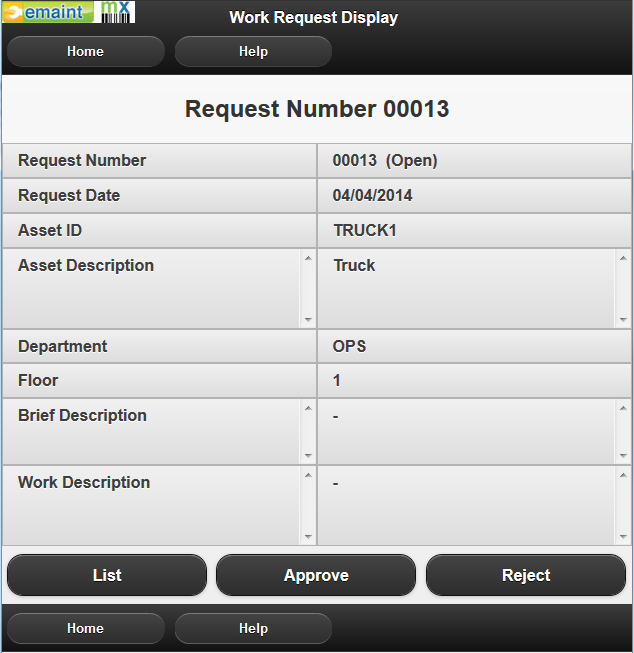 Fig. 4G
Work Requests : Looking up Requests
There are two ways to look up work requests. From the Work Requests menu (Fig. 4A), you can select either My Work Requests or Request Approvals.
My Work Requests
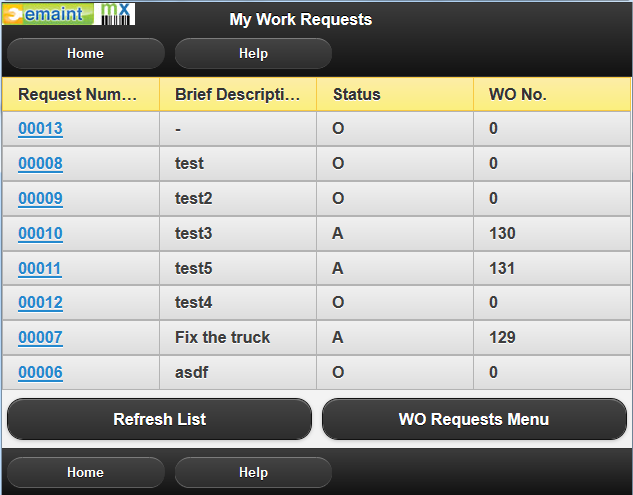 Fig. 4H
Here, you will see a list of all of the requests that you have submitted, as the user who is currently logged in. You’ll see the request number, the brief description, the status (O = Open, A = Approved, X = Rejected), and the Work Order Number (for approved requests). You can click Refresh List to refresh, Menu to return to the Work Requests menu, or click on a request number in the list to open that work request in the detail view.
Request Approvals
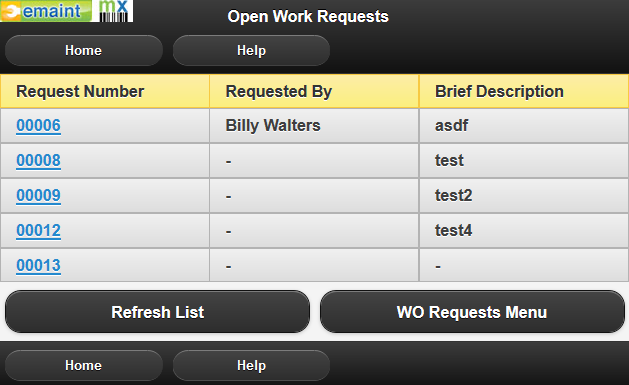 Fig. 4I
Clicking on Request Approvals will take you to a different list. This list contain all open requests, regardless of which user submitted them. This is a great way to see all the requests that require attention. Just click on one of the request numbers to see the detail view.
Approving a Request
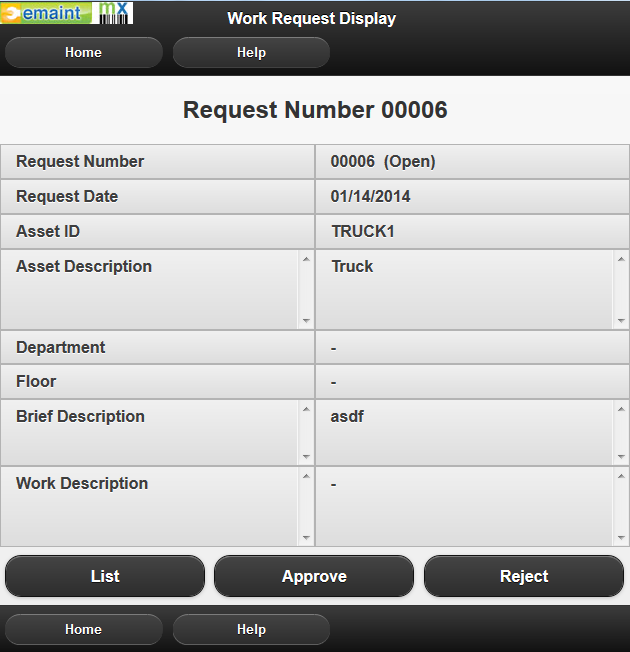 Fig. 4J
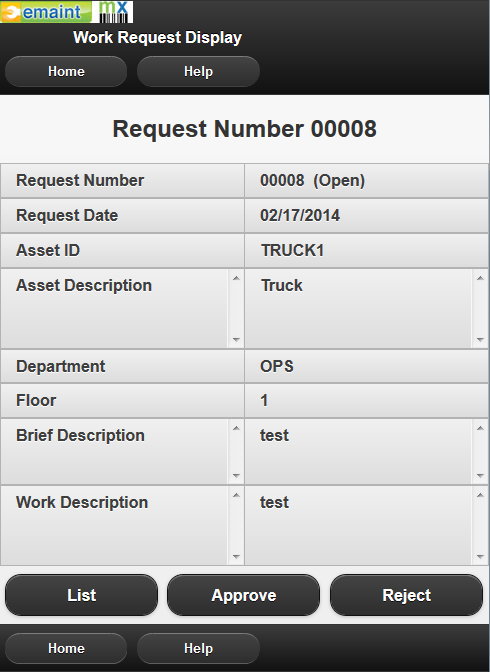
When viewing a request in the detail view, you’ll have button to Approve, Reject, or return to the list. Clicking the Approve button will take you to a screen where you can edit the brief description and work description (Fig. 4K).
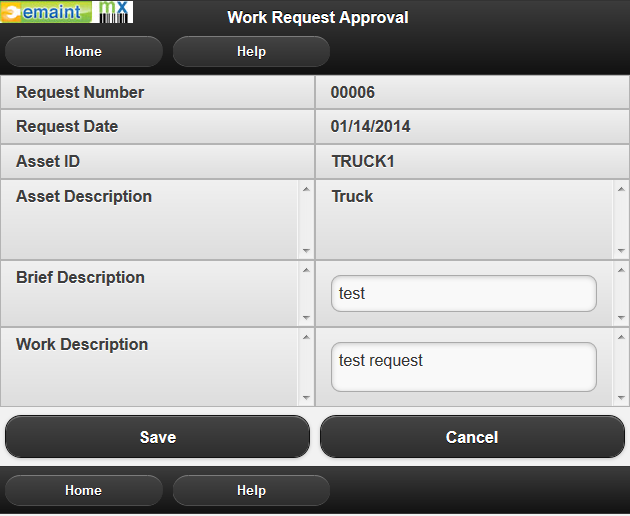 Fig. 4K
 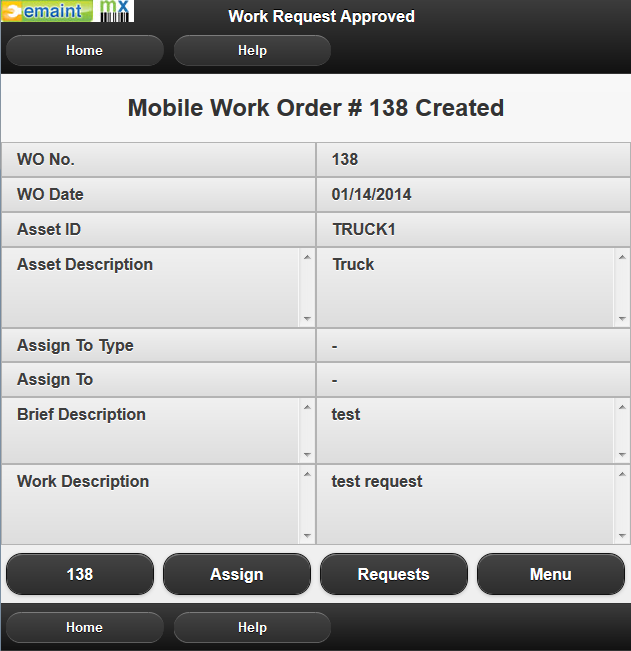 Fig. 4L
When you’re finished, click the Save button. It will approve the request, create the work order, and take you to the confirmation screen (Fig. 4L). There, you can choose to view the work order, assign it to somebody, return to the request list, or return to the menu.
Assigning a New Work Order
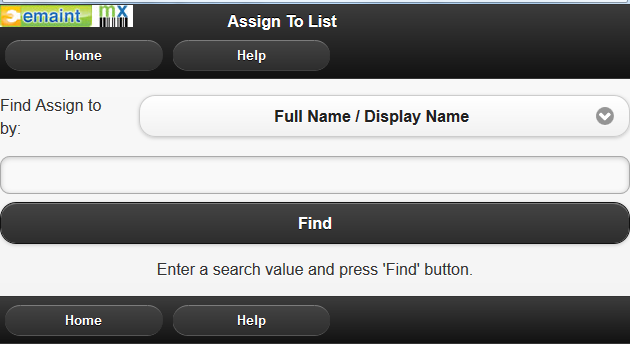
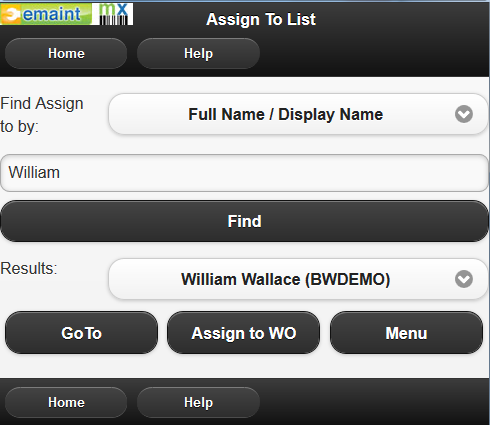
Click the Assign button to proceed to a page that will let you look up the contact to which you want to assign the work (Fig. 4M). Just like looking up an asset, select the field you want to use, type in the text you want to find, and click the Find button. You can also use the dropdown box to filter them by the category field. The results will appear in the box below (Fig. 4N). Click on the contact and then click the Assign to WO button. The work order will be assigned to that person and you will be taken back to the work order.
Work Requests : Rejecting a Request
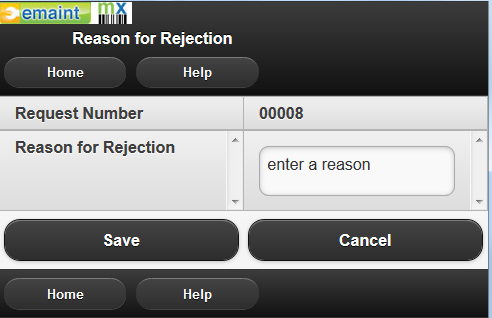
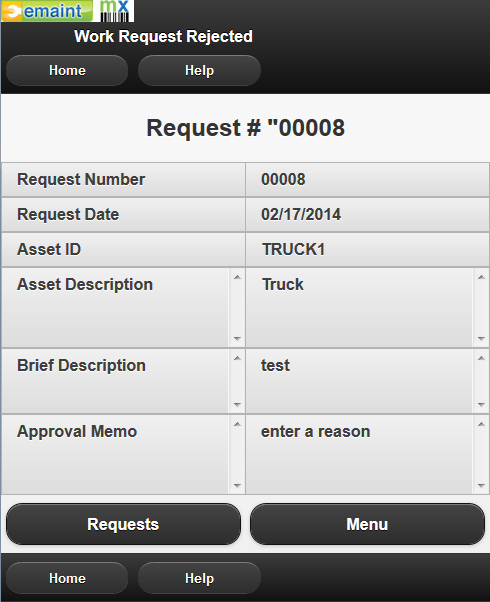
When viewing a request, just click the Reject button to reject it. You will be prompted for a rejection reason (Fig. 4O). just enter some text to describe the reason for rejecting it and click Save. It will show you a confirmation screen and send an email to the person who submitted it, as long as they entered a valid email address in the Email field.
Assets
Find Assets:
To search for assets by category, click the Assets button in the Main Menu (Fig. 2A). This will take you to the Assets search page (Fig. 2B).
Fig. 2A 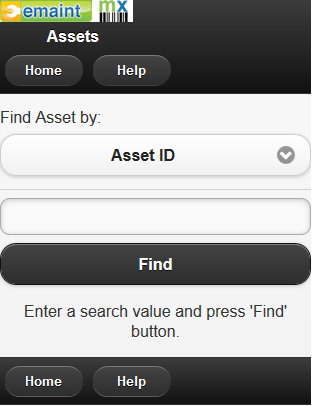 Fig. 2B
The Assets search page contains an input field with a Find and Exit button along with a list of search categories you can choose from. You can Search by: ID, Description, Serial #, Building, Floor, Department, and Room. When you click on any of the category buttons, the title (Find Asset by) above the input text box, changes to the specific category after it is clicked (Fig. 2B).
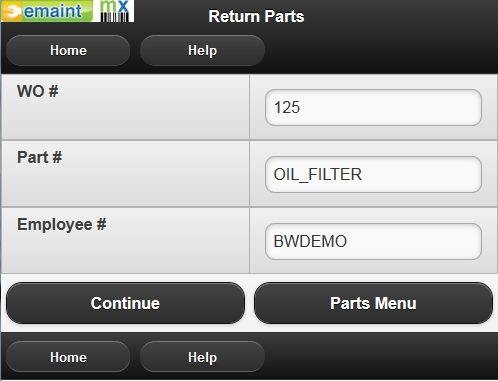 Fig. 2C
 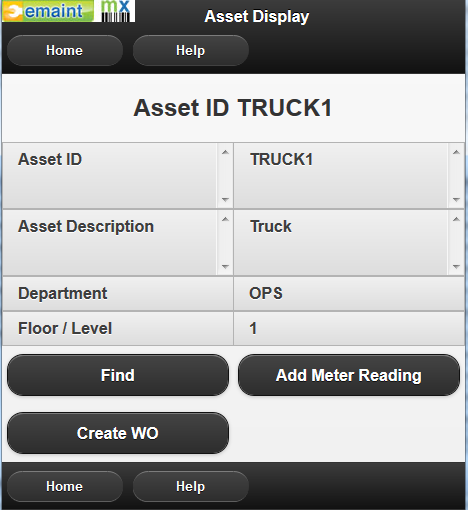 Fig. 2D
The search functionality is the same for all of the categories. Once you're ready to find an asset by a certain category, type it in the search field (Fig. 2C). You can search by exact criteria or all that begin with the entered text. If you're searching for all Asset IDs that have the same characters in the beginning of the Asset ID, it will display all Assets that start with what you have entered. This goes for all of the categories. For example, searching for all assets that begin with '100' will display 1001, 1002, 1003, 1004, etc in the results list. Asset IDs such as 2100 and 1100 will not show up as a result because it's only searching for the exact Asset ID or all Asset IDs that start with '100'. Just because it contains '100' somewhere in the Asset ID does not mean it will show up as result.
If the search was successful, a list will display your results. The list is displayed in this format: Asset Description(Asset ID). Three new buttons are also displayed as a result: Go To, Create WO and Menu (Fig. 2C). Select the asset from the list and click Go To. The Go To button will direct you to a details Asset view with Asset ID, Asset Description, Department, Floor/Level and three buttons: Find, Create WO and Menu (Fig. 2D). The Find button will take you back to the Asset Search page. Menu will take you back to the Main Menu. Create WO will take you to a Mobile Work Order (Step 2) forms page that displays basic fields, a couple of user input fields and three buttons: Save, Restart and WO Menu. The fields for user input are Brief Description and Work Description (Fig. 2E).
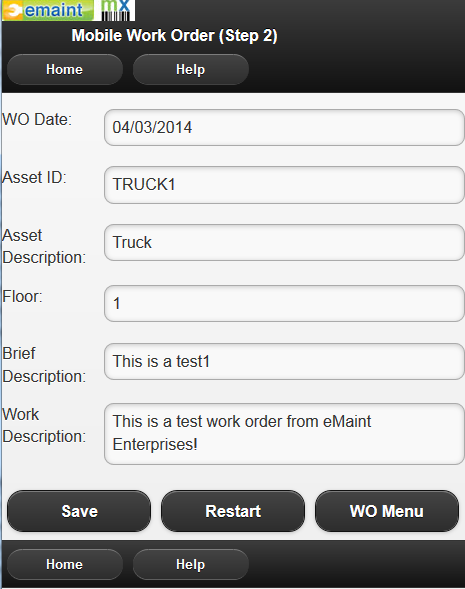 Fig. 2E
 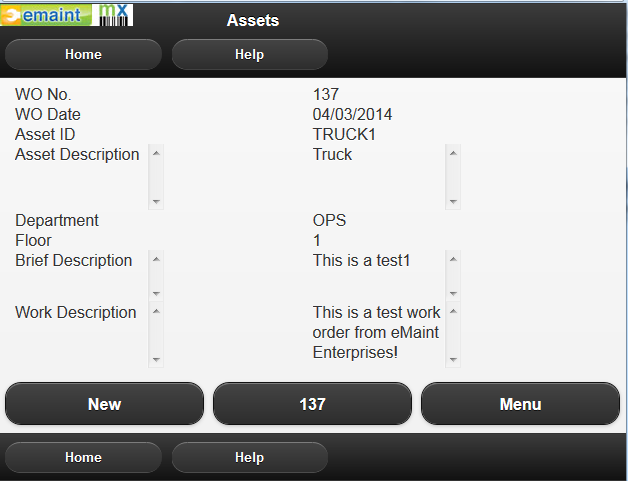 Fig. 2F
The WO Menu button takes you back to the Main Menu (Fig. 2A). The Restart button will take you back to the Asset Search page (Fig. 2B). The Save button will create a Work Order and it will show the summary of the WO you just created. The fields are WO No, WO Date, Asset ID, Asset Description, Department, Floor, Brief Description and Work Description. There are also three buttons associated with this WO: New, WO #, and Menu (Fig. 2F). The New button takes you back to the Asset Search Page. The WO # button will display the details of the WO and also have options(buttons) to Find WO, Close WO, add Charges to WO and Menu to direct you to the WO Menu page (Fig. 2G). The Close button takes you to a Work Order Close Out form. The Charges button will direct you to a new page to add Parts (+Parts), add Labor (+Labor), add Misc (+Misc) and a button to go back to the current Work Order.
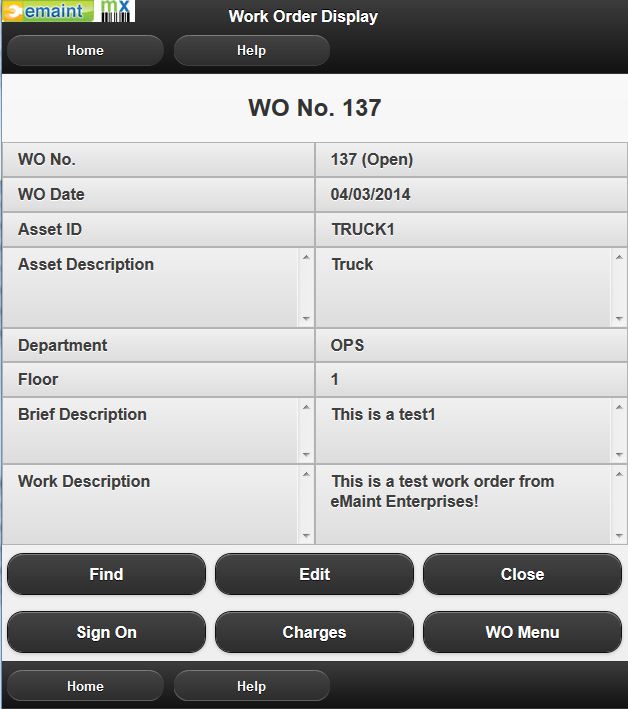 Fig. 2G
Parts

To search and view parts, click the Parts button. This will take you to the Parts Menu navigation page. Next, click View Parts to take you to a search form so you can enter an ID or Description to find your parts.
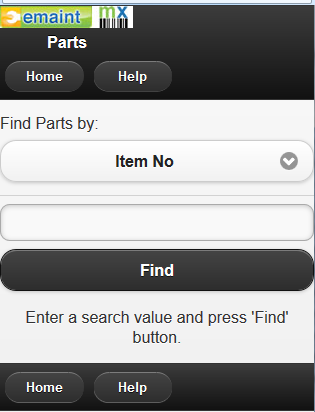

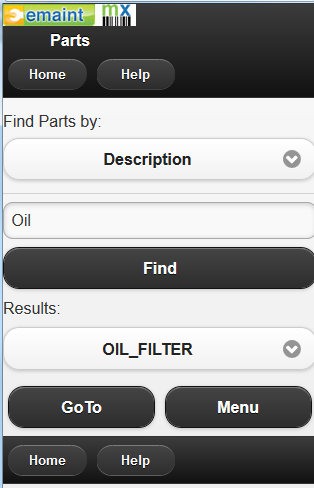
There are two ways to search for parts. Clicking the ID button will search from the ID field and clicking Description will search from the Description field . Searching by ID or Description can get the exact Part or a list of parts depending on how specific your search criteria is. If you're looking for a specific Part and know the full ID or Description, you can type the full ID or Description in the search field and if it's in the system, the Part will display in the list box . If you are looking for a list of all parts that begin with "Part" in its description, you type in "Part" and anything that begins with "Part" will be displayed in the list box. Part_01, Part_02, Part_03, etc. will be shown.
Once you identify what option you want to search by, enter it into the text box and click Find. For users with barcode scanners, select search by ID, scan the part barcode and click Find. If a part exists, the item(s) will appear in a list box otherwise a 'Your search found no records' will display. Select the part in the list box and click Go To for a details view of the part .
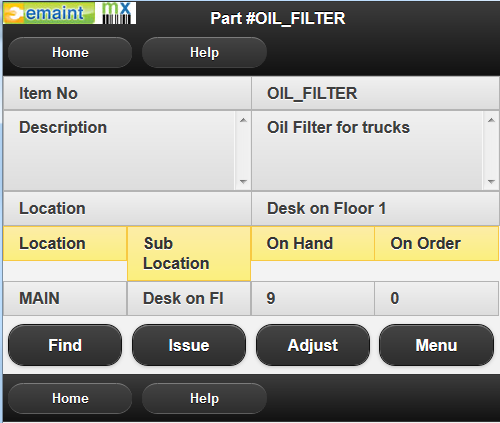
In the Details page, there are three buttons: Find, Issue and Menu. Find will take you back to search for other parts. Issue will take you to a Parts Charges form to issue the part to a work order. Issue will be discussed in further detail in the Issue Parts section. Menu will take you back to the Parts Menu.
Issue Parts
To issue parts, click the Parts button (Fig. 3A). This will take you to the Parts Menu navigation page (Fig. 3B). Next, click Issue Parts to take you to the Parts Charge form so you can enter required information to Issue your parts (Fig. 3G). Another option to Issue Parts is by clicking the Issue button from the Parts Details page (Fig. 3F).
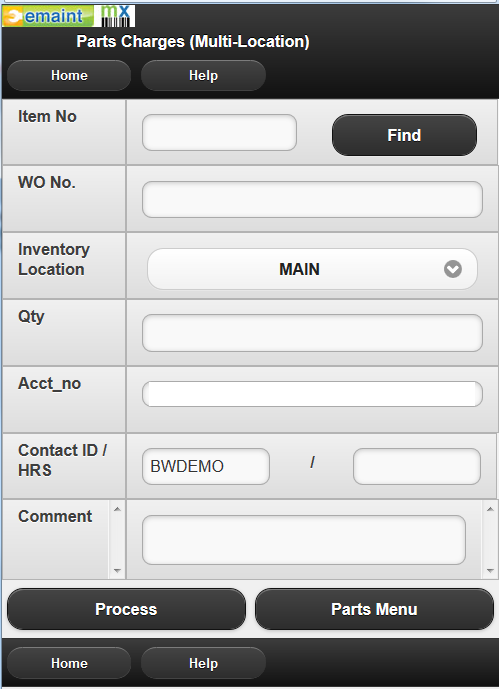
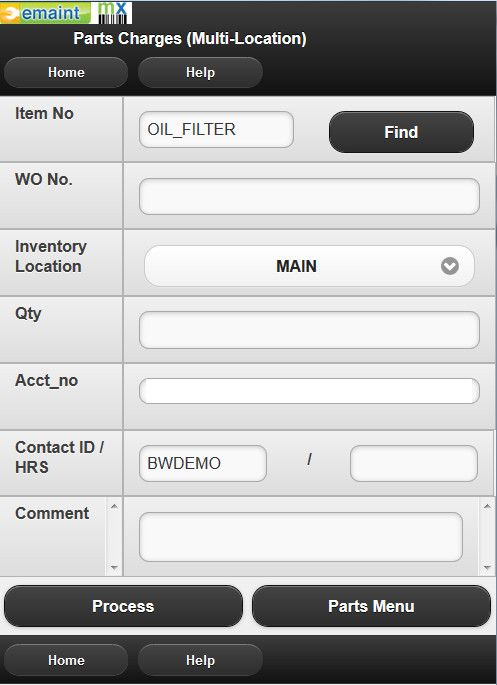
The Parts Charges form consists of Work Order Number, Item Number, Quantity, Account Number, Contact ID/Hours, and Comment (Fig. 3G). It also has two buttons, Process and Return to Menu. The Contact ID is automatically filled in for you and uses your log in name. If the Parts Charges was opened from the Parts Details page (Fig. 3F), the Item No will also be filled in along with the Contact ID (Fig. 3H). After all the data is filled in or scanned via barcode scanner, click the Process button to proceed.
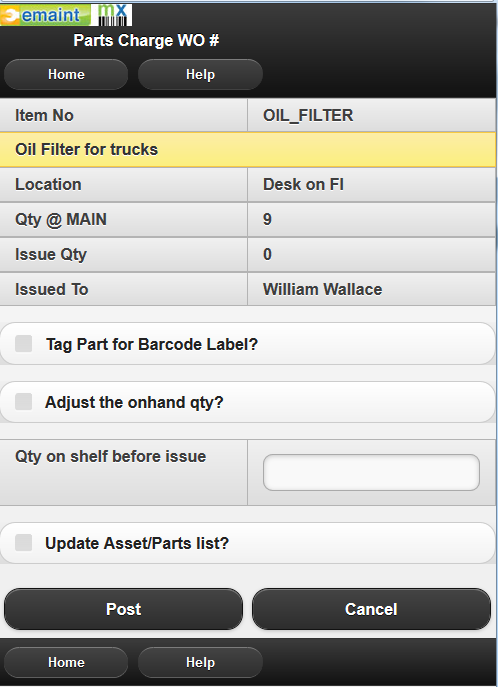 Fig. 3I
  Fig. 3J
If the Part and WO exists, a verification form will be present with the Part's information filled in along with a few check boxes and buttons (Fig. 3I). The check boxes include: 'Tag Part for Barcode Label', 'Adjust the onhand qty?' and 'Update Asset/Parts list. Once you have all things verified and ready to charge the part, click the Post button. A summary page will display the Work Order #, "Last transaction saved!", four buttons and Summary of Charges To-date (Fig. 3J). The first button will take you to details page of the Work Order where you can Find, Close, and Charge to the WO. The +Parts and +Labor buttons will take you back to the Parts Charge and Labor Charges, respectively, with the WO No. and Contact ID filled in. The +Issues button will take you to the Parts Charges form with only Contact ID filled in.
Return Parts
To return parts, click the Parts button (Fig. 3A). This will take you to the Parts Menu navigation page (Fig. 3B). Next, click Return Parts to take you to Return Parts form (Fig. 3K).
Fig. 3K 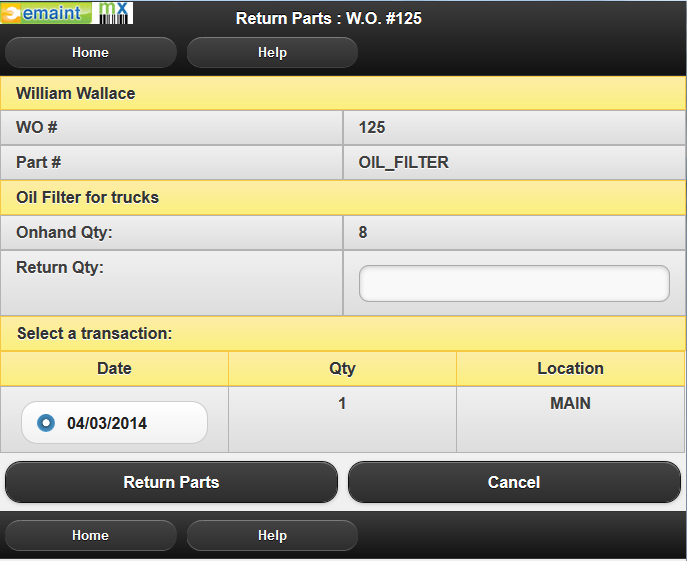 Fig. 3L
The Return Parts form has three fields: Work Order number, Part number, and Employee number (Fig. 3K). Once you've entered the appropriate fields and click Continue, a new details page will appear. This page contains the Work Order and Part information such as, WO #, Part #, Part description, on hand quantity, Return quantity input field and the quantity that is in the work order (Fig. 3L). After you enter a Return Qty, you click Return parts and the quantity will be returned accordingly and the WO charges will be updated and then you will be redirected back to the Return Parts form (Fig. 3K).
Parts Adjustments
To do parts adjustments, click the Parts button (Fig. 3A). This will take you to the Parts Menu navigation page (Fig. 3B). Next, click Parts Adjustments to take you to Parts Adjustments form (Fig. 3M).
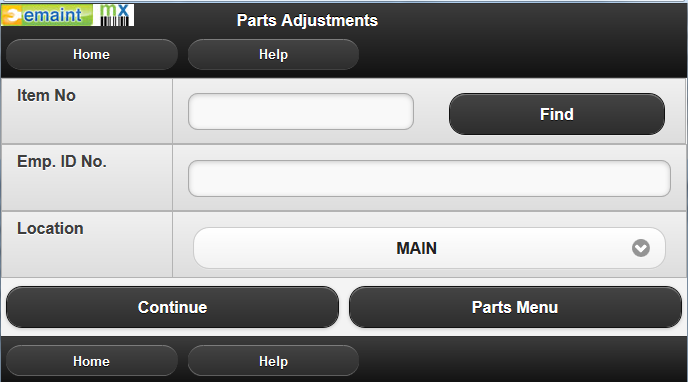 Fig. 3M
  Fig. 3N
Parts Adjustments form has two fields, Part number and Employee number, and two buttons, Continue and Parts Menu. Entering the Part # and Employee # then clicking the Continue button will take you to Adjust Inventory page. This detailed Parts page displays the information of the Part, such as Part #, Part description, on hand quantity, New quantity input field, and Adjust quantity(+/-) and Replace Onhand quantity radio buttons (Fig. 3N). The New Qty input field can be entered as (+)added or (-)subtracted value and depends on which radio button you select. The Adjust Qty(+/-) selection will add to or subtract from the Onhand Qty. If the Replace Onhand Qty is your selection, whatever value you put in the New Qty field, that will be your new Onhand Qty. When the Save button is clicked, the part will be adjusted accordingly and you will be redirected to back to the Parts Adjustments form to input the same part or a different part for adjustment (Fig. 3O).
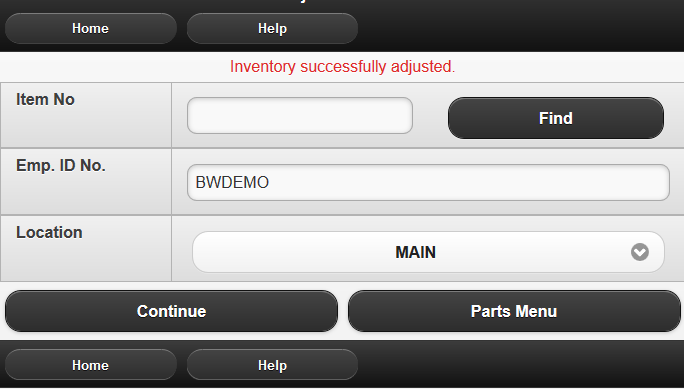 Fig. 3O
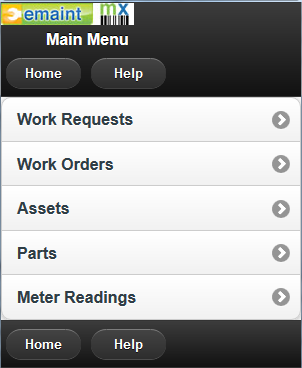
Meter Readings
To enter a meter reading in MX Mobile, click on Meter Readings from the main menu . This will open the Mobile Add Meter Reading screen.
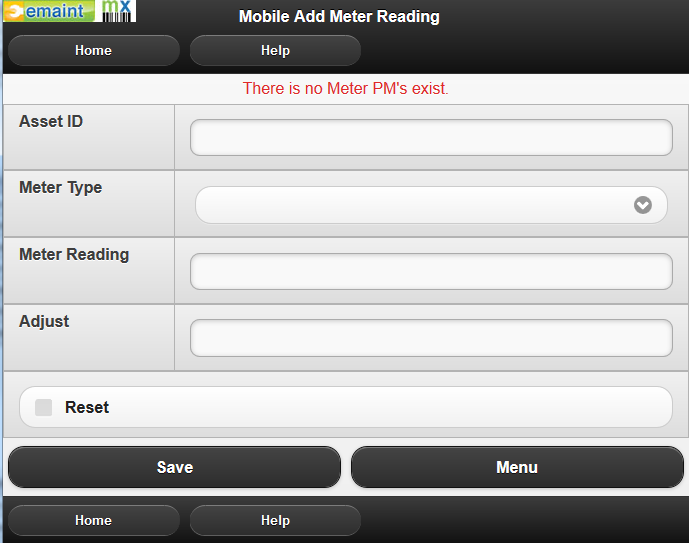
From this screen, you will be able to enter the following information:
Asset ID: Type in the Asset ID for the asset that you are updating here. If you are using a barcode scanner, you may be able to scan the barcode label for the asset instead of typing in the Asset ID.
Meter Type: Select the units of the meter here. This value corresponds to the value in the Occurs Desc. field on the PM Schedule. The choices in this drop-down will be populated with Occurs Desc. values already entered into any existing PM schedules.
Meter Reading: Enter the new reading on the asset’s meter here.
Reset: Check this box if you are resetting the meter for this asset.
Adjust: When resetting a meter, a value may be entered here to adjust the Meter To-Date value for this meter, which is used to determine when the next PM work order should be generated. For example, if an asset with a PM every 200 hours has 100 hours on its meter and it is reset to 20 meters the Meter To-Date value will be 120 without an Adjust value, so the PM will generate in 80 hours. With an Adjust value of -100, the Meter To-Date will be reduced to 20 hours and the PM will generate in 180 hours.
After filling in the necessary information, click Save to submit the meter reading or Menu to exit to the Mobile main menu.
Work Orders: Sign On/Sign Off
The Sign On/Sign Off tool can be used to easily create accurate work order charges, using the MX application. It allows you to start a timer (Sign on) when you begin working on a work order, and stop it (sign off) when the work is completed. A labor charge will automatically be created for that work order, with the elapsed time for the quantity of hours.
Setup
In order for the Sign On/Sign Off functionality to work, you must first have a contact record associated with the user. In the desktop application, look up the contact record that represents the particular user and edit it. Enter the user’s login name (all caps) in the field called “X3 username.” Now the Sign On/Sign Off tool will know which contact should be used, when it automatically creates labor charges.
NOTE: This field already exists, even if it’s not shown on the contact form. If it's not shown, it can be added through design mode.
Sign On
When viewing a work order, you’ll see a Sign On button available.
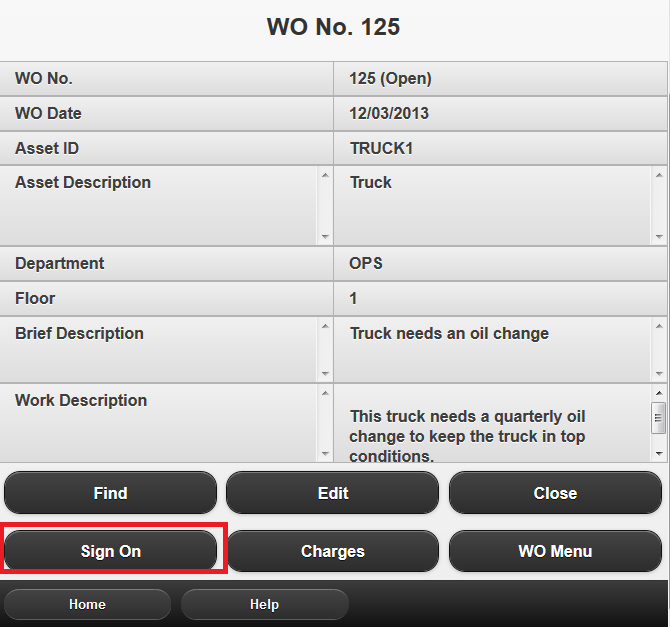
Click this to start the clock. You will continue to accumulate time, until you Sign Off.
The “My Work Orders” screen is often the easiest way to reach these work orders. It will show you all of the open work orders that are currently assigned to you. Just click on the one you want to start and click the Sign On button.
Sign Off
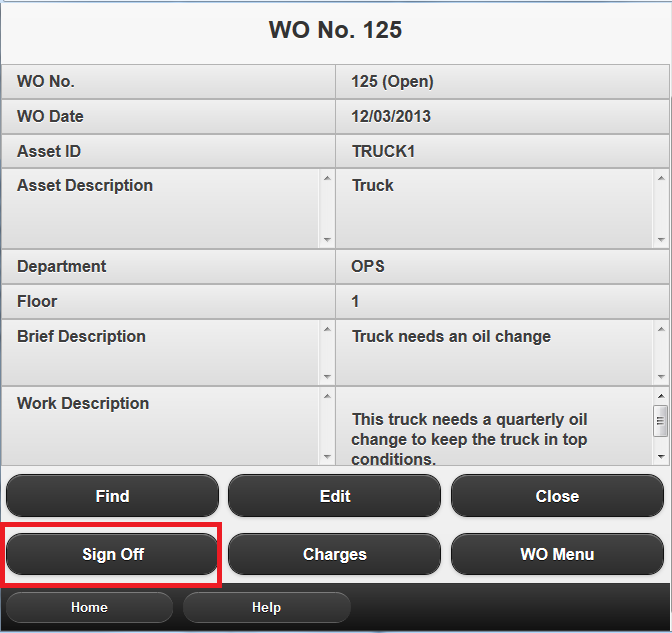
When the work is completed, you’ll need to sign off. Return to the same work order and, if you have signed on, you will see the Sign Off button.
After you click Sign Off, you will see a confirmation screen.
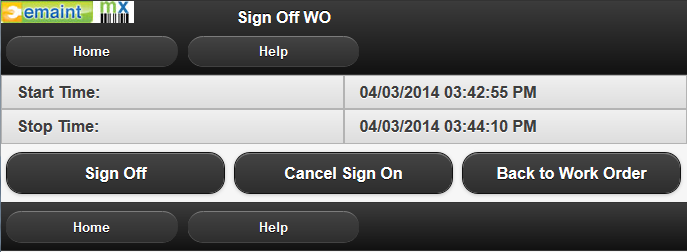
- Sign Off: Completes the action of signing off. This will cause a labor charge to be created on this work order, for the elapsed time.
- Cancel Sign On: Stops the timer without creating a labor charge
- Back to Work Order: Returns to the work order and keeps you signed on
Signed On Jobs
A helpful way to sign off is to locate the work order using the Signed On Jobs screen, which can be found on the Work Orders menu.
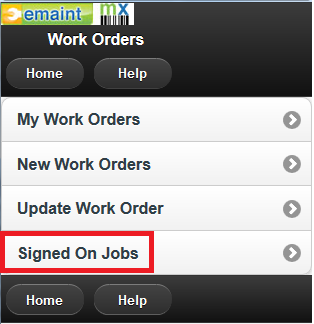
This will take you directly to the work order for which you are currently signed on, making it easier to locate and then sign off.