There are two methods available for generating PM Work Orders: Manual or Automatic.
UsingtheManuallyGenerateLink
Each PM Schedule has the ManuallyGenerate link in the “Actions” button above the detail screen (shown below). This feature allows you to generate individual PM work orders quickly and easily.
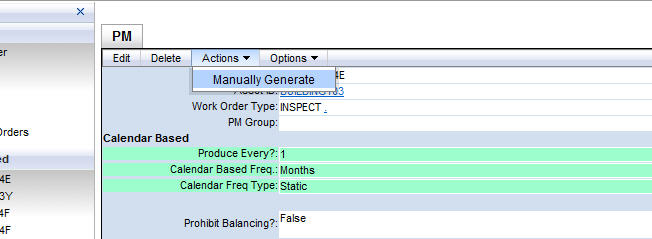
Clicking the link will immediately generate and show the PM work order. It will have the current date as the WO Date and the PM Schedule's interval will be reset based on the current date or last meter entry.
Usingthe “GeneratePMWorkOrders” Feature
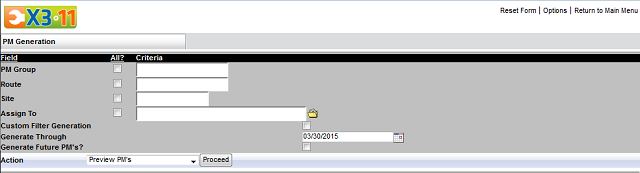
The Generate PM Work Order feature can be found in the “PM Center” and is used to either preview or generate PMs that match the criteria you have specified in the filters. The default available filters are PMGroup, Route, Site, and Assignto lists the PMs you wish to produce (described below). Single or multiple filters may be set.
PMGroup Filter – This field will allow you to display or generate PMs that have been assigned a particular PMGroup. Clicking on the drop-down list will display all PM Groups assigned in your PM Schedules.
Route Filter – This field will allow you to display or generate PMs that are a part of a Route. Clicking on the drop-down list will display all Routes assigned in your PM Schedules.
Site Filter – This field will allow you to display or generate PMs for a particular Site. The Site field is configured on the PM's associated asset screen. Clicking on the drop-down list will display available Sites.
Assignment Filter – This field will allow you to display or generate PMs for a particular Assignment. Clicking on the drop-down list will display all possible Assignments for selection.
GenerateThrough – This date field allows you to indicate the date the PMs are due to generate. All PM's due to occur on or before the date indicated will be displayed.
GenerateFuturePMs – By default, this field is blank (unchecked). Setting a date in the “Generate Through” field to a future date will not return any results past the present date. Placing a check in this box will display future PMs.
Action – The options are PreviewPM’s, GeneratePM’s and PreviewPMPartsRequirement. The PreviewPM’s command will show list the PMs that meet your criteria. Selecting GeneratePM’s will cause the PMs to be generated into work orders after the Proceed button is selected. PreviewPMPartsRequirement will list the PMs with parts listed in the PM Parts table on the PM form. See below for detailed explanations of these options.
PreviewPM's
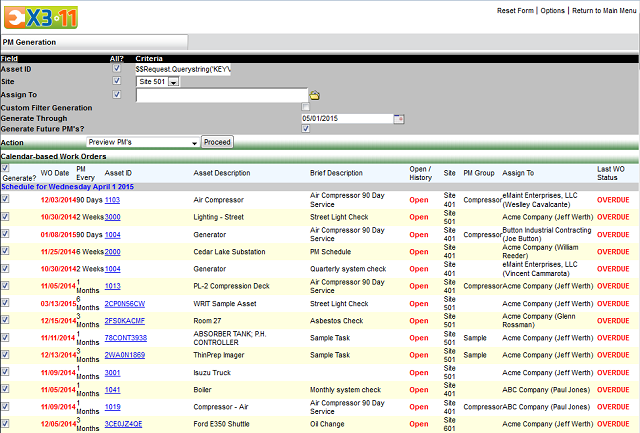
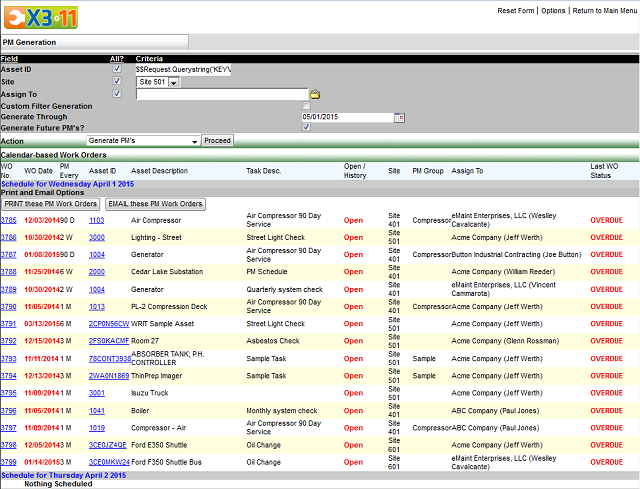
After you have configured your criteria, you must preview the list before generating the PM work orders. Select PreviewPM’s in the drop list and click the Proceed button. A list of PM Schedules that match your criteria will appear below the filter area.
Each line item provides you with basic information about the PM Schedule. Also included on each line is a checkbox so you can include or exclude the PM Schedule from the generation.
The WONo. field shows either a Preview C or a Preview M. C indicates a calendar-generated PM; M indicates a meter generated PM. When you generate the list, these values will change into the work order number assigned to the PM.
The AssetID and LastPMWorkOrderNo columns indicate the associated asset and the last PM work order number. Each contains a clickable link which opens the record's detail view. The LastWOStatus column shows the last work order's status as open or closed.
The right-most column indicates the status of the PM Schedule. If the PM was due to be generated before the current date, an OVERDUE status will appear, indicating the PM is past due. If the PM is due on the current date or a day in the future, this column will be empty.
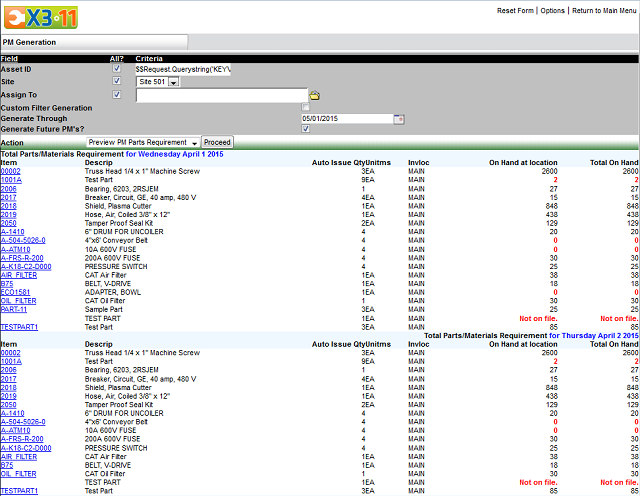
PreviewPMPartsRequirements
This option allows you to see the parts you have associated with the PM Schedules you have just previewed. Select the filter criteria for the PM's you would like to see then click to view the parts requirement. The list shows the partnumber (with hyperlink), description, PMquantityassociated with the PM Schedule and the quantityonhand. With this information, you can plot your purchasing strategy.
GeneratePM's
To generate the PM's, switch the Action field to GeneratePM’s and click Proceed. The listed PM Schedules will be generated into PM work orders. Above the listed work orders are buttons to either PRINT or EMAIL these generated PM Work Orders. Select either option by clicking either button. The email button uses the email settings configured in the My Account, PM Settings page.
When the PMs were generated, they received their work order number which appears as a clickable link. To see the detail of one of the work orders on the list, click on the individual work order number to open it in a new screen or navigate to the Work Order Center.
NOTE: UnliketheManuallyGeneratelinkonthePMSchedule (describedabove), eachworkorder’sWODateisassignedthesamedateitwasduetobegeneratedinsteadofthecurrentdate, andthenextintervalwillcalculatedbasedonthatdate. Forexample, ifaPMSchedulewasdueforgeneration 7 daysagoandisgeneratedtoday, itwillreceiveaWODate 7 dayspriortothecurrentdateandtheNextPMDatewillbecalculatedbasedonthatdate.
AutomaticallyGeneratingPM’s
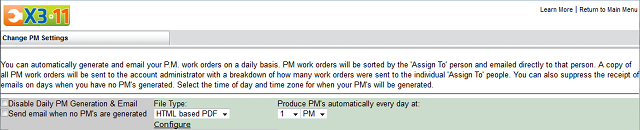
Instead of manually generating your PM Schedules, you can set the account to automatically generate PM Work Orders on a daily basis and email a copy of each PM work order to the SystemAdministrator, the AssignTo and PerformFor contacts, and other parties associated with the PM's. These configuration options are located in the MyAccount, PMSettings screen. You must be logged in as the system administrator to access this page.
Turning on automatic PM generation is as simple as navigating to the PM Settings page and removing the check from the checkbox for the DisableDailyPMGeneration & Email option.