The PM Manager is designed to aid you in defining, updating, and modifying the routes, assignments, next PM dates, etc. for groups of PM Schedules at one time.
FilteringforPMRecords
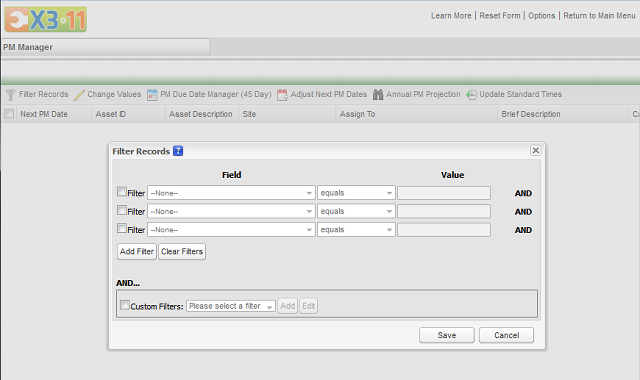
The first step in PM management is to select a subset of all of the PM schedules in the system by choosing existing values from a series of fields that relate to either the Asset record or the PM Schedule. This is the first option you will be presented with at the moment you open the PM manager. There are many elements to this panel:
Filterrows
- CheckBox - Click this box to activate this filter row.
- Field - This drop-down will allow you to select any field from the PM or Asset table by which to filter.
- Operator - This drop-down to the right of the field column will allow you to select the operator you would like to use to filter your records.
- Value - This area is a free form text field which will allow you to type the value you would like to filter by. For date, date/time, logical, and character fields with lookups there will be an additional folder icon to the right of the field. This option will open another panel that allows to select using a lookup or date picker, just as you would when entering a value into this field.
- AddFilters - This option will allow you to add additional lines of filters to this screen if you need to filter by more than 3 values.
- ClearFilters - This option will clear any and all filters that have been entered into this screen.
CustomFilters
- Custom Filters are employed in addition to any filters that you have set in the previous section. If no initial filters are set then only the Custom Filter selected will be used to reduce results returned.
- CheckBox - Click this to activate the Custom Filters option.
- SelectaFilter - Use this drop-down to select an existing filter to edit or use to reduce results returned.
- Add- This option will allow you to create a new Custom Filter.
- Edit - This option allows you to make modifications to existing Custom Filters.
Save
- Applies the selected filters and directs you to your filtered list of PM schedules. When you are directed to your list of PMs all records will automatically be selected.
Cancel
- Returns you to the previous list of filtered results that were displayed.
BlueQuestionMarkIcon
- This icon will bring you directly to the PM Manager manual that you are viewing now, should you have questions about this feature in the future.
SortingtheRecords
The records that appear in the list can be sorted by any field. Simply click the header of a column to sort by that column. The arrow in the center indicates whether it is in ascending or descending order. Click the header again to switch between the two. There is also an arrow on the right side of the header that will open a window which allows you to choose ascending or descending order.
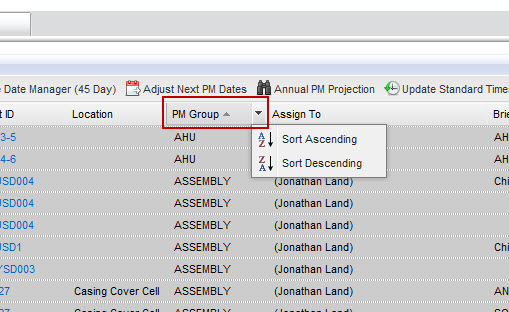
Placing the cursor between columns will allow you to adjust their width.
ModifyingPMManagerOutputFields
Before you begin adjusting your PM schedules, you should make sure that your PM Manager displays the fields you prefer to use for managing your PMs.
You can choose the fields you would like to view in your PM Manager. In the upper right hand side of the PM Manager screen there is a Options link. This area is for adding a field to the display. To add a field:
- Click the Options link in the upper right hand side of the user interface. A new output selection panel will open with a list of all available fields in the left-hand box grouped by their primary tables, either PM or COMPINFO (Asset).
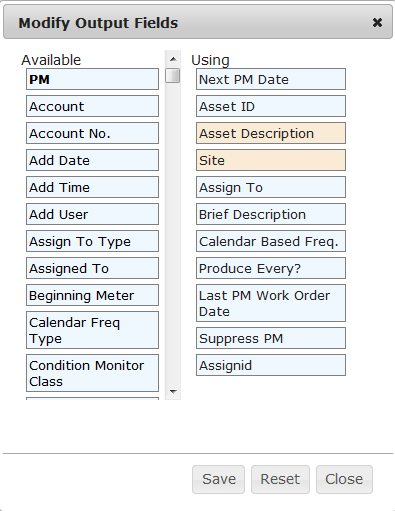
- Left click and hold the field you would like to add to your display fields. (PM Fields = Blue, Asset Fields = Beige)
- Drag the field to the location that you would like it to display in the grid. The field at the top is the leftmost field and additional fields will be displayed to the right.
- If you accidentally choose a field, you can left click and hold to drag it back to the main list. You can also drag and drop the fields to reorder them.
- Once you have selected all the fields you need, click Save to update the PM Manager with the new fields.
- To reset all changes you can select the Resetoption before selecting Save.
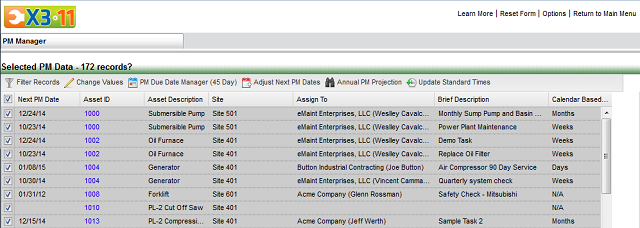
Once you have selected a subset of PM schedules to display on screen, you can then update or change the values of the PM schedule fields. You will not be able to modify any of the Asset fields.
ChangeValues
The Change Values feature allows you to make mass field changes to your PMs Schedules. A couple of common uses of this feature are, for example, changing the “Assign To” and/or “Perform For” assignments when employees are hired, or deactivating several PMs when the asset is shut down.

After configuring the filters and previewing the list of PMs:
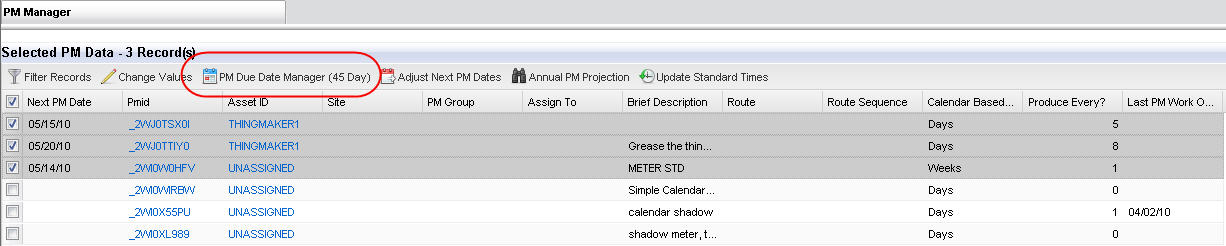
- Check the box next to the records you would like to update.
- Select ChangeValues from the main menu bar.
- Next, a panel will appear with the title Mass ChangeValues. This panel is very similar in some ways to the Filter panel.
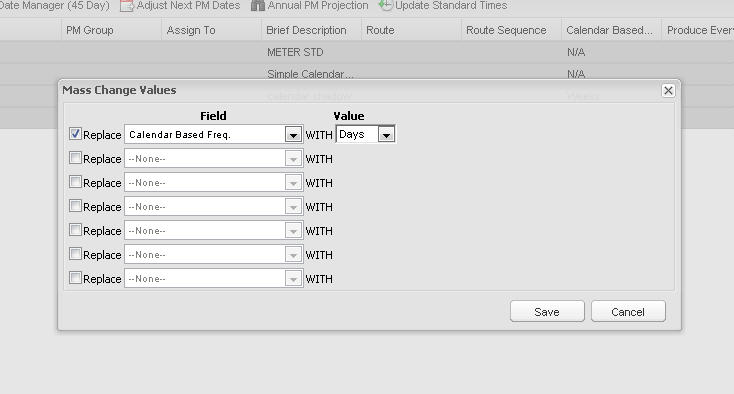
- Check the box to the left of a row to activate it.
- Next, Select a value in the field drop down. All fields from the PM table should be available here.
- Once a field is selected the Value column will become editable. If a field has special characteristics (lookups, date value, logical) you will be provided with those options to select a value.
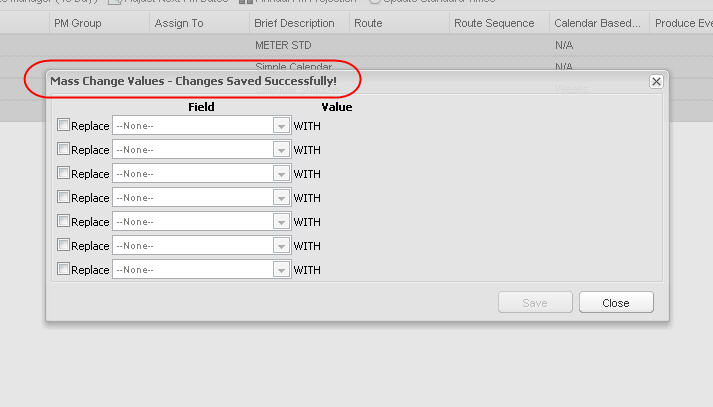
- Finally, you can select another row to replace another value or you can select Save to complete your changes. The panel title will update to confirm the changes have been made, then you can hit “Close”.
PMDueDateManager (45 Day)
This tool provides a graphic representation of when PM Schedules are set to generate and gives the user the ability to make adjustments to those dates quickly and easily.
To initiate the process first filter for and then select the group of PM schedules you would like to project into the future. Then, select PMDueDateManager (45 Day)
Next, you will be presented with a screen that will allow you to view and adjust the next PM dates for these records. If you receive the message Therearenovalidrecordsinyourselection. Tryagainwithnewnewfilters, then your selection has no PMs with a next pm date within the next 45 days.
This screen is composed of many elements, but the primary function is very straight forward. Each PM has a bar associated with sliders that represent the dates a PM will be generated. You can select and drag these sliders to align the generation dates for a group of PMs. When a user adjusts the next pm date through this screen it will validate against the attributes of the original schedule (IE skip days) to confirm that a valid date has been selected. Once you have made an adjustment to a PM schedule, you can click the Save button or you can select the red "x" icon to revert that adjustment.
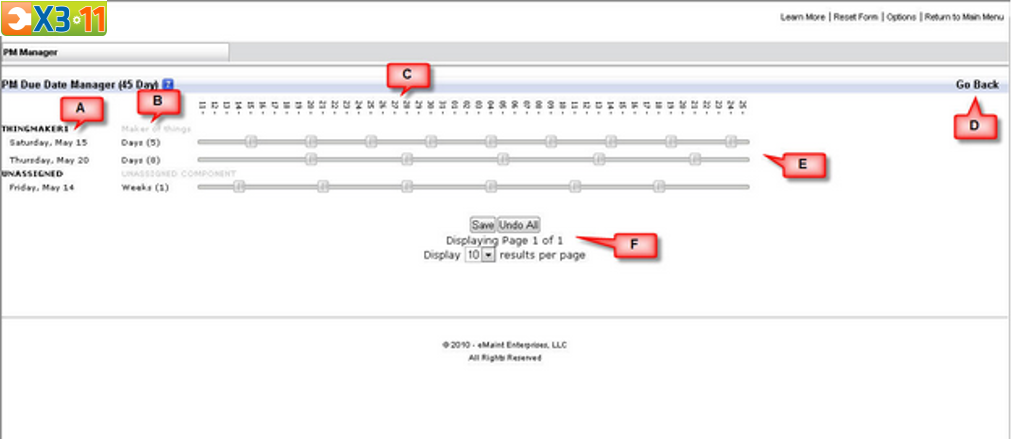
Below is a more thorough description of the individual elements from the previous image.
- (A) This area displays the Asset ID as the header and the current next pm date for each PM for this Asset. Mousing over the Asset ID or date will return a panel with more details about each record.
- (B) In gray the Asset Description is displayed. Below the description the "Calendar Frequency" and "Produce Every?" are displayed for each PM schedule.
- (C) This is the legend showing the numeric value of the days for the next 45 days.
- (D) This will take you back the to the main PM Manager screen, allowing you to re-filter for a new group of PM's.
- (E) These sliders allow you to adjust the "Next PM Date" simply by dragging to a new location on the bar.
- (F) Here you have a few basic options which will allow you to change the quantity of records displayed, Save or revert the changes, and move to the next page.
AdjustNextPMDates
The PM Manager screen also enables you to select a group of PM Schedules and make adjustments to their Next PM Dates. Besides adjusting the Next PM Date, this is a useful tool for establishing the initial PM Date for newly created PM Schedules. Click the AdjustNextPMDates button at the top of the screen.
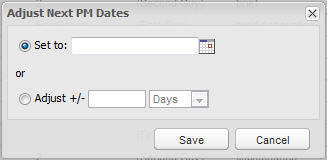
This can be done in two ways. You can select Setto and choose a date to change the Next PM Date of all the selected PM's to that date, or you can select Adjust +/- and enter the amount of time by which to increase or decrease the dates. For example, if you want to increase the Next PM Dates by 2 days, put a 2 in the field and select Days from the dropdown box. If you want to decrease them by 1 week, enter -1 in the field and select Weeks, instead of Days. When you are ready, click the Savebutton and the changes will be finalized.
AnnualPMProjection
The Annual PM Projection option allows you to see, on a 1-year timeline, when your PM schedules will produce PM work orders.
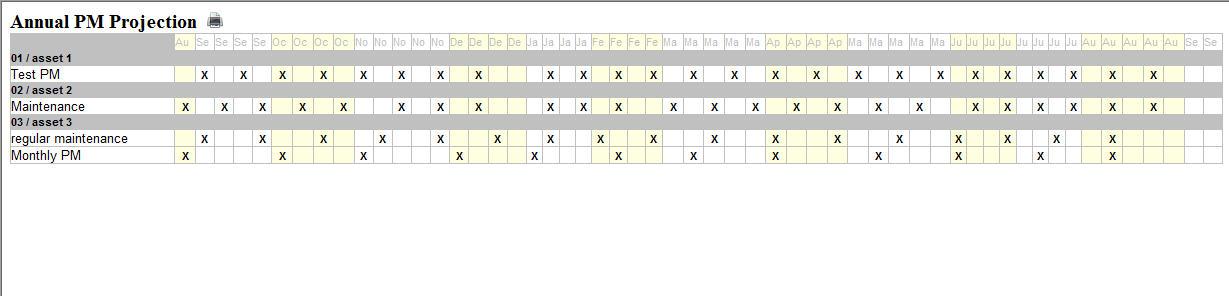
The individual blocks represent the different weeks in each month and the "X's" mark when the PM's will be due to generate. This tool is very useful for examining multiple PM schedules at once, with a long-term view, to foresee any potential overlap or redundancy.
UpdateStandardTimes
This tool will allow you to set the Est Hours field on the PM schedule with the average number of employee labor hours for the work orders that PM has produced in the past. Just click on Update Standard Times and this window will appear:
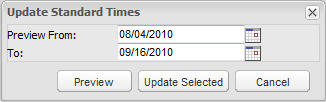
Enter a date range that will encompass the labor charges you want to use in the calculation and click the Preview button. The system will find all employee labor charges (within that date range) for the work orders that the PM's have generated in the past and take the average. It will assign that number to the Est Hours field for the PM's. In the preview, you can see that value under NewStandard.
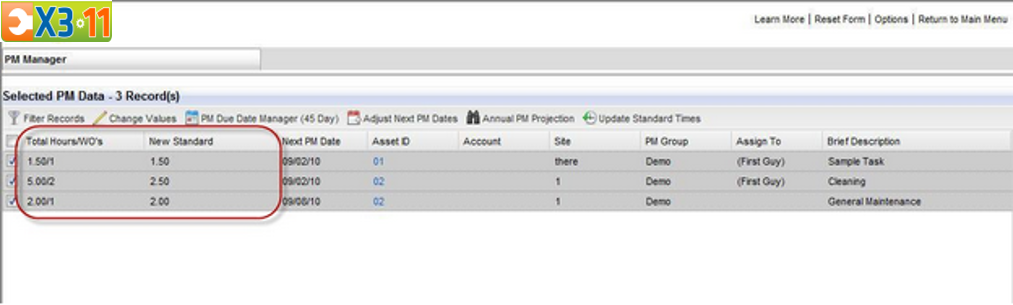
You'll see in the leftmost column, it's showing the total number of hours that were found and it's dividing that by the number of work orders. In the New Standard" column, you'll see the result of the calculation. This will be the new value for the Est Hours field. After reviewing the data, click Update Standard Times again. Click the UpdateSelected button and the changes will be applied.